Do you have a question about the Trane ComfortLink II 4TWL9024A1000B and is the answer not in the manual?
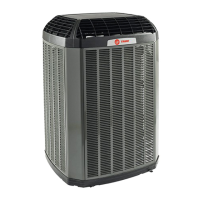
| Model Number | 4TWL9024A1000B |
|---|---|
| Brand | Trane |
| Series | ComfortLink II |
| Type | Air Conditioner |
| Refrigerant | R-410A |
| Energy Efficiency | High Efficiency |
| HSPF | Not Applicable |
| Voltage | 208/230V |
| Phase | 1 |
| Frequency | 60 Hz |
| Sound Level (Outdoor Unit) | 72 dB |
| Cooling Capacity | 24, 000 BTU/H |
Disconnect all power before servicing to prevent severe injury or death.
Use R-410A approved equipment; POE oil absorbs moisture and requires careful handling.
Avoid touching hot surfaces to prevent burns or property damage.
Recover refrigerant to relieve pressure before opening the system.
Ensure all grounding devices are properly reconnected before servicing.
Exercise caution when opening service valves to prevent abrupt charge release.
Ensure mechanical connections are brazed and leak-tested for safety.
Ensure earth connection is made before connecting electrical supply.
Product may expose to chemicals like lead, known to cause cancer/birth defects.
Wait 2 minutes after power disconnect; verify DC voltage is below 42VDC.
Voltage may be present with disconnected power due to high winds causing fan rotation.
Precautions for snow accumulation and prolonged freezing temperatures.
Use epoxy coated coils for applications within one mile of salt water.
Ensure pad is level, drains properly, and meets code requirements.
Outdoor units are factory charged for specific line lengths and indoor coil matches.
Specifies vapor and liquid line sizes for different models and service valves.
Determining required line length and vertical change for charging calculations.
Vapor line must be insulated; liquid line insulation may benefit performance.
Precautions for using existing lines: check size, leaks, acid, and oil.
Isolate lines from structure to prevent vibration noise transmission.
Secure vapor line with isolators every 8 ft; liquid line to vapor line.
Secure vapor line with isolators every 8 ft; liquid line to vapor line.
Ensure proper sealant and insulation; do not hang lines from ductwork.
Remove caps, debur pipe ends, and clean surfaces before brazing.
Remove pressure tap cap and valve core from each service valve.
Purge refrigerant lines and indoor coil with dry nitrogen.
Braze lines to service valves and external drier, ensuring correct flow direction.
Wrap valve body with wet rag; keep flame off base pan.
Replace pressure tap valve cores after service valves have cooled.
Pressurize lines and coil to 150 PSIG using dry nitrogen.
Check all brazed locations with a soapy solution for leaks.
Evacuate until micron gauge reads no higher than 350 microns.
Check gauge does not rise above 500 microns in one minute.
Use color-coded 18 AWG wire; max total cable length is 500 ft.
Diagram showing connections between outdoor unit, control, and indoor unit.
Turn valve stem 1/4 turn counterclockwise to fully open position.
Turn valve stem counterclockwise until it touches the rolled edge.
Indicates standby, capacity calls, power up delay, test mode, or lockout.
Indicates device count or loss of communication.
Ensure power supply agrees with nameplate; follow unit wiring diagram.
Install a separate disconnect switch; ensure earth connection and use flexible conduit.
Ensure refrigerant lines are brazed and system is set to OFF.
Apply power and wait 3 hours if outdoor temp is below 85°F.
Run system in test mode for setting system charge level by subcooling.
Measure outdoor and indoor temperatures for accurate charging.
Use line length, lift, and design subcooling to determine final subcooling value.
Chart provides liquid gage pressure based on liquid temp and design subcooling.
Charts adjust subcooling based on total line length and rise for different tonnages.
Wait 20 minutes for system conditions to stabilize before removing gauges.
Measure liquid line temperature and pressure to verify proper charge.
Add or recover refrigerant to match chart values for liquid gage pressure.
Record final system pressures, temperatures, and ambient conditions.
Use weighing method in heating mode for outdoor temps below 55°F.
Calculate charge based on line length beyond 10 ft and charge multiplier.
Check for minimum 10° subcooling in heating mode after adding charge.
Instructions on entering/exiting menus and navigating between screens.
Overview of Monitor, Alert, Alert History, Config, and Control menus.
Demand defrost measures delta-T to determine defrost initiation and termination.
System must run with demand; test initiated in heat mode via CDA or FRC DFT button.
Displays TEST IN PROGRESS and TEST COMPLETE status.
Confirm all wiring connections are tight and voltage/current are within limits.
Ensure lines are isolated, secure, sealed, and ductwork is sealed/insulated.
Check braze connections for leaks; confirm 350-micron vacuum for leak-free system.
Inspect for shifted tubing, ensure proper airflow, and system functions safely.
Instruct owner on system use and provide the manual.