Pub. No. 18-HE53D1-11 Numbers in [brackets] are for 50 Hz international systems. 5
Installer’s Guide
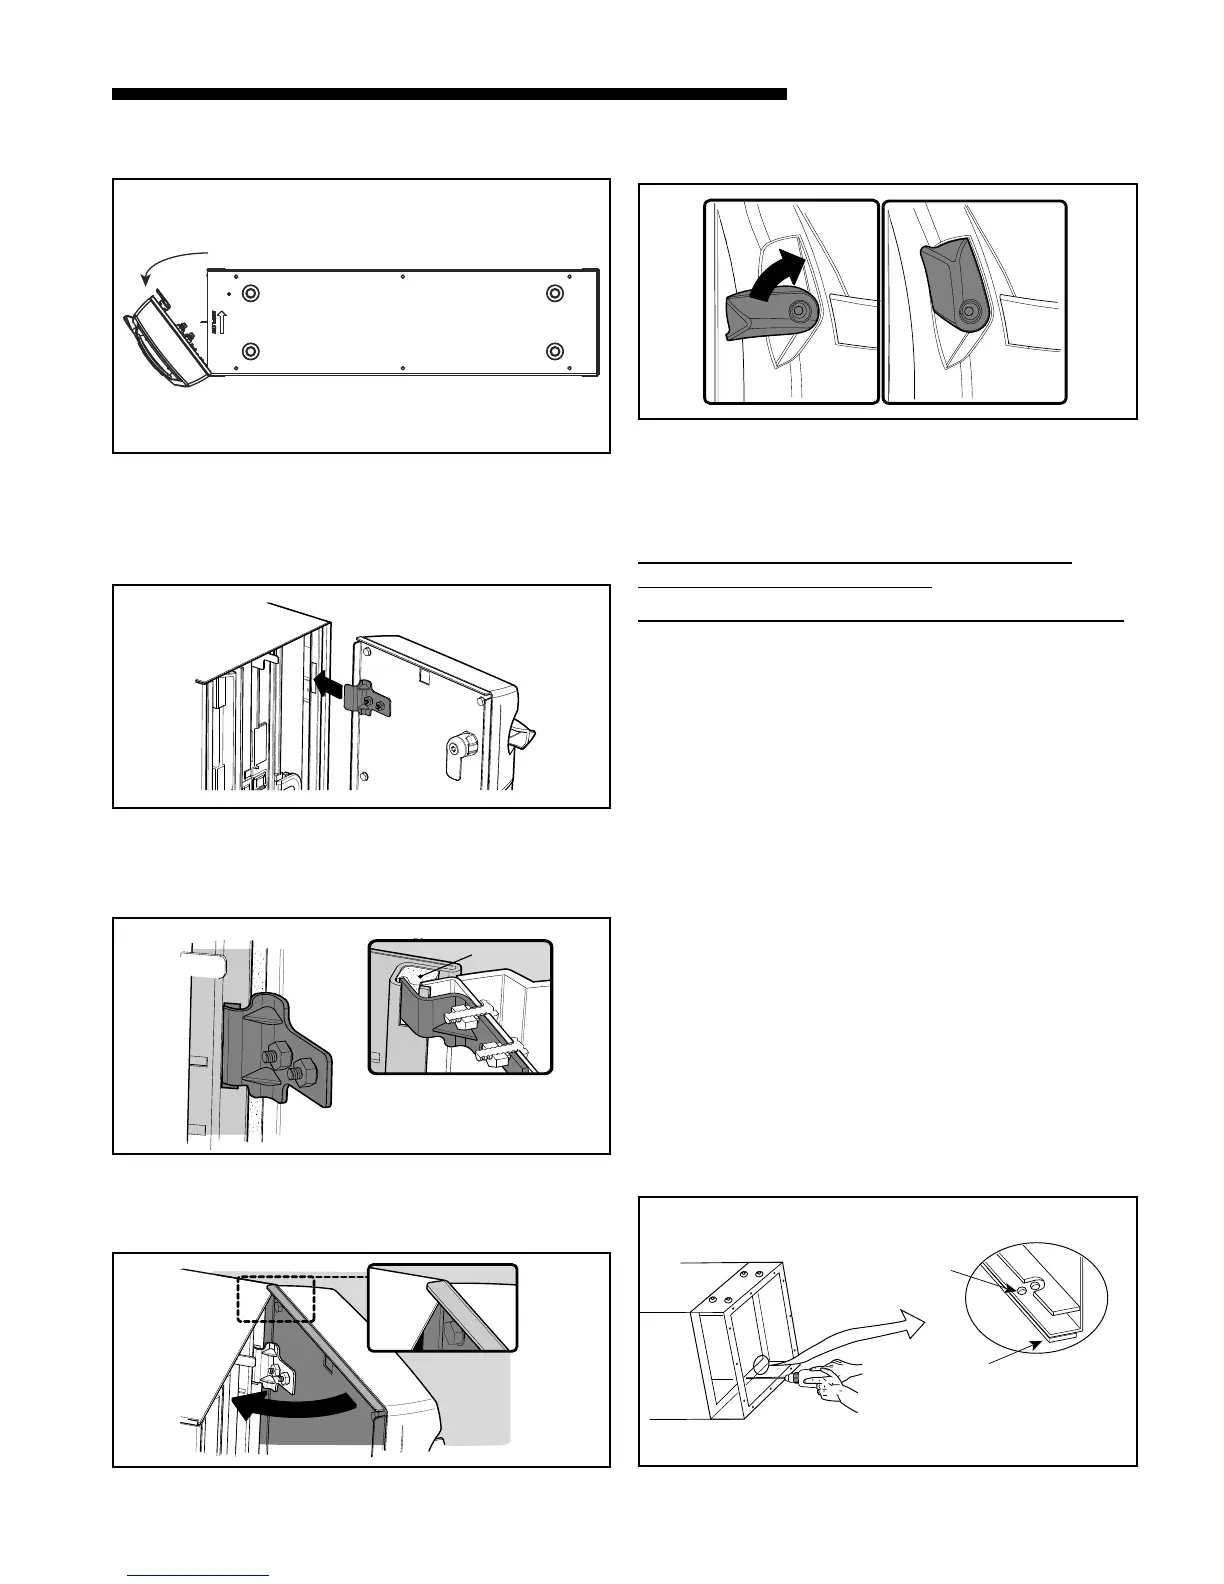
Step 2: Rotate the door to fully remove from the air
cleaner. See Figure 11.
Figure 11 Door Rotation
REINSTALLING THE POWER DOOR:
Step 1: Hold door so that tabs are aligned with slots in
cabinet as shown in Figure 12.
Step 2:
Insert tabs into cabinet slots. Edge of door
should fit into channel against gasket (see detail). See
Figure 13.
Step 3: Rotate door to closed position. Ensure ends of
door overlap the cabinet (see detail). See Figure 14.
Step 4:
Rotate latches to secure door as shown in Figure
15.
Figure 12 Aligning door tabs
Figure 13 Inserting door tabs into cabinet slots
Figure 14 Rotating Door Closed
Figure 15 Door Latch Detail
Figure 16 Installation Details
D. INSTALLATION GUIDELINES
UPFLOW FURNACE AND UPFLOW AIR
HANDLER INSTALLATION
DOWNFLOW AIR HANDLER INSTALLATION
1. Rotate the two quarter turn latches on the Power Door
outward then rotate the Power Door to remove it from
the cabinet. See Door Operation Section C. Remove
the PRE-FILTER, FIELD CHARGER, and both COL-
LECTION CELLS. Set the components aside until the
cabinet is installed and the indoor unit is in place.
2. Install the self-adhesive gasket material on the side of
the air cleaner cabinet flange that will mate with the
indoor unit. This flange has a double set of holes. See
Figure 16.
3. On a protective pad, lay the indoor unit on its side.
4. Position the air cleaner on the return opening of the
indoor unit with the air cleaner cabinet gasket against
the indoor unit. Check that the front of the air cleaner
cabinet is facing the front of the indoor unit.
5. Align the rear of the air cleaner flush with the rear of
the indoor unit.
6. Align the sides of the cabinet with the sides of the unit.
7. The front of the cabinet will NOT align flush with the
front of the unit.
8. Securely fasten the unit using the self-tapping sheet
metal screws provided. See Figures 16.
Rotate door away from unit to remove
Rotate door away from unit to remove
Air Cleaner
Gasket
Cabinet Edge
Use inner double
set of mounting
holes.
Install gasket material.
Cut to length required.
 Loading...