Installation
Here are some tips for choosing a location for the speed control:
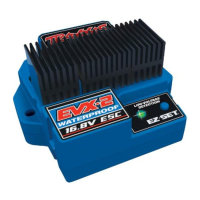
• The EVX-2 does not use a conventional on/off switch. Pressing the
EZ-Set button on the speed control turns it on and off. It is not
necessary to install an on/off switch into the wiring harness.
• Make sure there is adequate ventilation for the heat sink. If you
are planning to operate the speed control at the higher limits of
its capabilities, cut ventilation holes into the body for the heat
sinks. Proper ventilation and cooling will prevent premature
thermal shutdown.
• Mount the speed control where it will be protected from crash
damage. Protect the heat sinks from coming in contact with metal
that could short the banks of transistors. Also protect the speed
control from dirt and debris kicked up by the tires.
• Mount the speed control where you will have easy access to the plugs and
the on/off (EZ-Set) button without having to remove the body.
• Mount the speed control so that none of the power components (wiring,
motor, ESC) contacts any part of the radio system, particularly the
antenna wire. The receiver should be mounted so the antenna wire can
be extended as far away from the speed control as possible. The antenna
wire should be extended vertically in the mast and not wrapped on the
chassis under the body. Excess antenna wire should not be coiled on
the chassis. Servo cables and the antenna wire should not cross or come
in contact with any of the motor or battery wires. These steps will help
reduce the possibility of radio interference.
• Graphite or metal chassis have been known to transmit radio noise
generated by the motor. If the receiver is to be mounted on the
chassis, position it so the crystal and antenna are as far away from the
chassis as possible. This may require you to mount the receiver on its
side. This will reduce the chance of picking up radio interference from
the motor.
• When mounting the speed control with double-sided servo tape,
clean both application surfaces thoroughly with alcohol to remove
any grease, dirt, oil, fingerprints, etc. The surfaces must be perfectly
clean for maximum adhesion.
• The motors require capacitors to reduce the possibility of radio
interference. If your motors are not equipped with capacitors, install the
capacitors supplied with the EVX-2 as shown in the diagram below.
Transmitter Setup
Traxxas TQ Radio Systems
Before attempting to program your EVX-2, it is important to make
sure your TQ transmitter is properly adjusted (set back to the factory
defaults). Otherwise, you may not get the best performance from your
speed control.
The transmitter should be adjusted as follows:
1. Set the throttle neutral switch to the 50/50 setting. This adjusts the
transmitter’s throttle trigger throw to 50% for throttle and 50% for
braking and reverse. Experienced users may wish to use the 70/30
setting if more broad proportional control is desired in forward
than with braking and reverse. This might be desirable in a racing
environment where reverse is disabled.
2. Set the throttle trim control to the middle “0” setting.
3. Set the Channel 2 servo reversing switch to the left position.
Do not change the position of any of the servo reversing switches
after programming the EVX-2.
4. You are now ready to program your speed control.
Aftermarket (Non-Traxxas) Transmitters
The following instructions are provided as a general reference
only for those who are using non-Traxxas transmitters. Consult
your transmitter’s instructions for information on how to change
the settings.
1. Set the High ATV (adjustable travel volume) or EPA (end point
adjustment) to the maximum setting. This is the amount of servo
throw at full throttle.
2. Set the Low ATV, EPA or ATL (low side only trim adjustment) to
the maximum setting. This is the amount of servo throw at full
brakes or reverse.
3. Set the throttle trim to the middle (neutral setting).
4. Set the throttle channel reversing switch to either position.
Do not change the switch position after programming.
5. Set the trigger throw adjustment to 50% throttle and 50% brake
(either mechanical or electronic).
6. Set the exponential setting (if equipped) to the zero or fully
linear setting.
Aftermarket Receivers
The EVX-2 is compatible with most aftermarket
receivers. By removing the tab on the edge
of the power connecter, the EVX-2 can be
plugged directly into some models of Futaba®,
Airtronics®, Hitec®, and JR® receivers. Please
refer to the manufacturer’s wiring diagrams
that came with your receiver. On the EVX-2,
the red wire is positive, the black wire is
negative, and the white wire is the control wire. Warning: On some
older Airtronics® radio systems, the positive and negative terminals are
opposite of the EVX-2 and an adapter is required. Crossing the red (+)
and black (-) wires could damage the receiver and the EVX-2. Study the
manufacturer’s wiring diagrams closely, or consult your hobby dealer.
Setup Programming
EVX-2 Setup Programming (Calibrating your ESC and transmitter)
Read through all of the following programming steps before you begin.
If you get lost during programming or receive unexpected results,
simply unplug the battery, wait a few seconds, plug the battery back in,
and start over.
1. Disconnect each of the motor wires between
the EVX-2 and the motors. This is a precaution
to prevent runaway when the speed control is
turned on before it is programmed.
2. Connect two fully charged
battery packs to the EVX-2.
3. Turn on the transmitter (with the
throttle at neutral).
4. Press and hold the EZ-Set
button (A). The LED will rst turn
green and then red. Release the
EZ-Set button.
5. When the LED blinks RED ONCE.
Pull the throttle trigger to the
full throttle position and hold it
there (B).
6. When the LED blinks RED TWICE. Push the throttle
trigger to the full reverse and hold it there (C).
7. When the LED turns solid GREEN, programming is
complete. The LED will continuously shine green
indicating the EVX-2 is on and at neutral (D).
EVX-2 Operation
To operate the speed control and test the programming, place the
vehicle on a stable block or stand so all of the driven wheels or propellers
are off the ground. Reconnect the motor wires. Always
make sure that objects and ngers are clear of the wheels.
1. With the transmitter on, press the EZ-Set button for ½ second, until
the LED shines GREEN, then immediately release the button. This turns
on the EVX-2. If you press and release too quickly, you may hear the
steering servo jump but the LED may not stay on. Press the button again
until the LED shines GREEN and then release. (Note: If the throttle is not
at neutral or if the throttle trim has been altered, the LED will turn off
after one second and the wheels may begin to drive.)
2. Apply forward throttle. The LED will turn off until full throttle power
is reached. At full throttle, the led will shine GREEN.
3. Move the trigger forward to apply the brakes. Note that braking
control is fully proportional. The LED will turn off until full braking
power is reached. At full brakes, the LED will shine GREEN.
4. Return the throttle trigger to neutral. The LED will shine GREEN.
5. Move the throttle trigger forward again to engage reverse (Prole #1).
The LED will turn off. Once full reverse power is reached, the LED will
shine GREEN.
6. To stop, return the throttle trigger to neutral. Note that there is no
programmed delay when changing from reverse to forward. Use
caution to avoid slamming the speed control from reverse to forward.
On high-traction surfaces, this could result in transmission or driveline
damage.
7. To turn the EVX-2 off, press the EZ-Set button until the green LED
turns off.
Thermal Shutdown Protection
The EVX-2 is equipped with thermal shutdown protection to guard
against overheating caused by excessive current ow. If the operating
temperature exceeds safe limits, the EVX-2 will automatically shut down
and the EVX-2 LED will ash red. The LED on the face of the EVX-2 will
continuously ash red, even if the throttle trigger is moved back and
forth. After the speed control cools down to a safe level,
the LED will continuously shine green. The EVX-2 will once again
function normally.
EVX-2 Profile Selection
The speed control is factory set to Prole #1. To change the prole,
follow the steps on described below. The speed control should be
connected to the receiver and battery, and the transmitter should be
adjusted as described previously. The proles are selected by entering
the programming mode.
EVX-2 Prole Description
Prole #1 (Sport Mode): 100% Forward, 100% Brakes, 100% Reverse
Prole #2 (Race Mode): 100% Forward, 100% Brakes, No Reverse
Prole #3 (Training Mode): 50% Forward, 100% Brakes, 50% Reverse
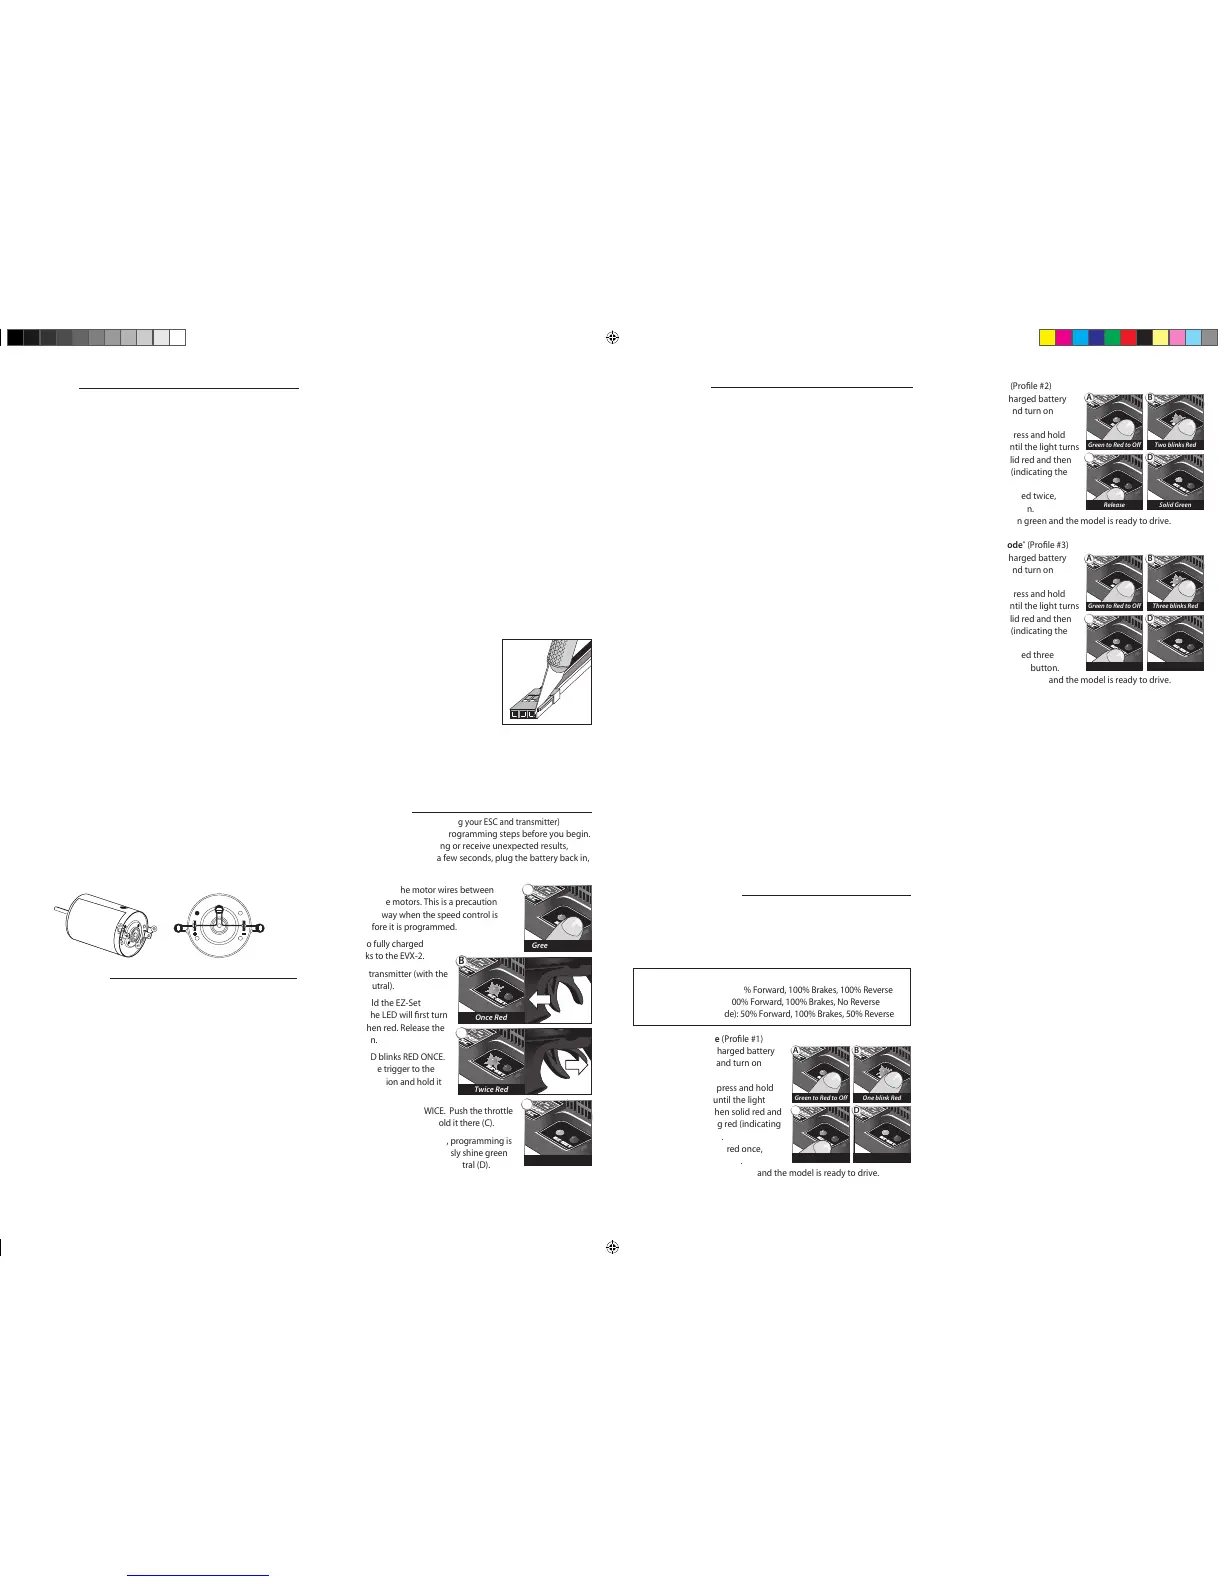
Selecting Sport Mode (Prole #1)
1. Connect two fully charged battery
packs to the EVX-2 and turn on
your transmitter.
2. With the EVX-2 off, press and hold
the EZ-Set button until the light
turns solid green, then solid red and
then begins blinking red (indicating
the Prole numbers).
3. When the light blinks red once,
release the EZ-Set button.
4. The light will then turn green and the model is ready to drive.
Selecting Race Mode (Prole #2)
1. Connect two fully charged battery
packs to the EVX-2 and turn on
your transmitter.
2. With the EVX-2 off, press and hold
the EZ-Set button until the light turns
solid green, then solid red and then
begins blinking red (indicating the
Prole numbers).
3. When the light blinks red twice,
release the EZ-Set button.
4. The light will then turn green and the model is ready to drive.
Selecting Training Mode
*
(Prole #3)
1. Connect two fully charged battery
packs to the EVX-2 and turn on
your transmitter.
2. With the EVX-2 off, press and hold
the EZ-Set button until the light turns
solid green, then solid red and then
begins blinking red (indicating the
Prole numbers).
3. When the light blinks red three
times, release the EZ-Set button.
4. The light will then turn green and the model is ready to drive.
Note: If you missed the mode you wanted, keep the EZ-Set button
pressed down and the blink cycle will repeat until a Mode is selected.
*patent pending
A
Green then Red
B
Once Red
C
Twice Red
D
Solid Green
B
One blink Red
A
Green to Red to Off
D
Solid Green
C
Release
B
Two blinks Red
A
Green to Red to Off
D
Solid Green
C
Release
B
Three blinks Red
A
Green to Red to Off
D
Solid Green
C
Release
 Loading...