Programming Operation
The Model 156A can be operated in any one of three modes, the (+) DECAY mode,
the (-) DECAY mode, and the FLOAT mode.
Note: When the instrument is first turned on, it will indicate the revision level of the
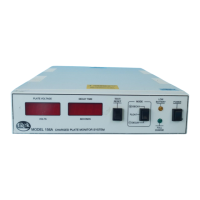
program in the DECAY TIME display. The unit will also flash the (previously)
programmed START voltage in the PLATE VOLTAGE display and the (previously)
programmed STOP voltage in the DECAY TIME display. The START and STOP voltages
are initially factory set to 1000 V and 100 V, respectively.
Programming the START voltage
1. Ensure the power is OFF.
2. Place the MODE switch to the FLOAT position.
3. Press and hold down the TEST/RESET switch. Keep the switch down when turning
ON the POWER switch.
4. After the POWER switch is turned on, the letter ‘S’, representing START
voltage, appears in the PLATE VOLTAGE
display.
5. Release the TEST/RESET switch. The
DECAY TIME display will indicate the
present START voltage.
6. Place the MODE switch in the positive (+)
DECAY position to increase the START
voltage. The START voltage will
automatically increase in 1 volt increments.
Place the MODE switch in the negative (-)
DECAY position to decrease the START
voltage. The START voltage will automatically decrease in 1 volt increments.
Select the voltage value desired for testing. When the desired START voltage
parameter is obtained, place the MODE switch in the FLOAT position.
Note: The START voltage cannot be set above 1000 V or below the programmed
STOP voltage.
III - 5
Operation
DECAY
FLOAT
RESET
TEST /
MODE
DECAY