2 IQView4 Installation Instructions TG201038 Issue 8, 14-Jan-2016.
IQView4 Installation Instructions
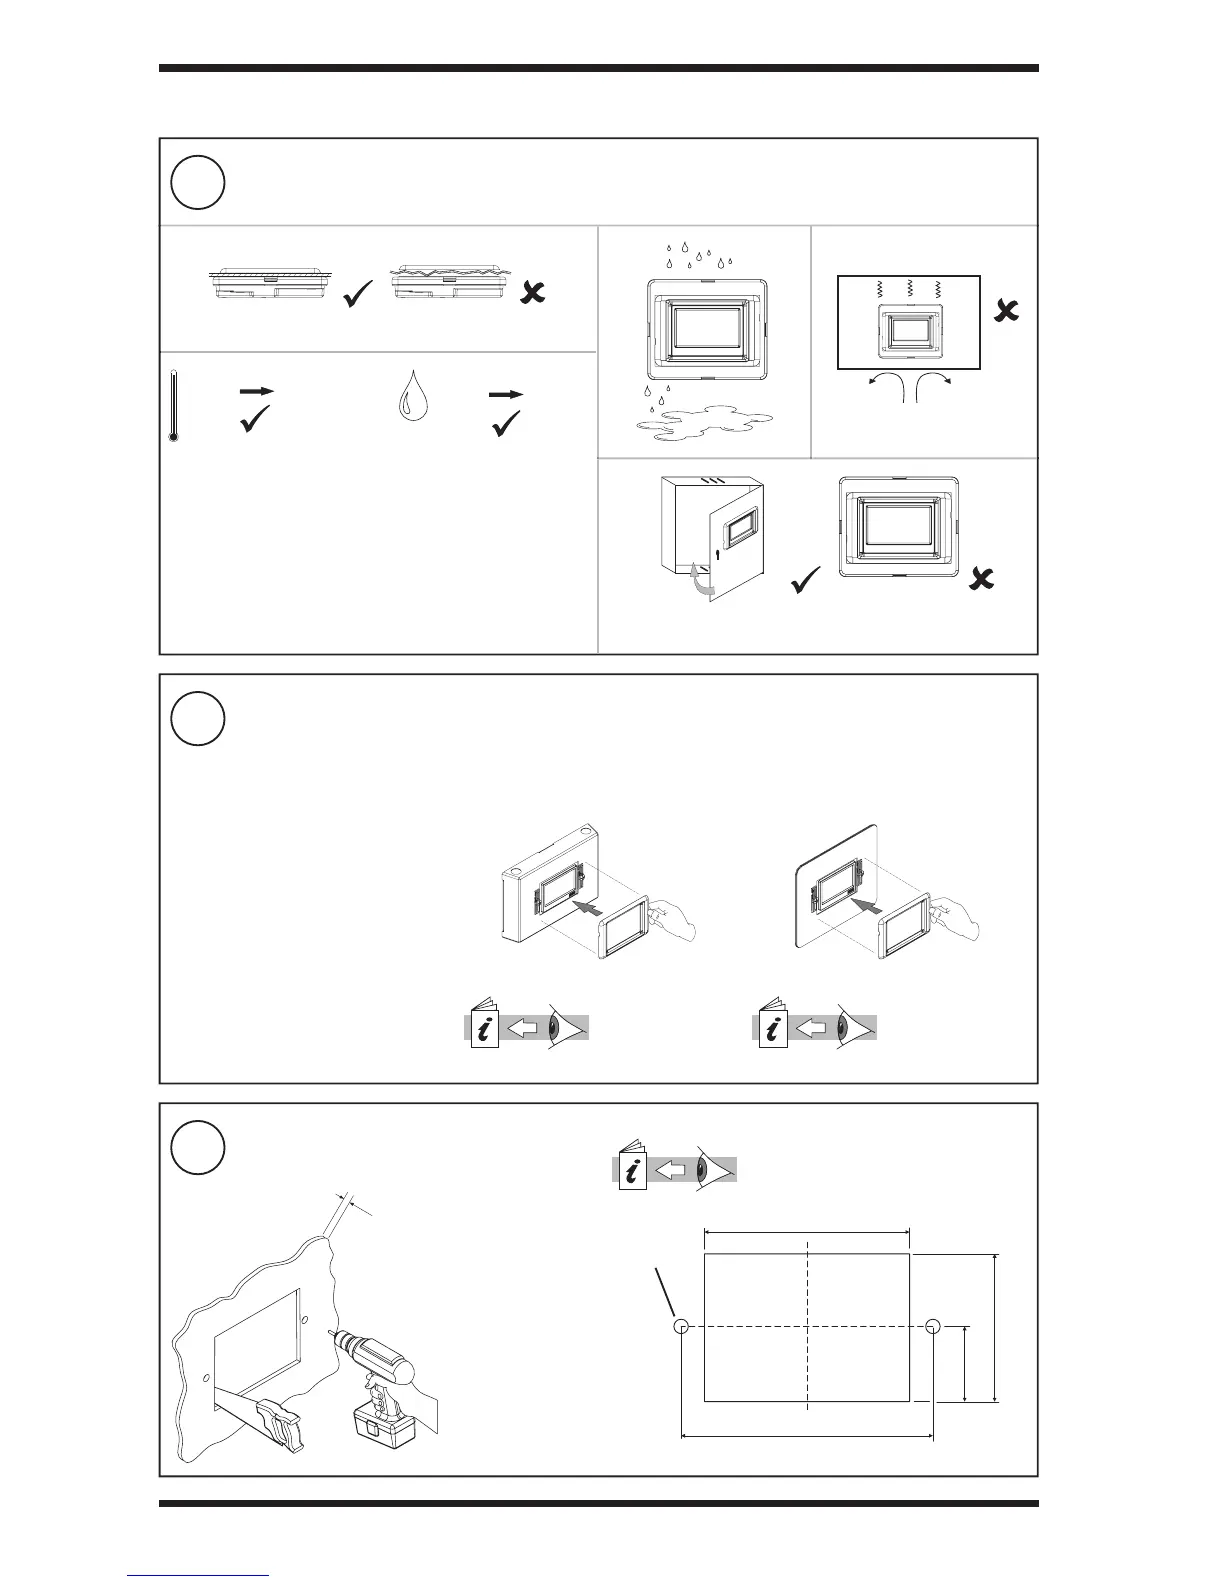
3
Select mounting method
2
Mounting Requirements
4
Prepare Panel (view from front)
3.1 Installation- Mounting (continued)
0 °C
(32 °F)
+45 °C
(113 °F)
0 %RH
80 %RH
The unit is UL rated as ‘UL916 listed open energy management
equipment’
EMC (EN61326-1: 2006) Emissions: Class A
Warning: This is a class A product. In a domestic environment
this product may cause radio interference in which case the
user may be required to take adequate measures.
Protection: IP50 (if correctly tted in panel)
Operating Altitude: <2000 m (6562’)
115 ±1 mm (4.53”)
140 ±0.5 mm (5.5”)
83 ±1 mm (3.27”)
43 ±0.5 mm (1.69”)
2 off Ø6 mm
(0.24”) holes
2 to 5 mm
(0.08” to 0.2”)
If panel mounting goto step (4) If mounting on a wall or panel (avoiding
cutting square holes), use IQVIEW4 SM
BOX
IQVIEW4 SM BOX
Installation Instructions
(TG201078)
Then go to section
3.2
If mounting semi-fl ush mounting in panel
in place of FPK, GDP, or NDP, use
IQVIEW4/FPK ADAPTOR PLATE
IQVIEW4/FPK
ADAPTOR PLATE
Installation Instructions
(TG201039)
Then go to step (7)
IQView4 Touch Screen Display Template
(TG201037) - supplied