Do you have a question about the TriangleTube Instinct Solo Series and is the answer not in the manual?
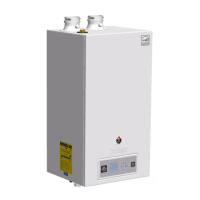
This document outlines the procedure for converting Triangle Tube Instinct Solo/Combi boilers from Natural Gas (NG) to Propane (LP) operation. The conversion process is critical for ensuring the safe and efficient functioning of the boiler when switching fuel types. It is imperative that this conversion is performed by a qualified installer or service technician, as improper execution can lead to serious injury, property damage, or even death.
The conversion kit includes essential components such as a new rating label, a conversion label, and a propane gas venturi, which is specifically designed for the particular boiler model being converted. Before beginning the conversion, it is crucial to verify that the correct venturi replacement kit is being used for the specific boiler model. This initial verification step prevents the installation of incorrect parts that could compromise the boiler's performance and safety.
The process begins with preliminary safety measures, including turning off the electrical power supply to the boiler and closing the manual gas shut-off valve. These steps are fundamental to prevent electrical shock and gas leaks during the conversion. The front panel of the Instinct boiler must be removed to access the internal components. A voltmeter is then used to confirm that there is no electrical power to the boiler, specifically by checking the high voltage terminals L and N. This double-check ensures that the unit is completely de-energized, mitigating the risk of electrical shock.
The removal of the natural gas venturi involves several steps. First, the silicone tube is detached from the air inlet elbow, followed by the removal of the air inlet elbow itself. The venturi interface is then rotated approximately 60 degrees clockwise to disengage its clamping mechanism, allowing for its removal. The gas valve to venturi pipe is disconnected by loosening the nuts at both ends with an adjustable wrench. It is important to note that gaskets are present at both ends of this pipe, and care must be taken not to damage them, as they will need to be reinstalled. Finally, three bolts securing the venturi to the fan assembly are removed using a 10 mm socket and ratchet, allowing the natural gas venturi to be taken out. Throughout this process, it is vital to avoid damaging the blower O-ring gasket, which is crucial for maintaining a proper seal.
Installing the propane venturi requires careful alignment. The UP arrow on the plastic housing of the new venturi must point upward, and the threaded connection for the gas piping must be correctly oriented for re-fitting the gas pipe. These alignment steps ensure that the venturi is installed in the correct position, which is essential for proper gas flow and combustion. The three bolts are then used to secure the propane venturi to the fan assembly, ensuring a tight and secure fit. The gas valve to venturi pipe is reassembled, with careful attention to seating the gaskets properly before tightening the nuts. The venturi interface is then installed on the venturi and rotated counterclockwise until it locks into place. Finally, the air inlet elbow is installed, and the silicone tube is reattached. Proper installation of these components is critical for preventing gas leaks and ensuring efficient combustion.
After the physical installation, the manual gas shut-off valve is opened. Before placing the boiler back into operation, all gas connections must be thoroughly tested for leaks using a bubble test. It is explicitly warned against using an open flame for leak detection, as this poses a severe risk of fire or explosion. Any detected leaks must be repaired immediately.
A crucial step in the conversion is the application of new labels. The propane conversion label must be affixed to the gas valve, and the propane conversion rating label must be placed next to the existing rating label on the unit. It is important not to cover the existing rating label. These labels provide essential information about the boiler's new fuel type and specifications, which are vital for future servicing and safety.
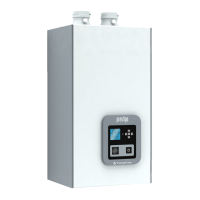
The boiler's control system also needs to be updated to reflect the change to propane. This involves entering the propane (LP) appliance code from the rating label into the CTRLMax Navigation Control. The installer accesses the system by simultaneously pressing and holding the UP and DOWN buttons. An installer access code ("054") is then entered using the LEFT and RIGHT buttons to select digits and the UP and DOWN buttons to change them. Once in the installer menu, the CH/DHW Settings icon is selected, followed by the Boiler Settings icon and then Appliance Setting. The propane (LP) appliance code is then entered using the LEFT and RIGHT buttons to select characters and the UP and DOWN buttons to change them. This step configures the boiler's internal settings for optimal propane operation.
Following the conversion, a comprehensive combustion test and adjustments are mandatory. This test ensures that the boiler operates at optimum conditions with the new fuel type and that combustion levels meet recommended standards at both high and low input firing rates. This is a critical safety measure to prevent incomplete combustion and the production of carbon monoxide, which can be fatal. The combustion testing must be performed by a qualified professional using calibrated equipment to ensure accurate readings.
To perform the combustion test, the installer accesses the manual operation functions through the CTRLMax control by simultaneously touching the up and down soft keys for three seconds and entering the installer access code. The Manual Operation icon is then highlighted, and the burner is manually fired, along with the CH circulator. An adequate CH load must be present to dissipate the heat generated during the test; if not, an indirect water heater can be used to create a DHW call.
The firing rate is adjusted to 100% (high fire) by holding down the RIGHT button. If the combustion levels (O₂ and CO₂) are outside the recommended settings, the THROTTLE SCREW is adjusted using a flat-blade screwdriver. Counter-clockwise adjustment decreases O₂ and increases CO₂, while clockwise adjustment increases O₂ and decreases CO₂. Once high fire combustion levels are set, the boiler is manually placed into low fire mode (1% firing rate) by pressing the LEFT button. If low fire combustion levels are not within recommended settings, Triangle Tube Technical Support should be contacted. After the test, the burner is shut down by pressing the CENTER button while the fan icon is highlighted, and the service mode is exited. Finally, the front panel is replaced, and the boiler is put back into operation.
Throughout the entire process, adherence to the provided warnings and notices is paramount. These include warnings about the importance of retaining the O-ring gasket, installing the correct venturi for the model, properly installing the air inlet elbow and silicone tube, and not using adhesive on gaskets or O-rings. The instructions emphasize that failure to follow these guidelines can lead to severe consequences, underscoring the critical nature of each step in ensuring the boiler's safe and efficient operation after conversion.
| Category | Boiler |
|---|---|
| Fuel Type | Natural Gas or Propane |
| Boiler Type | Condensing |
| Heat Exchanger Material | Stainless Steel |
| Ignition Type | Electronic |
| Modulation | 5:1 |
| Efficiency | Up to 95% AFUE |
| Vent Type | Direct Vent |