Do you have a question about the Trillium WSP-6 and is the answer not in the manual?
Details the process of removing the cover plate and wearplate from the pump.
Outlines the steps for removing the suction check valve assembly.
Describes the procedure for removing the pump's rotating assembly.
Explains how to detach the impeller from the shaft.
Details the process of removing the mechanical seal from the shaft.
Covers the disassembly and removal of the shaft and bearing components.
Explains how to disassemble the two-piece bearing housing if necessary.
Details the reassembly process for the two-piece bearing housing.
Guides on reassembling and installing the shaft and bearing.
Provides instructions for installing a new mechanical seal.
Details the installation and adjustment of the impeller.
Outlines the procedure for installing the rotating assembly into the pump casing.
Describes how to install the suction check valve assembly.
Explains the installation and adjustment of the back cover.
Details lubrication requirements for the seal cavity.
Outlines lubrication for the bearing cavity.
Refers to power source lubrication requirements.
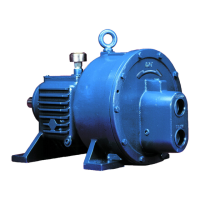
Provides information on the physical dimensions of the pump.
Details the pre-installation inspection checklist for the pump.
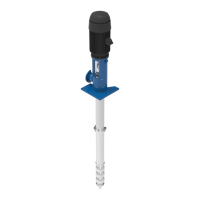
Covers lifting, mounting, and clearance for pump placement.
Discusses piping materials, configuration, connections, and gauges.
Provides guidelines for suction line fittings, strainers, sealing, sump installation, and positioning.
Discusses avoiding siphoning in discharge lines to prevent pump damage.
Covers the use and type of valves in discharge lines for throttling and safety.
Details the installation and sizing of bypass lines for priming and operation.
Explains how the WSP™ ARV functions during priming and operation.
Provides instructions for installing the WSP™ ARV on the pump discharge line.
Aligns shafts in vertical and horizontal planes using couplings for mechanical accuracy.
Details alignment for spider insert-type couplings using calipers for precision.
Describes alignment for non-spider couplings using feeler gauges for accuracy.
Covers alignment of pulleys for V-belt drives to ensure proper power transmission.
Explains the process of priming the pump and piping, ensuring it's ready for operation.
Details procedures for starting up the pump and motor correctly.
Covers pump operation with/without bypass, leaking, temperature, vacuum, and strainer checks.
Outlines procedures for safely stopping the pump, including cold weather preservation.
Explains how to check bearing temperatures using a thermometer for operational health.
Presents performance curves for the 6" WSP pump, showing head, flow, and efficiency.
Shows the general arrangement drawing and dimensions of the 6" WSP pump.
| Brand | Trillium |
|---|---|
| Model | WSP-6 |
| Category | Water Pump |
| Language | English |