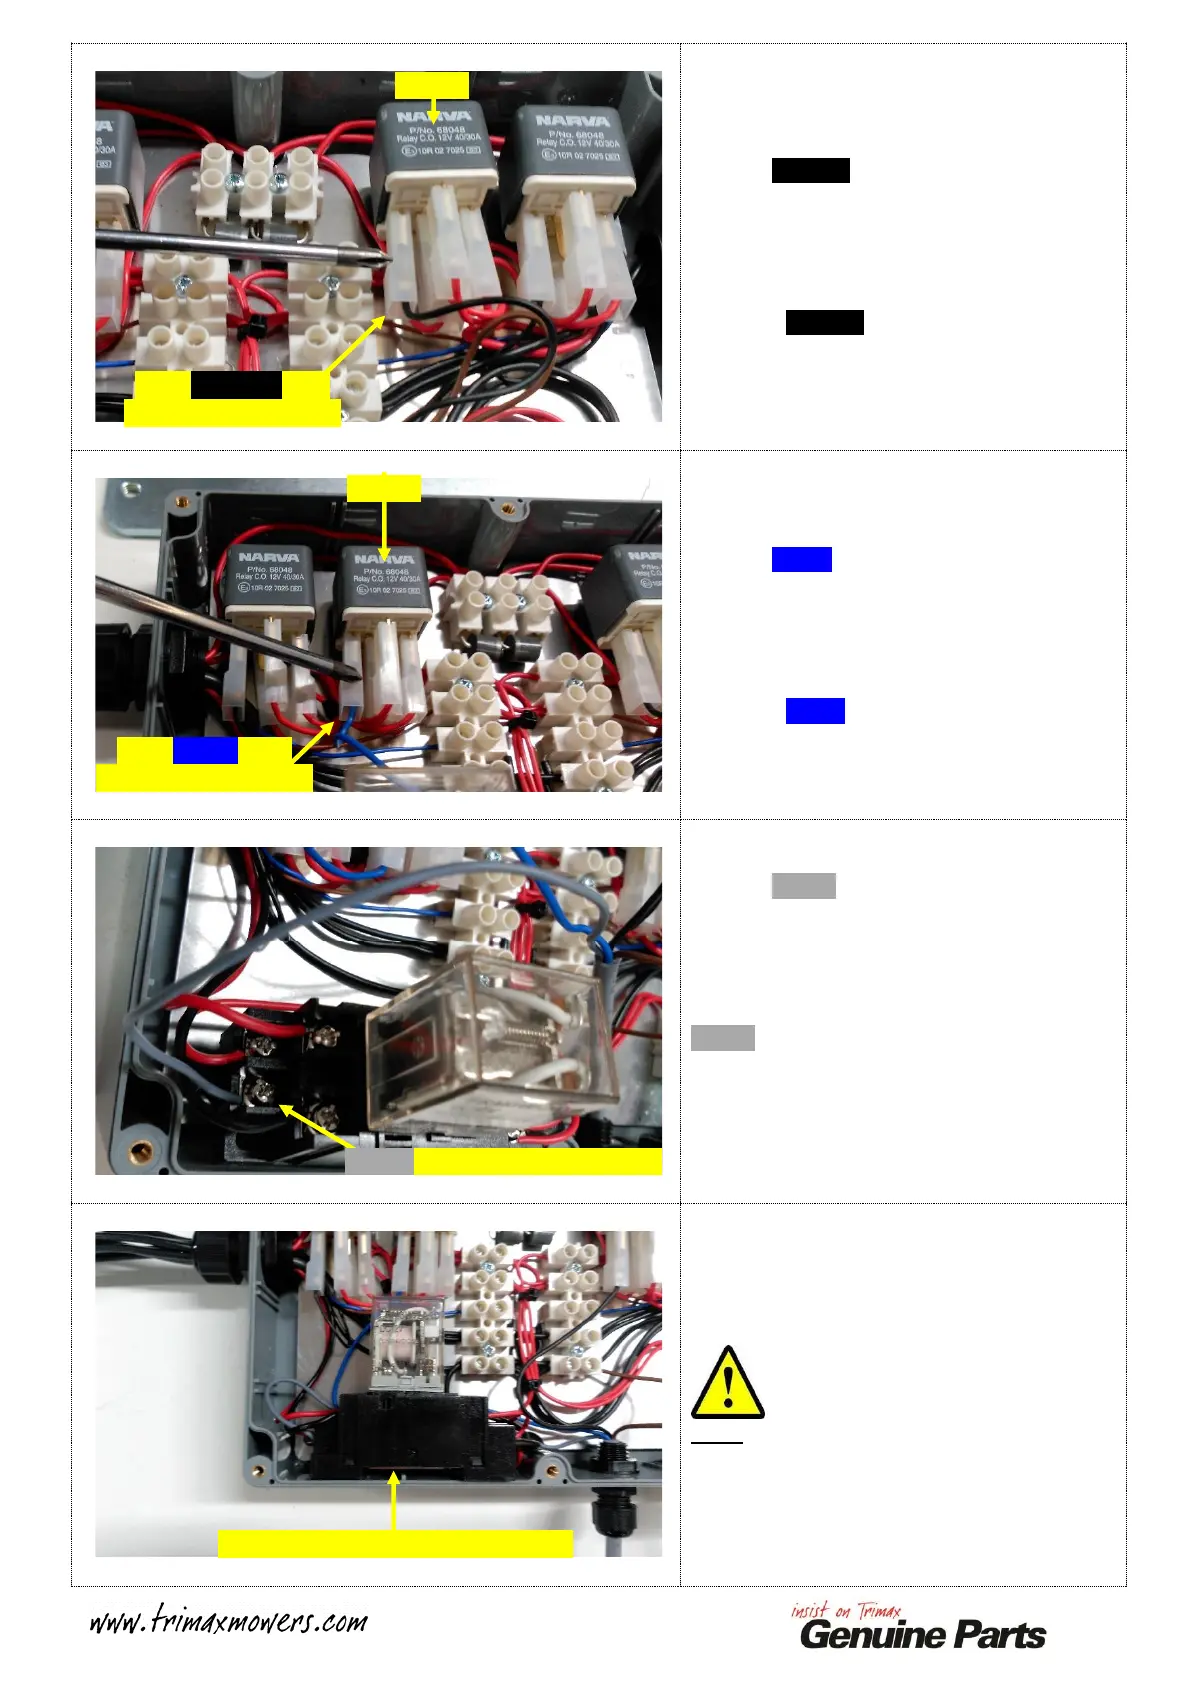
Feed the BLACK wire running from the I.L.S.
Control Cable to Relay 4.
This is labelled on Relay 4 as POSITION 85.
Slide the Spade Terminal onto the Relay Pin to
secure the BLACK wire.
Feed the BLUE wire running from the I.L.S.
Control Cable to Relay 3.
This is labelled on Relay 3 as POSITION 85.
Slide the Spade Terminal onto the Relay Pin to
secure the BLUE wire.
Feed the GREY wire running from the I.L.S.
Control Cable to Relay 5.
This is labelled on Relay 5 as POSITION 7.
Tighten the retaining Screw to secure the
GREY wire.
Give this wire a gentle pull to ensure that it is
secured correctly!
Slide Relay 5 back onto its mounting tag as
shown.
Note:
Take care to ensure that no wires are pinched
when remounting this Relay!
Slide BLACK Wire
Terminal onto Relay 4
Slide BLUE Wire
Terminal onto Relay 3
GREY Wire in place on Relay 5
Relay 5 mounted in original position
 Loading...