2-29
Operating Your Tablet Computer
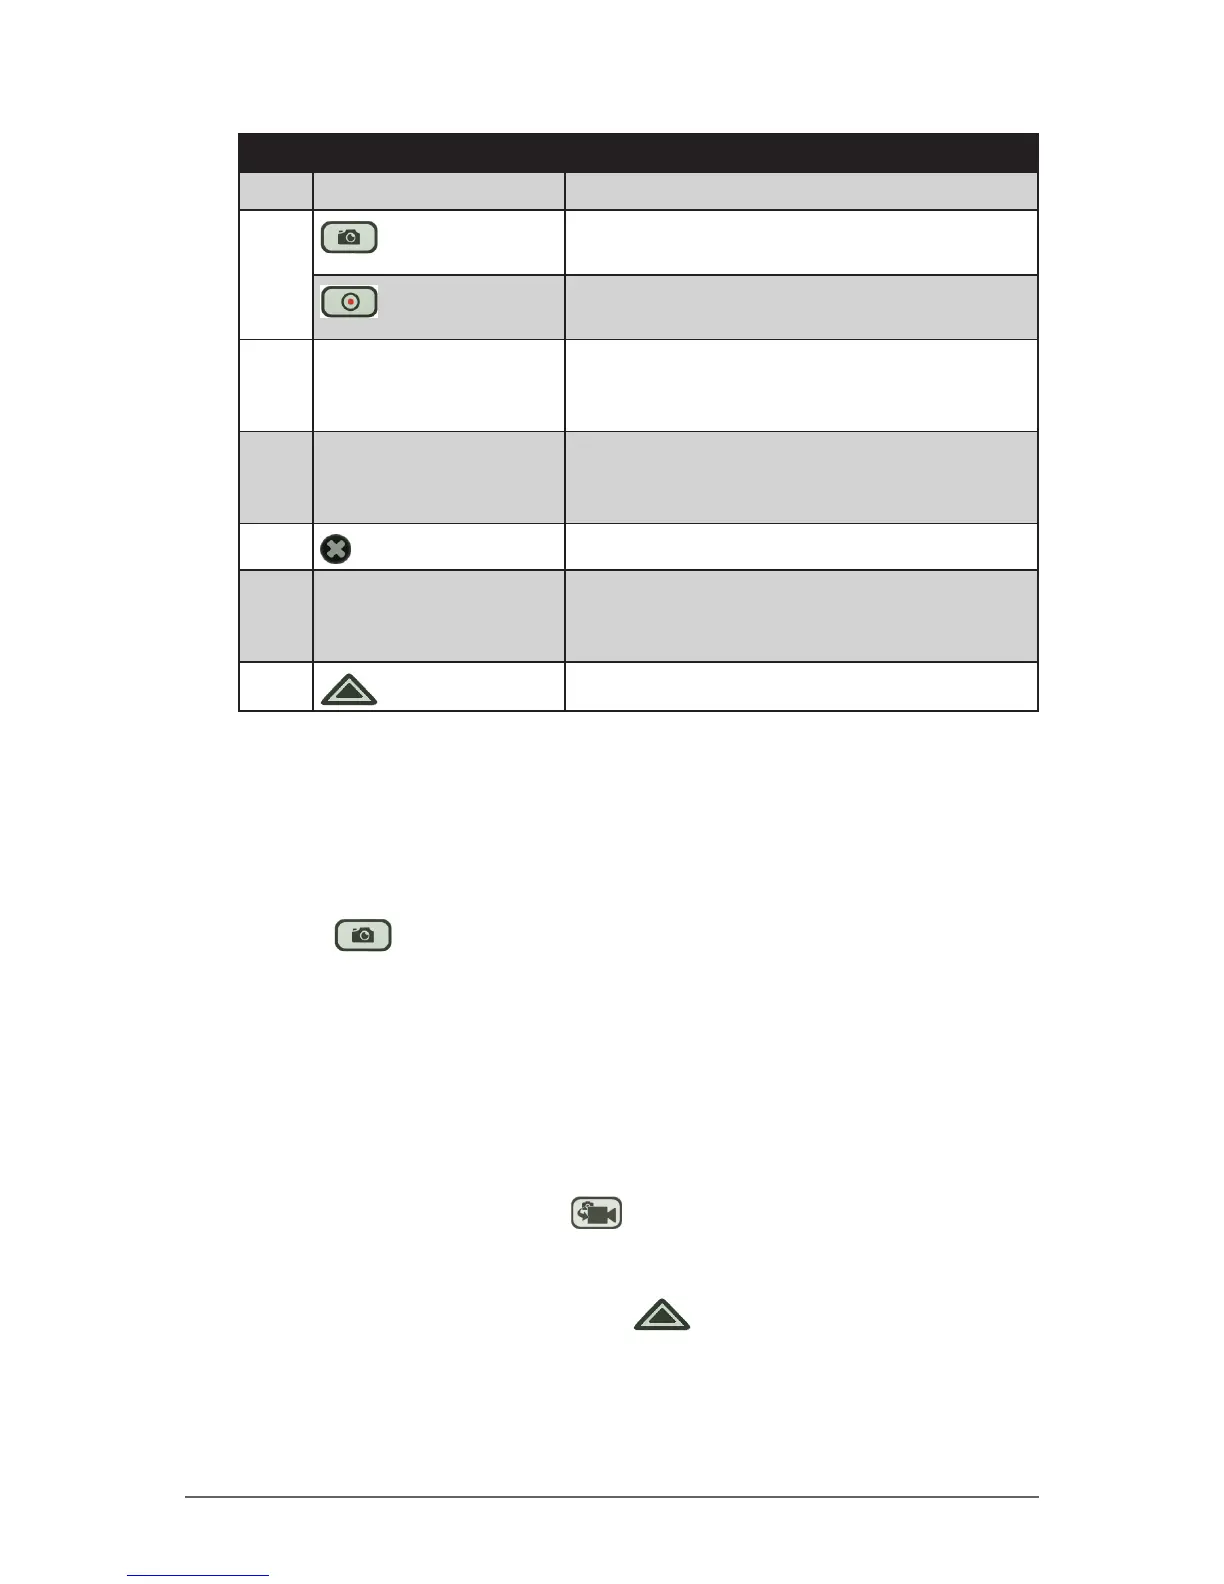
No. Item Description
3 Camera Screen Shows the object to capture.
4
Shutter Button
• Indicates the camera is in photo mode.
• Tap the shutter button to capture a photo.
Record Button
• Indicates the camera is in video mode.
• Tap the record button to record a video.
5 Date Stamp Indicates date stamping is included when
capturing photos.
NOTE: Available only in Photo mode.
6 Resolution • Indicates the current camera resolution.
• Tap repeatedly to change to a different
resolution setting.
7
Close Button
Tap to close the camera.
8 GPS Tag Indicates GPS tagging is included when
capturing photos.
NOTE: Available only in Photo mode.
9
Menu Button
Tap to display the camera menu.
Shooting Photos
1. Open the camera.
2. Focus on your subject.
3. Tap to capture the photo.
To change the photo resolution
• To change the photo resolution, repeatedly tap the resolution on the
upper-right corner of the screen. The available options vary depending on
the current aspect ratio setting. See “To set the aspect ratio and resolution”
on page 2-34.
To switch to Video mode
• To switch to Video mode, tap .
To congure photo settings
• To congure the photo settings, tap . See “Working With Photos” on
page 2-32 for more information.
 Loading...