6
HOLDING THE UNIT
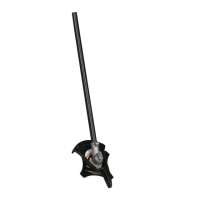
Before operating the unit, stand in the operating position (Fig. 12).
Check for the following:
• The operator is wearing eye protection and proper clothing
• With a slightly-bent right arm, the operator’s right hand is
holding the shaft grip
• The operator’s left arm is straight, the left hand holding the J-
handle
• The unit is at waist level
• The cutting blade is parallel to the ground and easily contacts
the weeds or brush without the need to bend over
Once you are in the operating position, hook the shoulder strap to
the unit. Check the length of the strap before operating. If it needs
adjustment, refer to Step 4 of Install the Shoulder Harness.
USING THE CUTTING BLADE
To establish a rhythmic cutting procedure:
• Plant feet firmly, comfortably apart.
• Bring the engine to full throttle before entering the material to be cut. At full throttle the blade has
maximum cutting power and is less likely to bind, stall or cause blade thrust (which can result in
serious personal injury to the operator or others).
• Cut while swinging the upper part of your body from left to right.
• Always release the throttle trigger and allow the engine to return to idle speed when not cutting.
• When you are finished, always unsnap the unit from the harness before taking off the harness.
• Maneuver the unit in the opposite direction as the blade spins, which increases the cutting action.
• After the return swing, move forward to the next area to be cut plant your feet again.
• The cutting blade is designed with a second cutting edge. You can use it by removing the blade,
turning it upside down, and reinstalling it.
To reduce the chance of material wrapping around the blade,
follow these steps:
• Cut at full throttle
• Swing the unit into material to be cut from your left to your
right (Fig. 13)
• Avoid the material just cut as you make the return swing
WARNING:
Always wear eye, hearing, foot, body protection and the shoulder strap to
reduce the risk of injury when operating this unit.
WARNING:
Always wear eye, hearing, foot
and body protection to reduce the risk of injury
when operating this unit.
WARNING:
Blade thrust may occur when the spinning blade contacts an object that it
does not immediately cut. Blade thrust can be violent enough to cause the unit and/or
operator to be propelled in any direction, and possibly lose control of the unit. Blade
thrust can occur without warning if the blade snags, stalls or binds. This is more likely to
occur in areas where it is difficult to see the material being cut.
Fig. 12
WARNING:
Do not use the cutting blade for edging or as an edger. Severe personal
injury to yourself or others can result.
WARNING:
The blade continues to spin after the engine is turned off. The coasting
blade can seriously cut you if accidentally touched.
Fig. 13
WARNING:
Do not sharpen the cutting blade. Sharpening the blade can cause the
blade tip to break off while in use. This can result in severe personal injury to yourself or
others. Replace the blade.
WARNING:
Do not clear away any cut
material with the engine running or blade turning.
To avoid serious personal injury, turn off the
engine. Allow the blade to stop before removing
materials wrapped around the blade shaft.
MAINTENANCE AND REPAIR INSTRUCTIONS
REPLACING THE CUTTING BLADE
When the cutting blade gets dull, you need to replace it. Never
sharpen a dull blade. Follow the instructions in this section to
successfully replace the blade.
Remove the Cutting Blade
NOTE: To make cutting blade removal and installation easier,
place the unit on the ground or on a work bench.
1. Align the shaft bushing hole with the locking rod slot and
insert the locking rod into the bushing hole (Fig. 14).
2. Hold the locking rod in place by grasping it next to the boom
of the unit (Fig. 15).
3. While holding the locking rod, loosen the nut on the blade by
turning it clockwise with a 13 mm closed-end or socket
wrench (Fig. 15).
4. Remove the nut, blade retainer, and blade.
Install the New Cutting Blade
1. Place the cutting blade on the output shaft bushing (Fig. 16).
2. Make sure that the cutting blade is centered on the pilot step
and sitting flat against the output shaft bushing (Fig. 17).
3. Align the shaft bushing hole with the locking rod
slot and insert the locking rod into the bushing hole (Fig. 14).
4. Put the blade retainer and nut on the output shaft. Make sure
that the blade is installed correctly.
5. Tighten nut counterclockwise against the blade while holding
the locking rod:
• If using a torque wrench and an 13 mm socket tighten to: 325 -
335 in•lb, 27 - 28 ft.•lb, 37 - 38 N•m.
• Without a torque wrench, use a 13 mm closed-end or socket
wrench, turning the nut until the blade retainer is snug against
the shaft bushing. Make sure that the blade is installed
correctly, then rotate the nut an additional 1/4 to 1/2 turn
counterclockwise (Fig. 18).
6. Remove the locking rod from the locking rod slot.
CLEANING
Use a small brush to clean off the outside of the unit. Do not use strong detergents. Household cleaners
that contain aromatic oils such as pine and lemon, and solvents such as kerosene, can damage plastic
housing or handle. Wipe off any moisture with a soft cloth.
STORAGE
• Store the unit locked up to prevent unauthorized use or damage.
• Store the unit in a dry, well-ventilated area.
• Store the unit out of the reach of children.
Fig. 14
Shaft Bushing Hole
Output Shaft
Locking Rod
Locking
Rod Slot
Output
Shaft
Bushing
WARNING:
The gear housing gets hot with
use. It can result in injury to the operator. The
housing remains hot for a short time even after
the unit is turned off. Do not touch the gear
housing until it has cooled.
Fig. 15
Fig. 17
Fig. 16
Blade Retainer
Nut
Locking
Rod
Pilot Hole
Cutting
Blade
Clockwise
Pilot Step
Output
Shaft
Bushing
Blade Shield
WARNING:
To avoid serious personal injury,
always wear gloves while handling or installing
the blade.
WARNING:
If the cutting blade is off-center,
the unit will vibrate and the blade may fly off,
causing possible serious personal injury.
WARNING:
To avoid serious personal injury,
always wear gloves while handling or installing
the blade.
Fig. 18
1/4-1/2 turn
Counterclockwise
WARNING:
Do not sharpen the cutting blade.
Sharpening the blade can cause the blade tip to
break off while in use. This can result in severe
personal injury. Replace the blade.
WARNING:
To avoid serious personal injury or
damage to the unit, do not start or operate this unit
with the locking rod in the locking rod slot.
WARNING:
To avoid serious personal injury, always turn your unit off and allow it to
cool before you clean or service it.
* All specifications are based on the latest product information available at the time of printing. We
reserve the right to make changes at any time without notice.
Approximate Attachment Weight. . . . . . . . . . . . . . . . . . . . . . . . . . . . . . . . . . . . . . . . . . . . 3.75 lbs. (1.7 kg)
Cutting Path Diameter, Cutting Blade . . . . . . . . . . . . . . . . . . . . . . . . . . . . . . . . . . . . . . 8 inches (204 mm)
Shoulder Harness. . . . . . . . . . . . . . . . . . . . . . . . . . . . . . . . . . . . . . . . . . . . . . . . . . . . . . Single Quick-Snap
SPECIFICATIONS
 Loading...