EasyManuals Logo

Trinity 100 QT User Manual

Default Icon
12 pages
To Next Page IconTo Next Page
To Previous Page IconTo Previous Page
Page #3 background imageLoading...
Page #3 background image
ASSEMBLY INSTRUCTIONS
© 2017 TRINITY - 800.985.5506
2
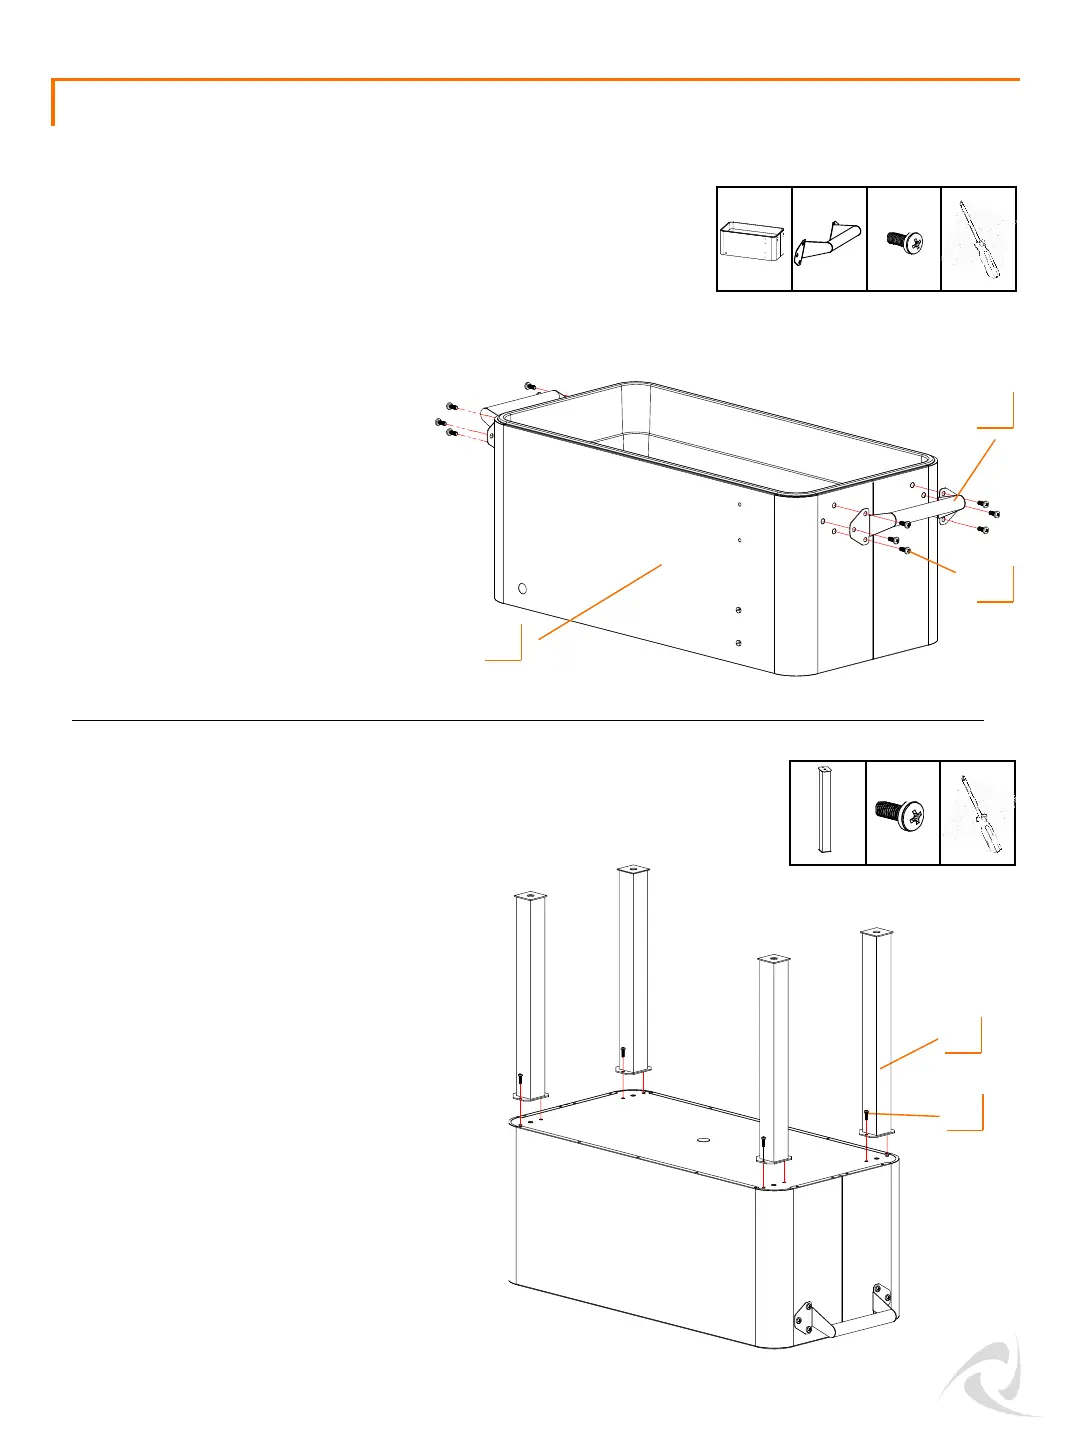
Turn the TUB (A) upside down, and align
LEGS (D) with the holes on the bottom of the
TUB (A). Attach LEGS (D) with the SMALL
SCREWS (E). Make sure to tighten securely.
Align the HANDLES (F) on each side of the TUB
(A). Attach the HANDLES (F) with the LARGE
SCREWS (G). Make sure to tighten securely.
The HANDLES (F) can be attached either angled
up or down based on your preference.
STEP 1
STEP 2
F (2) G (12)
A (1)
D (4) E (8)
Phillips
F
A
G
D
E
Phillips

Questions and Answers:

Question and Answer IconNeed help?

Do you have a question about the Trinity 100 QT and is the answer not in the manual?

Trinity 100 QT Specifications

General IconGeneral
BrandTrinity
Model100 QT
CategoryAccessories
LanguageEnglish