ASSEMBLY INSTRUCTIONS
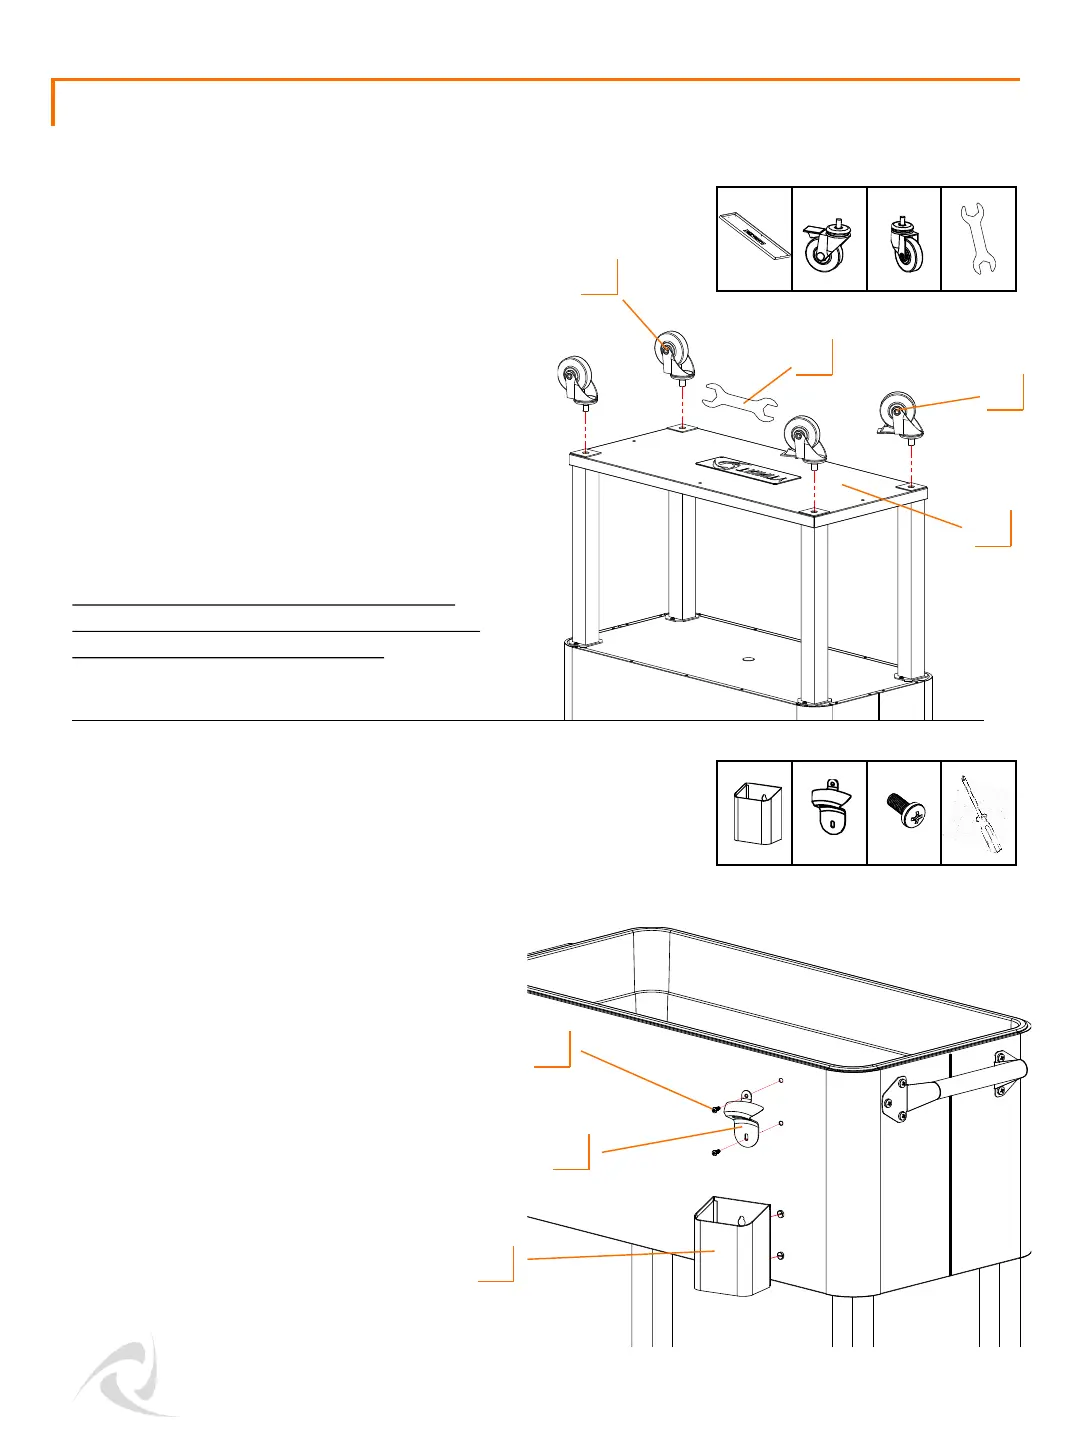
Turn the Cooler right-side up. Attach the CAP
CATCHER (H) to the TUB (A) by sliding it
downward, over the metal notch. Attach the
BOTTLE OPENER (I) to the TUB (A) using
SMALL SCREWS (E).
Align the holes in the SHELF (C) with the bottom
of the LEG (D), making sure that the SHELF Lip is
facing the TUB (A). Screw the LOCKING CASTER
(K) into the bottom of the LEG (D), securing the
SHELF (C) in between. Please make sure the
LOCKING CASTERS (K) are installed on the same
side. Screw the NON-LOCKING CASTER (L) into
the bottom of the LEG (D) securing the SHELF (C)
in-between. Repeat for the other NON-LOCKING
CASTER (L).
Tighten all CASTERS (K, L) with the provided
WRENCH (M).
Use the provided caster wrench to tighten
completely. Failure to do as instructed could
result in the caster stem breaking.
© 2017 TRINITY - 800.985.5506
3
STEP 3
STEP 4
K (2) L (2)
M (1)
C (1)
Phillips
I (1) E (2)
H (1)
C
K
L
I
E
H
M