ASSEMBLY INSTRUCTIONS
© 2017 TRINITY - 800.985.5506
6
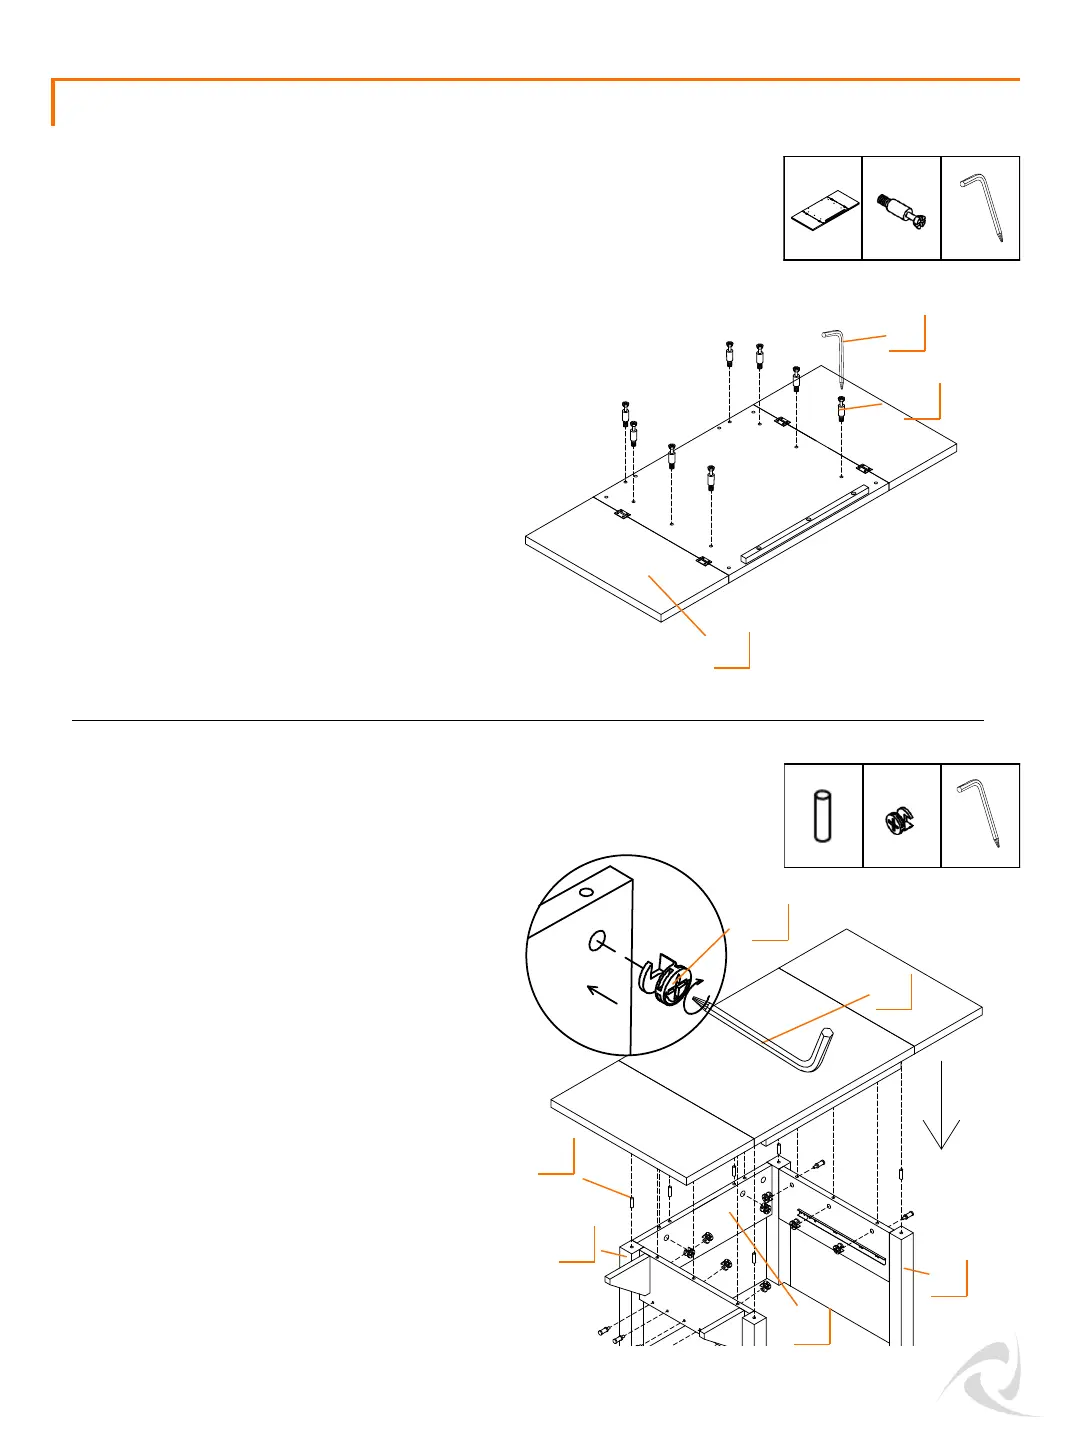
STEP 7
A (1)
II
II (1)
JJ
Lay TOP (A) on a clean surface with holes
facing up.
Screw (8) CONNECTOR SCREWS (JJ) to the
small holes on TOP (A) as shown with
SCREWDRIVER (II).
A
JJ (8)
Insert a DOWEL (CC) into the top of each leg.
Insert (4) DOWELS (CC) to the BACK FRAME
(F).
Make sure the (2) side surfaces of TOP (A) are
extended so that they are flat. With two
people, lift TOP (A) and align the holes on the
underside with the DOWELS (CC) on the
Kitchen Island Frame. Carefully lower TOP (A)
onto the Kitchen Island Frame.
Insert (3) CAM LOCKS (KK) each to LEFT SIDE
FRAME (B) and RIGHT SIDE FRAME (C) with
pointer arrow pointing up, toward the edge.
Insert (2) CAM LOCKS (KK) to BACK FRAME (F).
Use SCREWDRIVER (II) to turn CAM LOCKS (KK)
in clockwise direction until TOP (A) is pulled
tight with the frame.
STEP 8
CC (6) II (1)
KK (8)
II
CC
B
F
C
KK