9
Installation
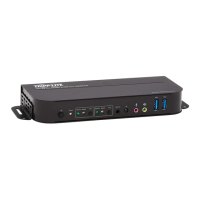
5. Connect a wired USB keyboard and mouse to the console USB keyboard
and mouse ports of the KVM switch.
Note: Keyboards and mice with internal USB hub or composite device functions
are not supported. Wireless keyboards and mice are not supported.
6. Connect a set of speakers to the console audio output port of the KVM
Switch using a 3.5 mm stereo audio cable.
Note: Microphones or headsets with microphones are not supported.
7. For models with CAC support, connect a CAC reader to the console CAC
port of the KVM switch.
Note: CAC readers with external power sources are not supported.
8. Power on the KVM by connecting the included external power supply
and plugging it into a Tripp Lite Surge Protector, Power Distribution Unit
(PDU), or Uninterruptible Power Supply (UPS).
9. Power on all connected computers and monitor. The Front Panel LEDs
will begin to flash.
Note: The computer connected to port 1 will always be selected by default after
power up.
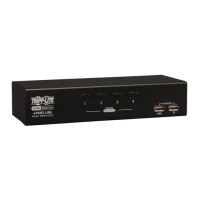
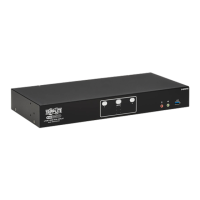
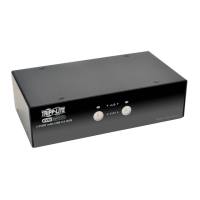
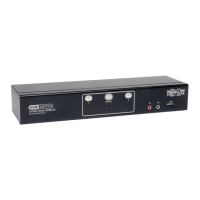
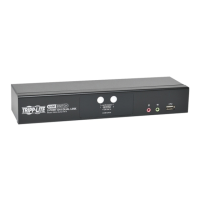
10. To switch among the connected computers, simply push the desired
input button on the front-panel of the KVM. If an input port is selected,
the LED of that port will turn on.
18-06-260-933845-EN.indd 9 8/10/2018 2:43:53 PM
16
EDID Learn
8. Once downloaded, run the Administration and Security Management
Tool executable file. The Administration and Security Management
screen will appear.
9. Initiate the session by pressing the following hotkey command, one key
one after another.
[Alt][Alt][c][n][f][g]
10. Upon completing the command, the mouse connected to the KVM will
stop functioning. A prompt will appear to enter the Credential ID.
11. Log in by entering the default username admin and pressing Enter.
12. Enter the default password 12345 and press Enter.
13. Seven options will appear in a numerical menu. Select option 6 and
press Enter.
14. A menu will appear prompting you to Select Mode. Type local and
press Enter. The Administration and Security Management Tool will
automatically learn and store the display’s EDID. The device will then
reset and reboot. At the end of the boot-up, ensure all connected
computers are properly displaying video on the connected monitor.
18-06-260-933845-EN.indd 16 8/10/2018 2:43:54 PM
8
Important Safety Instructions
Installation
• This device is equipped with a three-wire grounding-type plug. This is a
safety feature. If you are unable to insert the plug into the outlet, contact
an electrician to replace your outlet with one that will accept this type of
plug. Do not attempt to defeat the purpose of the grounding-type plug.
Always follow your local/national wiring codes.
• Warning! There is a risk of explosion if the battery is replaced with
an incorrect battery type. Do not attempt to service the device
yourself. Refer all servicing to qualified service personnel.
Note: Before proceeding with installation, make sure all devices being connected to
the KVM switch are turned off.
1. Using audio/video cables appropriate for your switch model, connect the
video output port of each computer you are adding to the video input
ports of the KVM Switch.
Note: Models with Dual Monitor capability require two available video ports per
computer.
2. Using USB A/B device cables, connect a USB port on each computer
being added to the USB input ports of the KVM Switch.
Note: Models with CAC (Common Access Card) support require an additional USB
2.0 A/B cable connected to each computer.
3. Using 3.5 mm stereo audio cables, connect the audio output of each
computer you are adding to the audio input ports of the KVM Switch.
4. Using the appropriate audio/video cable, connect a monitor appropriate
for your switch model to the console video output port of the KVM
switch.
18-06-260-933845-EN.indd 8 8/10/2018 2:43:53 PM
12
17
Miscellaneous KVM Functionality
Note: The following steps are intended for the system administrator only.
Disabling CAC Functionality
To disable CAC for any port on the KVM switch (all CAC ports are enabled
as default), use the front panel push-buttons to switch the KVM to the port
whose CAC mode you wish to change. Once selected, the push-button LED
for the selected port will illuminate blue to indicate CAC functionality is
enabled. Press and hold the button for 3 seconds until the blue push-button
LED turns off. CAC functionality for the port is now disabled.
Enabling CAC Functionality
To enable CAC for any port on the KVM switch, use the front panel push-
buttons to switch the KVM to the port whose CAC mode you wish to change.
Once selected, the push-button LED for this specific channel should be off
to indicate CAC functionality is disabled. Press and hold the button for 3
seconds until the blue push-button LED turns on. CAC functionality for the
port is now enabled.
CAC Port Configuration
Note: The following steps are intended for the system administrator.
CAC port configuration is an optional feature, allowing registration of
any USB peripheral to operate with the KVM. Only one peripheral can
be registered at a time, and only the registered peripheral will be able to
operate with the KVM. If a peripheral other than the registered peripheral
is plugged in to the USB-A CAC port, it will not work. When no peripheral
is registered, the KVM will default to operate with any CAC Reader. To
configure the USB-A CAC port, follow the instructions below.
Note: Only one computer connected to port 1 is required for this operation.
1. Open the Administration and Security Management Program (See the
EDID Learn section for download instructions). The Administration and
Security Management screen will appear.
18-06-260-933845-EN.indd 17 8/10/2018 2:43:54 PM
8
Important Safety Instructions
Installation
• This device is equipped with a three-wire grounding-type plug. This is a
safety feature. If you are unable to insert the plug into the outlet, contact
an electrician to replace your outlet with one that will accept this type of
plug. Do not attempt to defeat the purpose of the grounding-type plug.
Always follow your local/national wiring codes.
• Warning! There is a risk of explosion if the battery is replaced with
an incorrect battery type. Do not attempt to service the device
yourself. Refer all servicing to qualified service personnel.
Note: Before proceeding with installation, make sure all devices being connected to
the KVM switch are turned off.
1. Using audio/video cables appropriate for your switch model, connect the
video output port of each computer you are adding to the video input
ports of the KVM Switch.
Note: Models with Dual Monitor capability require two available video ports per
computer.
2. Using USB A/B device cables, connect a USB port on each computer
being added to the USB input ports of the KVM Switch.
Note: Models with CAC (Common Access Card) support require an additional USB
2.0 A/B cable connected to each computer.
3. Using 3.5 mm stereo audio cables, connect the audio output of each
computer you are adding to the audio input ports of the KVM Switch.
4. Using the appropriate audio/video cable, connect a monitor appropriate
for your switch model to the console video output port of the KVM
switch.
18-06-260-933845-EN.indd 8 8/10/2018 2:43:53 PM
 Loading...


