10
GB
Troubleshooting
Symptom Possible Cause Solution
No power
Mains plug not inserted into socket or switched on Plug in and switch on
Fuse blown in plug or circuit breaker tripped in consumer
unit
Replace fuse or reset circuit breaker
RCD connected and not reset Reset RCD
Extension lead overloaded and thermal protection has
operated
Replace extension lead or unwind cable fully from reel to
allow maximum current use and reset thermal protection
Power lead or power lead connection to tool or mains
plug damaged
Requires repair at an authorised Triton service centre
Power tool fault Requires repair at an authorised Triton service centre
Motor does not start
Carbon brushes worn Brushes need replacing by an authorised Triton service
centre
Power tool fault Requires repair at authorised Triton service centre
Rough finish on wood after planing
Worn blade or blades Replace all blades
Damaged blade or blades Replace one or more blades
Wood is wet Allow wood to dry
Depth of cut incorrect
Worn or damaged blades Replace blades
Poorly fitted blade or blades Re-fit blade or blades
Incorrect blades fitted Replace blades with correct type
Barrel not rotating
Broken drive belt Replace belt
Vibration or abnormal noise
STOP using tool immediately Re-check all user accessible parts are secure and correctly
fitted first and if not solved contact an authorised Triton
service centre
WARNING: If the blades protrude or are not square, they could hit the casing with serious risk
to the operator and others in the vicinity.
Note: The planing surface will end up rough and uneven unless the blades are set and secured
properly.
The examples below show proper and improper settings:
• Correct setting - clean smooth cut (Fig. III).
• Nicks in surface – as caused by the edge of one or all blades not being parallel to the
surface of the rear base (Fig. IV).
• Gouging at start – as caused by the edge of one or all blades not protruding enough in
relation to the surface of the rear base (Fig. V).
• Gouging at end – as caused by the edge of one or all blades protruding too far in relation
to the surface of the rear base (Fig. VI).
(a) Movable Front Base (11) which is altered by the Depth Adjustment Knob (12)
(b) Fixed Rear Base (6)
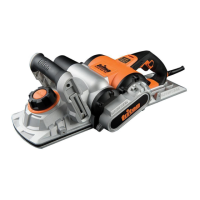
Drive belt replacement
1. Replace the drive belt by first taking out the three cross-head screws that secure the Drive
Belt Cover (8) on the left-hand side of the planer when viewed from the rear (Image N)
Note. The front screw is longer than the other two. Take care to replace this screw in the same
hole when replacing the cover.
2. Remove the damaged belt by pulling it sideways off the top pulley and turning the bottom
pulley by hand. Use a soft brush to clean the pulleys and the surrounding area
Note: Wear eye protection when cleaning out the pulley area.
3. With the six continuous ‘v’ profiles on the inside, place the new belt over the bottom
pulley. Half-fit the other end of the belt on the top pulley, then roll the belt in place whilst
turning the pulley
4. Check the belt runs evenly by manually turning the belt
5. Replace the Drive Belt Cover and the three fixing screws, ensuring the longer screw is
located in the hole at the front of the cover
6. Plug the machine back into the power outlet and switch the tool on and run for a minute to
make sure that the motor and belt are operating correctly
Brushes
• Over time the carbon brushes inside the motor may become worn
• Excessively worn brushes may cause loss of power, intermittent failure, or visible sparking
• If you suspect that the brushes may be worn, have them replaced at an authorised
service centre
Disposal
Always adhere to national regulations when disposing of power tools that are no longer
functional and are not viable for repair.
• Do not dispose of power tools, or other waste electrical and electronic equipment (WEEE),
with household waste
• Contact your local waste disposal authority for information on the correct way to dispose of
power tools
459500_Manual.indd 10 03/09/2019 09:21

 Loading...