9
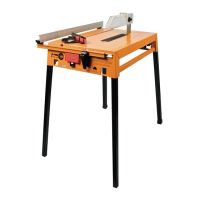
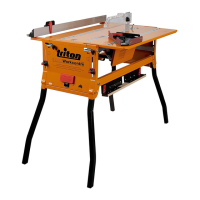
12. Do not operate the saw upside down unless securely mounted and guarded
in a reputable brand saw bench (eg. a Triton Workcentre or Triton Compact
Saw Table)
Accessories
A range of accessories are available for this power tool from your Triton dealer
including saw blades. Spare parts are available from your Triton dealer or
www.toolsparesonline.com.
Maintenance
WARNING: Ensure that the tool is switched off and the plug is removed
from the power point before making any adjustments or maintenance
procedures.
• Inspect the supply cord of the tool, prior to each use, for damage or wear.
This advice also applies to extension cords used with this tool
• If the replacement of the supply cord is necessary, this has to be done by the
manufacturer or his agent in order to avoid a safety hazard.
• Regularly check that all the fixing screws are tight. They may vibrate loose
over time
• Regularly check that the saw arbors and arbor washer are clean, and free of
built-up gum deposits or caked-on sawdust. Check that the faces of the
arbor washers are smooth and free from burrs. Check that the blade
retaining bolt is correctly tightened
• Check the operation of the spring-loaded lower guard. It must close quickly
and without scraping anywhere. Remove the blade and clean accumulated
sawdust or wood slivers from the guard area
• Occasionally check the tension of the micro-adjustment knob, and if
necessary tighten or loosen the Nyloc nut
• The saw ventilation slots should be kept clean and clear of any foreign
matter. Use a lightly dampened cloth to wipe the saw clean - do not use
solvents
Replacing the saw blade
WARNING: Ensure that the tool is switched off and disconnected from the
power supply before making any adjustments or installing or removing blades.
• Only use 235mm (9¼”) blades, with a kerf between 2.2 and 3.5mm,
designed for circular saws with a no-load speed rating of at least 5000rpm.
Never fit high speed steel blades or abrasive discs. Fitting of other purpose
or different sized blades could void the warranty
• Do not fit inferior blades. Regularly check the blade is flat, sharp and free of
cracks or defects
1. Ensure the saw is disconnected from power
2. Hold in the Spindle Lock Button (19) and use the 6mm Hex Key (20)
supplied to remove the arbor bolt (Image J) - turn in the direction of the
blade rotation. The shaft will turn slightly before locking, allowing the bolt
and outer arbor washer to be removed
3. Holding the Lower Blade Guard (8) fully back, carefully lift the worn blade
off the inner washer on the shaft and slide the blade through the baseplate
(Image K)
4. Now, keeping the Lower Blade Guard fully retracted, carefully slide the new
blade through the baseplate and position it onto the inner washer on the
shaft. The graphics should face out and the arrow on the blade should point
in the same direction as the arrow on the guard
5. Refit the outer arbor washer and, while depressing the Spindle Lock Button,
tighten the arbor bolt firmly into position – turn against the direction of
blade rotation
6. Ensure the blade sits flush between the inner and outer washers, then
tighten firmly with the Hex Key
Blade maintenance
• Regularly check that the blade is free from a build-up of gum resins or
sawdust. If necessary, clean with a solvent such as mineral turpentine
• Regularly check the saw blade for flatness. Use of the saw with a buckled
blade places excessive load on the motor and gearbox assembly, and may
affect your warranty rights
• The tungsten carbide teeth should be checked regularly for sharpness
and tooth breakages, and repaired or re-sharpened as required. Note that
when re-sharpening, the bevel angles on the front of the teeth should be
retained. The tungsten carbide teeth should be checked regularly for sharp-
ness and tooth breakages, and repaired or re-sharpened as required.
Contact the manufacturer
Cleaning
1. Keep the tool’s air vents unclogged and clean at all times
2. Remove dust and dirt regularly with a cloth or soft brush
3. Never use caustic agents to clean plastic parts. A damp cloth is
recommended. Water must never come into contact with the saw
4. Re-lubricate all moving parts at regular intervals
Brush replacement
• The carbon brushes are a consumable item which should be inspected
periodically and replaced when worn
• With the saw disconnected from power, unscrew the brush caps located
near the end of the motor (Image L). Remove the brushes by pulling care-
fully on the protruding springs (Image M)
• If either brush is worn to less than 6mm long, both brushes must be
replaced using genuine Triton replacement brushes - available from
Authorised Triton Saw Repair Centres
• Triton Precision Power Tools will not be responsible for any damage or
injury caused by mishandling or unauthorised repair of this tool
Power lead maintenance
If the power lead needs replacing, the task must be carried out by the
manufacturer, the manufacturer’s agent, or an authorised service centre in
order to avoid a safety hazard
Storage
• Store this tool carefully in a secure, dry place out of the reach of children
Disposal
Always adhere to national regulations when disposing of power tools that are
no longer functional and are not viable for repair.
• Do not dispose of power tools, or other waste electrical and electronic
equipment (WEEE), with household waste
• Contact your local waste disposal authority for information on the correct
way to dispose of power tools
961277_Z1MANPRO1_AUS.indd 9 23/02/2015 15:50
 Loading...