7
Laser Safety
The laser used in this device is a Class 2 laser with maximum power of ≤1mW
and a wavelength of 650nm.
These lasers do not normally present an optical hazard, although staring at the
beam may cause flash blindness.
WARNING: Avoid direct eye contact.
A hazard may exist if you deliberately stare into the beam, please observe all
safety rules as follows:
• The laser shall be used and maintained in accordance with the manufac
turer’s instructions
• Do not switch on the laser light until the tool is ready to cut
• Never aim the beam at any person, and particularly not into the eyes of any
person or animal, or any object other than the workpiece
• Always ensure the laser beam is aimed at a sturdy workpiece without
reflective surfaces. i.e. wood or rough-coated surfaces are acceptable.
Reflective sheet steel or similar is not suitable for laser use as the reflective
surface could direct the beam back at the operator
• Do not change the laser light assembly. Repairs must only be carried out by
the laser manufacturer or an authorised agent. DO NOT exchange with a
different type of laser
CAUTION: Use of controls or adjustments or performance of procedures other
than those specified herein may result in hazardous radiation exposure.
Please refer to the relevant EN standards, EN60825-1:2007 for more
information on Lasers.
Product Familiarisation
1. Laser Sight Switch
2. Dust Port
3. Laser Sight Assembly
4. Bevel Lock Knob (rear)
5. Short Blade Guard Lever (fitted)
6. Base Plate
7. 40 Tooth TCT Blade
8. Lower Blade Guard
9. Power-On Neon Light
10. Front Handle
11. Upper Guard
12. Bevel Detent Latch
13. Bevel Lock Knob (front)
14. Bevel Scale
15. Bevel Micro Adjustable Lever
16. 90° and 45° Blade Sight Notch
17. Rip Fence
18. Rip Fence Locking Knob
19. Spindle Lock Button
20. 6mm Hex Key
21. Long Blade Guard Lever
22. Main Handle
23. Rack & Pinion Adjustment Knob
24. Depth Adjustment Locking Lever
25. Depth of Cut Scale
26. Lock-Off Button
27. Micro Depth Adjustment Knob
28. Trigger Switch
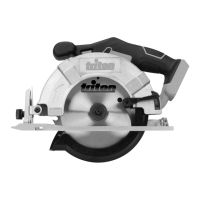
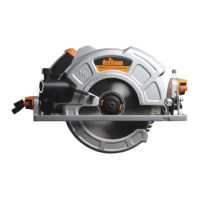
Intended Use
Hand-held corded electric circular saw for cross, rip and bevel cutting of hard
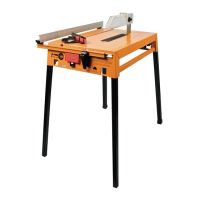
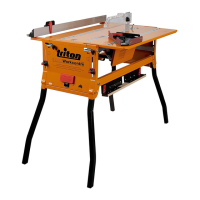
and softwood timber and sheet material. This machine may also be used as a
table saw, mounted in the Triton Saw Table, the Triton Workcentre or a suitable
third-party stand.
WARNING: This circular saw is only suited for cutting wood, MDF, chipboard
and similar materials; it is NOT suitable for cutting metal or wood with
embedded nails.
Unpacking Your Tool
Carefully unpack and inspect your tool. Familiarise yourself with all its features
and functions.
Ensure that all parts of the tool are present and in good condition. If any parts
are missing or damaged, have such parts replaced before attempting to use
this tool.
Before Use
WARNING: Ensure that the tool is switched off and disconnected from the
power supply before making any adjustments or installing or removing blades.
Adjusting the cutting depth
1. Loosen the Depth Adjustment Locking Lever (24) and lift the back of the
saw away from the baseplate until the approximate depth is achieved
(Image A). Push down on the lever to lock the saw in position
2. For fine depth adjustments, lock the saw at the approximate depth and
then turn the Micro Depth Adjustment Knob for the exact depth. Turn the
Micro Depth Adjustment Knob in a clockwise direction to decrease the
depth of cut, turn in an anti-clockwise direction to increase the depth of
cut. The adjustment range is 6mm, if insufficient, reset the main depth
adjustment, and fine tune again. The micro-adjustment knob must be set to
full depth to achieve the 82mm maximum depth of cut
3. The circular saw also features a rack & pinion depth adjustment feature.
The rack & pinion depth adjustment is most useful when the saw is
mounted below a Triton Workcentre
4. To adjust the depth using the rack & pinion feature loosen the Depth
Adjustment Locking Lever (24) and then turn the Rack & Pinion Adjustment
Knob (23), to adjust the cutting height. Turn the knob in an anti-clockwise
direction to increase the cutting depth, turn in a clockwise direction to
decrease the cutting depth. Tighten the Depth Adjustment Locking Lever to
lock the saw in position
Adjusting the depth locking lever tension
If the Depth Adjustment Locking Lever (24) is not providing enough tension
adjust as follows:
1. Loosen and remove the two Phillips head screws that secure the Rack &
Pinion Adjustment Knob (23). Remove the adjustment knob; this will reveal
the locking lever tension nut (Image B)
2. Using a 10mm wrench tighten the tension nut in a clockwise direction to
increase the tension of the Depth Adjustment Locking Lever (24)
3. Once the locking lever is providing sufficient tension replace the
adjustment knob and secure using the two Phillips head screws
4. Check the operation of the locking lever before operating the saw
Adjusting the bevel angle
1. Bevel angles can be set anywhere within the range 0° to 47°. Pre-set
stops are available at 0°, 15°, 22.5°, 30° and 45° for quick, accurate bevel
settings
2. Loosen the Front and Rear Bevel Lock Knobs (13 and 4) and depress the
Bevel Detent Latch (12). Pivot the saw to the angle you require then release
the Bevel Detent Latch. A small movement of the saw motor will allow the
latch to pop up into the detent position. Tighten both Bevel Lock Knobs
3. For selecting other angles, leave the Bevel Detent Latch disengaged by
pushing it down and back towards the motor, where it has a ‘lock-out’
position. Firmly tighten both knobs at the required angle
961277_Z1MANPRO1_AUS.indd 7 23/02/2015 15:50
 Loading...