9
GB
3. For selecting other angles, leave the detent latch
disengaged by pushing it down and back towards the
motor, where it has a 'lock-out' position. Firmly tighten
both knobs at the required angle.
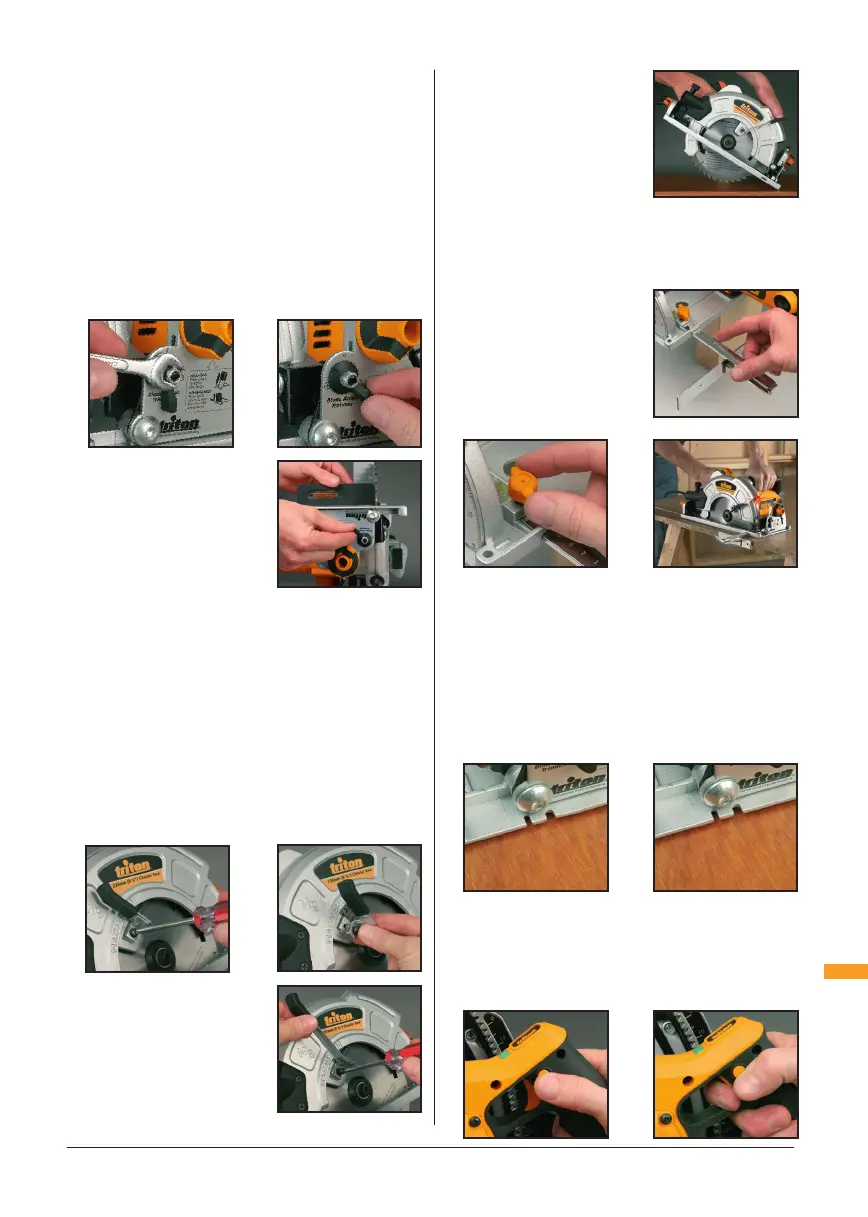
FINE-TUNING BEVEL ANGLE & STOPS
1. You can fine-tune the calibration scale and the bevel
detent positions by +/-2˚.
2. Make sure the saw is set at 0˚ and the bevel detent
latch is engaged.
3. Loosen the rear Bevel Lock Knob (4), also loosen the Nyloc
nut on the Bevel Micro Adjustment Lever (15) using a 10mm
spanner.
4. Adjust the trimmer to the
left or right until the blade is
square to the baseplate or to
the Triton table.
5. Tighten the rear bevel lock
knob and Nyloc nut after any
adjustments.
Note: For full trim range adjustment ensure the blade depth
is set 2–3mm (3/32"–1/8") below maximum, for motor
clearance. Full depth can be re-set once the adjustment
has been made.
BLADE GUARD LEVER
For plunge or pocket cuts, use the Long Blade Guard Lever
(21). To change the lever follow the below instructions:
1. Loosen and remove the Phillips head screw holding
the Short Blade Guard Lever (5). Also remove the blade
guard lever.
2. Fit the Long Blade Guard Lever (21) into the same
position.
3. Replace the Phillips head
screw and tighten to secure
the long blade guard lever in
position.
4. The long blade guard lever
can now be used to provide
better control of the lower
guard when performing
pocket cuts.
RIP FENCE ADJUSTMENT
1. The Rip Fence (17) can be
used on the left or the right of the blade. Using the rip
fence provides accurate cuts without the need to work
free-hand following pencil lines.
2. Locate the rip fence into the mounting slots at the
front of the Base Plate (6)
and tighten the Locking Knob
(18) to lock it at the required
cut width. For greater width
setting, the thumb screw can
be repositioned to the inner or
outer clamp location.
SIGHTING NOTCHES
1.
Two sets of sighting notches at the front of the base plate
provide guidance when performing free-hand cuts following a
pencil line.
2. When viewed from the front of the saw use the left
hand side notch for 90° cuts and the right hand sight
notch for 45° cuts. Sight along either edge of the
notch, depending on which side of the line you wish to
cut.
3. Use the second set of notches, closer to the saw blade,
to confirm the alignment of your saw during the cut.
SWITCHING ON AND OFF
1. Connect the plug to the power supply.
Preparation
Use left notch
for 90˚ cuts
Use right notch for
45˚ cuts
Manual.indd 9 29/06/2012 10:06

 Loading...