BRAKES
29.
TO
REMOVE
REAR
WHEEL
(e)
Bleed the hydraulic system as described
CYLINDER
on page
3.
Adjust the brake shoes
(a)
Jack up rear of
car.
Remove nave
as described on page
3.
plate, road wheel and brake
clnun.
Slacken off micram adjuster.
(f)
Check the system for fluid leakage by
applying
firm
pressure to the pedal
(b)
Drain ofl hydraulic fluid, disconnect and inspecting the line andconnections.
handbrake cables and remove banjo
bolt from banjo connection which is
(g)
Fit road wheel and nave plate. Re-
situated
on
the inner side of the brake
move jacks.
plate.
(c)
Pull the trailing shoe against the load
31.
TO
DISMANTLE
REAR
WHEEL
of the pull-off springs and away from
CYLINDER
its abutment at either end; on releasing
tension of the pull-off springs the lead-
(a)
Withdraw the piston complete with
ing shoe will
fall
away.
Collect the
piston cover from the cylinder body.
micram adjuster and mask.
(b)
Remove the seal from the piston by
(d)
Remove the rubber boot and the hand-
easing out of its groove.
brake piston.
(c)
Drift out the handbrake lever pivot
(e)
Swing the handbrake lever
until
the
pin to remove handbrake lever.
shoulder is clear of the back plate and
slide the cylinder casting forward.
(d)
Apply low air pressure to the
Pivot the cylinder about its forward inlet connection, the rubber cup, the
end and withdraw its rear end from
cup filler and spring can readily be
the slot
in
the back plate.
A
rearward removed.
movement of the cylinder
will
now
bring its forward end clear of the back
plate.
30.
TO
FIT
REAR
WHEEL CYLINDERS
(a)
Offer up the rear wheel cylinder to
the back plate with the handbrake
lever to the slot. Engage the forward
end of the cylinder in the slot and slide
it well forward, taking care to position
the lever so that the shoulder clears
the back plate. Engage the rear end of
the cylinder in the slot and slide it
back to hold it
in
position.
(b)
Place the rubber boot over the hand-
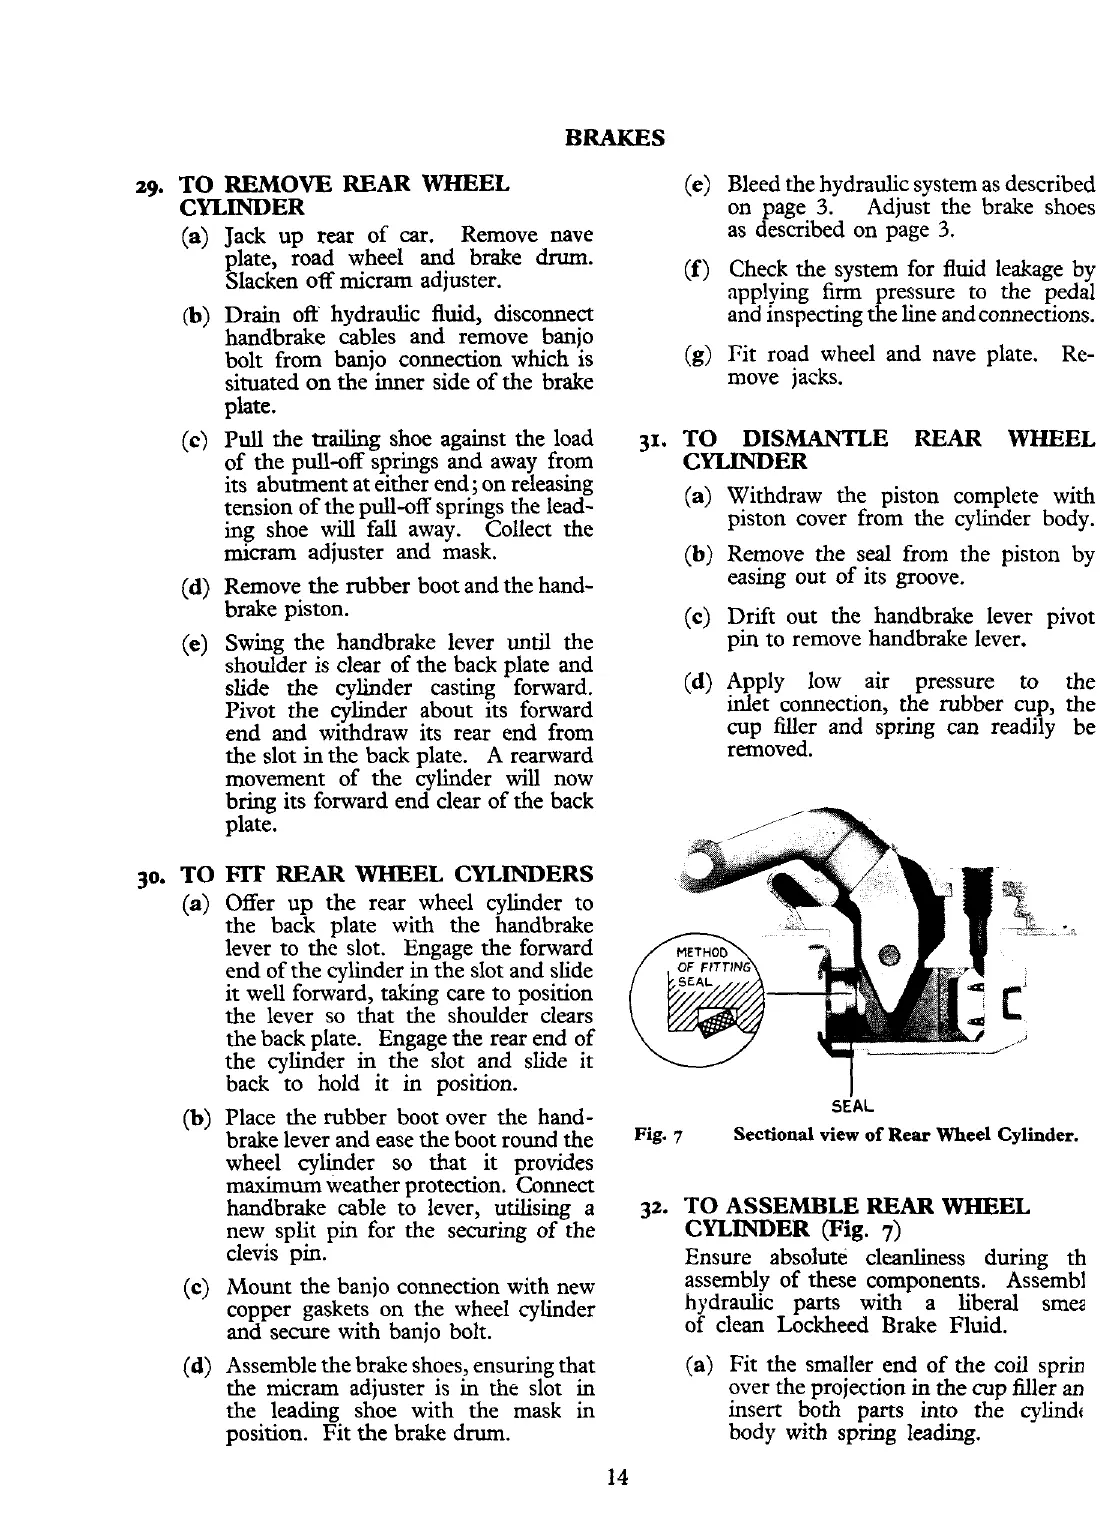
SEAL
brake lever and ease the boot round the
Fig.
7
Sectional
view
of
Rear
Wheel
Cylinder.
wheel cylinder so that it provides
maximum weather protection. Connect
handbrake cable to lever, utilising a
32.
TO
ASSEMBLE
REAR
WHEEL
new split pin for the securing of the
CYLINDER
(Fig.
7)
clevis pin. Ensure absolute cleanliness during th
(c)
Mount the banjo connection with new
assembly of these components. Assembl
copper gaskets on the wheel cylinder hydraulic parts with a liberal smea
and secure with banjo bolt.
of clean Lockheed Brake Fluid.
(d)
Assemble the brake shoes, ensuring that
(a)
Fit the smaller end of the coil sprin
the rnicrarn adjuster is in the slot in over the projection in the cup filler an
the leading shoe with the mask in insert both parts into the cylindr
position. Fit the brake drum. body with spring
leading.
 Loading...


