View
Underneath
Shredder
Fig.
9
Fig.
10
STEP 14.
Being careful to avoid any sharp edges on the cutting flails or
other metal parts (wear thick gloves for added protection),
reach down inside the shredder hopper and securely fasten a
clothesline or very strong twine around one of the cylinder
pins just behind the flywheel so the entire assembly will be
balanced. The rope or twine must
be
in
good condition (not
frayed or split) and
be
capable of supporting 40 or more
pounds. Pull the rope or twine taut to remove any slack and
securely fasten the upper end to a sturdy 2"x4" piece of wood
(see Fig. 10) spanning the shredder hopper. Tying up the
cylinder assembly
in
this manner will prevent
it
from falling
to
the ground when you remove the cylinder shaft
in
the follow-
ing steps.
STEP 13.
On
the chipper side of the cylinder shaft, use a
1fa"
hex key
(Allen) wrench to loosen the set screw
in
the bearing locking
collar
(see Fig.
8).
Slide the collar off and save the collar
(unless being replaced with new parts).
STEP 15.
On
the chipper side of the main frame, use a
'/2"
wrench
to
remove the three Whiz locknuts that secure the two triangle-
shaped bearing
f1angettes
to
the main frame (see Fig.
11).
While loosening the nuts. apply slight outward pressure
to
the nuts
to
prevent the screws
from
turning.
o
STEP 12.
Remove the broom handle or stick from the shredder hopper.
Using a flashlight, look up inside the cylinder chamber and
locate the two screws that secure the cylinder assembly tube
to
the cylinder shaft (see Fig. 9). Being careful to avoid any
sharp edges on the cutting flails or other metal parts (wear
thick gloves for added protection), rotate the cylinder assem-
bly until the locknuts on the screws are facing down. Remove
the locknuts using a
9/
16
" wrench on the screw h('3ds and a
9/
16
"
socket wrench (with 6" extension adapter) on the locknuts.
After removing the locknuts, gently tap the screws out with a
long punch or driftpin. Save the screws and nuts for reuse.
-_.~
~
LOCking/
Y
Collar
!
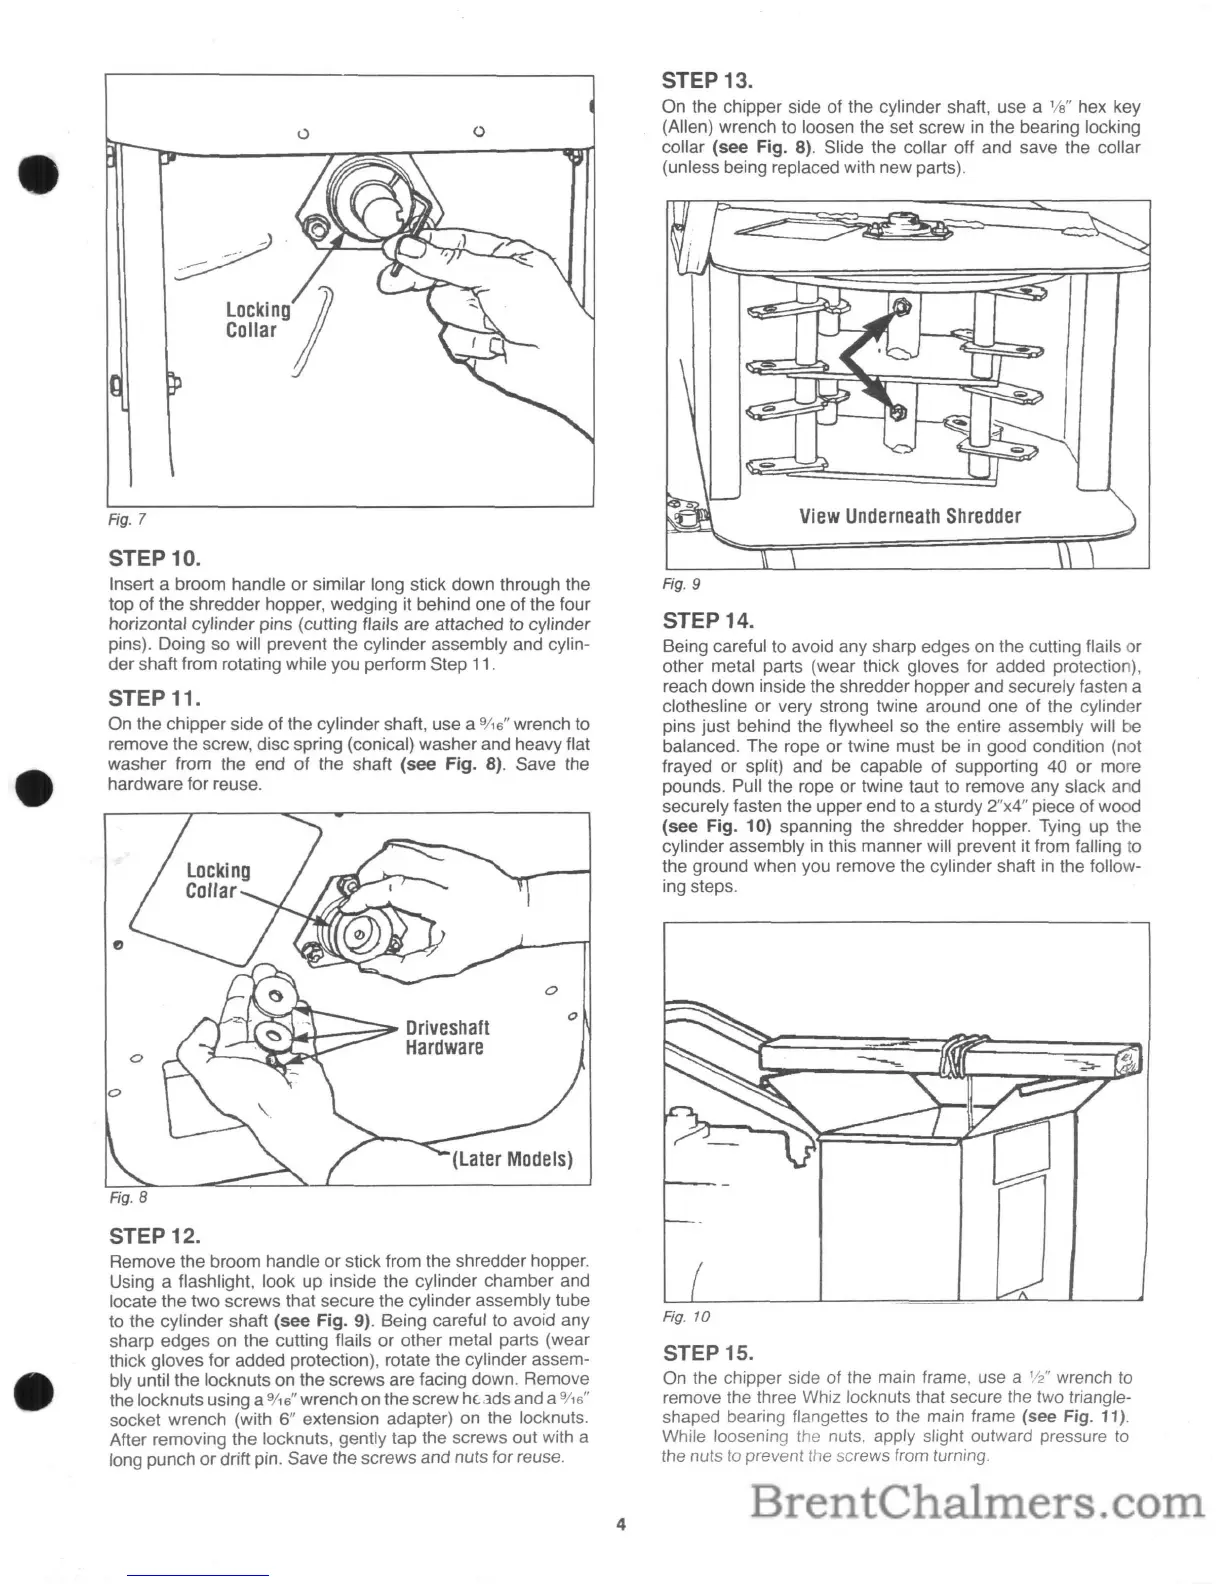
STEP 10.
Insert a broom handle or similar long stick down through the
top of the shredder hopper, wedging it behind one of the four
horizontal cylinder pins (cutting
flails are attached
to
cylinder
pins). Doing so will prevent the cylinder assembly and cylin-
der shaft from rotating while you perform Step 11.
Fig.
7
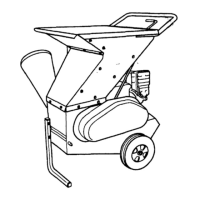
STEP 11.
On the chipper side of the cylinder shaft, use a
9/
16
" wrench to
remove the screw, disc spring (conical) washer and heavy flat
washer from the end
of
the shaft (see Fig. 8). Save the
hardware for reuse.
4