EasyManua.ls Logo

Troy-Bilt TB146 EC User Manual

Troy-Bilt TB146 EC
16 pages
To Next Page IconTo Next Page
Page #1 background imageLoading...
Page #1 background image
IMPORTANT: READ THE OPERATOR’S MANUAL THOROUGHLY AND FOLLOW THE SAFE OPERATION PRACTICES WHILE OPERATING THE UNIT.
Place unit on a level surface
and fill fuel tank. DO NOT
overfill.
5
Remove Unit From Carton Assemble The Unit
1
Remove all contents from
the carton.
Loosen the two handlebar
knobs. Swing the
handlebars up into the
operating position.
NOTE: Do not pinch the
throttle cable or switch
wires.
2
Tighten the two handlebar
knobs to secure the
handlebars. Readjust the
throttle cable and switch
wires.
NOTE: Do not over tighten
the handlebar knobs.
3
Handlebar Knobs
Start The Unit
R
emove the oil plug from the
c
rankcase, and pour the
e
ntire bottle of oil into the fill
h
ole.
4
S
tart The Unit
S
tart The Unit
10
Stand in starting position.
WARNING: Tines WILL
ROTATE on START. Always
stand in starting position with
foot on wheel when starting
the unit.
9
DO NOT squeeze the
throttle control.
P
ull starter rope in
controlled motion until unit
starts. Wait 60 seconds.
DO NOT Squeeze the throttle
c
ontrol.
6
Red Cold Weather
S
tart Lever
For cold weather conditions
(below 40°F), push the red
cold weather start lever
down to the closed position.
DO NOT push this lever
down if the temperature is
above 40°F.
7
P
ress primer bulb 10 times,
o
r until fuel is visible
18
Primer Bulb
10 X
DIDN’T START?
Repeat these instructions.
If engine still fails to start, refer
to the Starting/ Stopping
instructions section of this
manual for additional starting
and troubleshooting information.
IF ENGINE IS HOT
Go back to Step 8
Then squeeze the throttle
c
ontrol for an additional 30 to
60 seconds to let the engine
warm up further. The unit may
be used during this period.
12
Need Help?
Call 1-800-828-5500
No Tools Required!
Starter Rope
F
uel Cap
Lower Handle
Handle Knobs
T
hrottle Control
On/ Off Switch
Upper Handle
Tine Shield
Choke Lever
Tines
Air Filter
Cover
P
rimer Bulb
Electric Starter or
Power Start Bit Optional!
T
HESE OPTIONAL ACCESSORIES
ARE SOLD SEPARATELY!
This unit has an alternate starting method
that many find easier to use than pulling a
r
ope. Please contact a local retailer or call
1-800-828-5500 for more information.
Information may also be found at
www.troybilt.com
For cold weather conditions
(
below 40°F), pull the red
cold weather start lever
back up to the open position
after the unit starts.
11
Red Cold Weather
S
tart Lever
Español — Page 7
English — Page 1
769-07453 P03 01/12
NEED HELP? CALL 1-800-828-5500 IN U.S. OR 1–800–668–1238 IN CANADA
TB146 EC
4-Cycle Cultivator
Operator’s Manual
Question and Answer IconNeed help?

Do you have a question about the Troy-Bilt TB146 EC and is the answer not in the manual?

Troy-Bilt TB146 EC Specifications

General IconGeneral
Engine Type4-Cycle
Tilling Width16 inches
Number of Tines4
Starting SystemRecoil
Forward TinesYes
Warranty2-year limited
Tilling Depth8 inches

Summary

FastGuide Setup and Starting

Assembling the Unit

Steps for assembling the handlebars and securing them in place.

Starting the Cultivator

Step-by-step guide to starting the engine, including cold weather procedures.

Safety Guidelines

Safety Symbols and Meanings

Explanation of safety icons and pictographs used in the manual.

Important Safety Instructions

Key safety guidelines for operating the unit, including personal protection and warnings.

Unit Information and Operation

Know Your Unit Overview

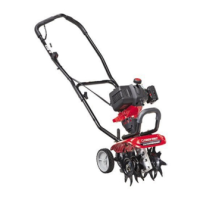
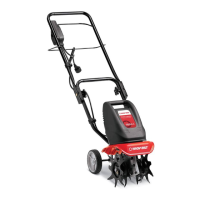
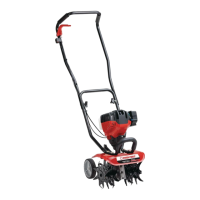
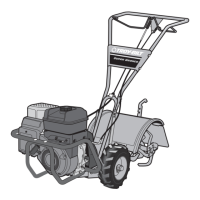
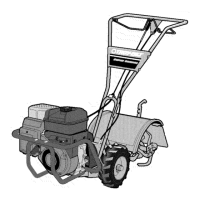
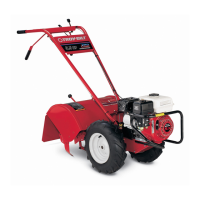
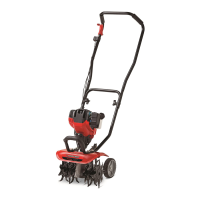
Identification of unit parts and common applications for the cultivator.

Oil and Fuel Information

Details on recommended oil, fuel types, and fueling precautions.

Starting and Stopping Procedures

Step-by-step instructions for starting and stopping the engine.

Operating the Cultivator

Operating Instructions and Tips

Guidance on how to use the unit for cultivation and safely transport it.

Adjusting Tine Depth

Steps to change the cultivation depth by adjusting the wheel support bracket.

Maintenance and Repair

Maintenance Schedule

Recommended maintenance tasks and their frequency for optimal performance.

Oil Level and Change Procedures

How to check and change the engine oil for proper lubrication.

Tine Removal and Replacement

Instructions for safely removing and replacing cultivator tines.

Engine Maintenance

Air Filter Maintenance

How to clean and maintain the air filter for proper engine operation.

Rocker Arm Clearance Adjustment

Procedure for adjusting valve clearance for engine performance.

Idle Speed Adjustment

How to adjust the engine's idle speed for smooth operation.

Spark Plug Replacement

Steps for checking and replacing the spark plug.

Cleaning, Storage, and Troubleshooting

Cleaning and Storage Instructions

How to properly clean and store the unit for short or long term.

Troubleshooting Common Issues

Solutions for common problems like engine not starting or lacking power.

Optional Accessories

Information on optional electric starter and power start bit accessories.

Unit Specifications

Technical details and measurements of the cultivator.

Limited Warranty Information

Warranty Coverage and Exclusions

Details on what the warranty covers, exclusions, and limitations.

Obtaining Warranty Service

Instructions on how to get service under the product's limited warranty.

Related product manuals