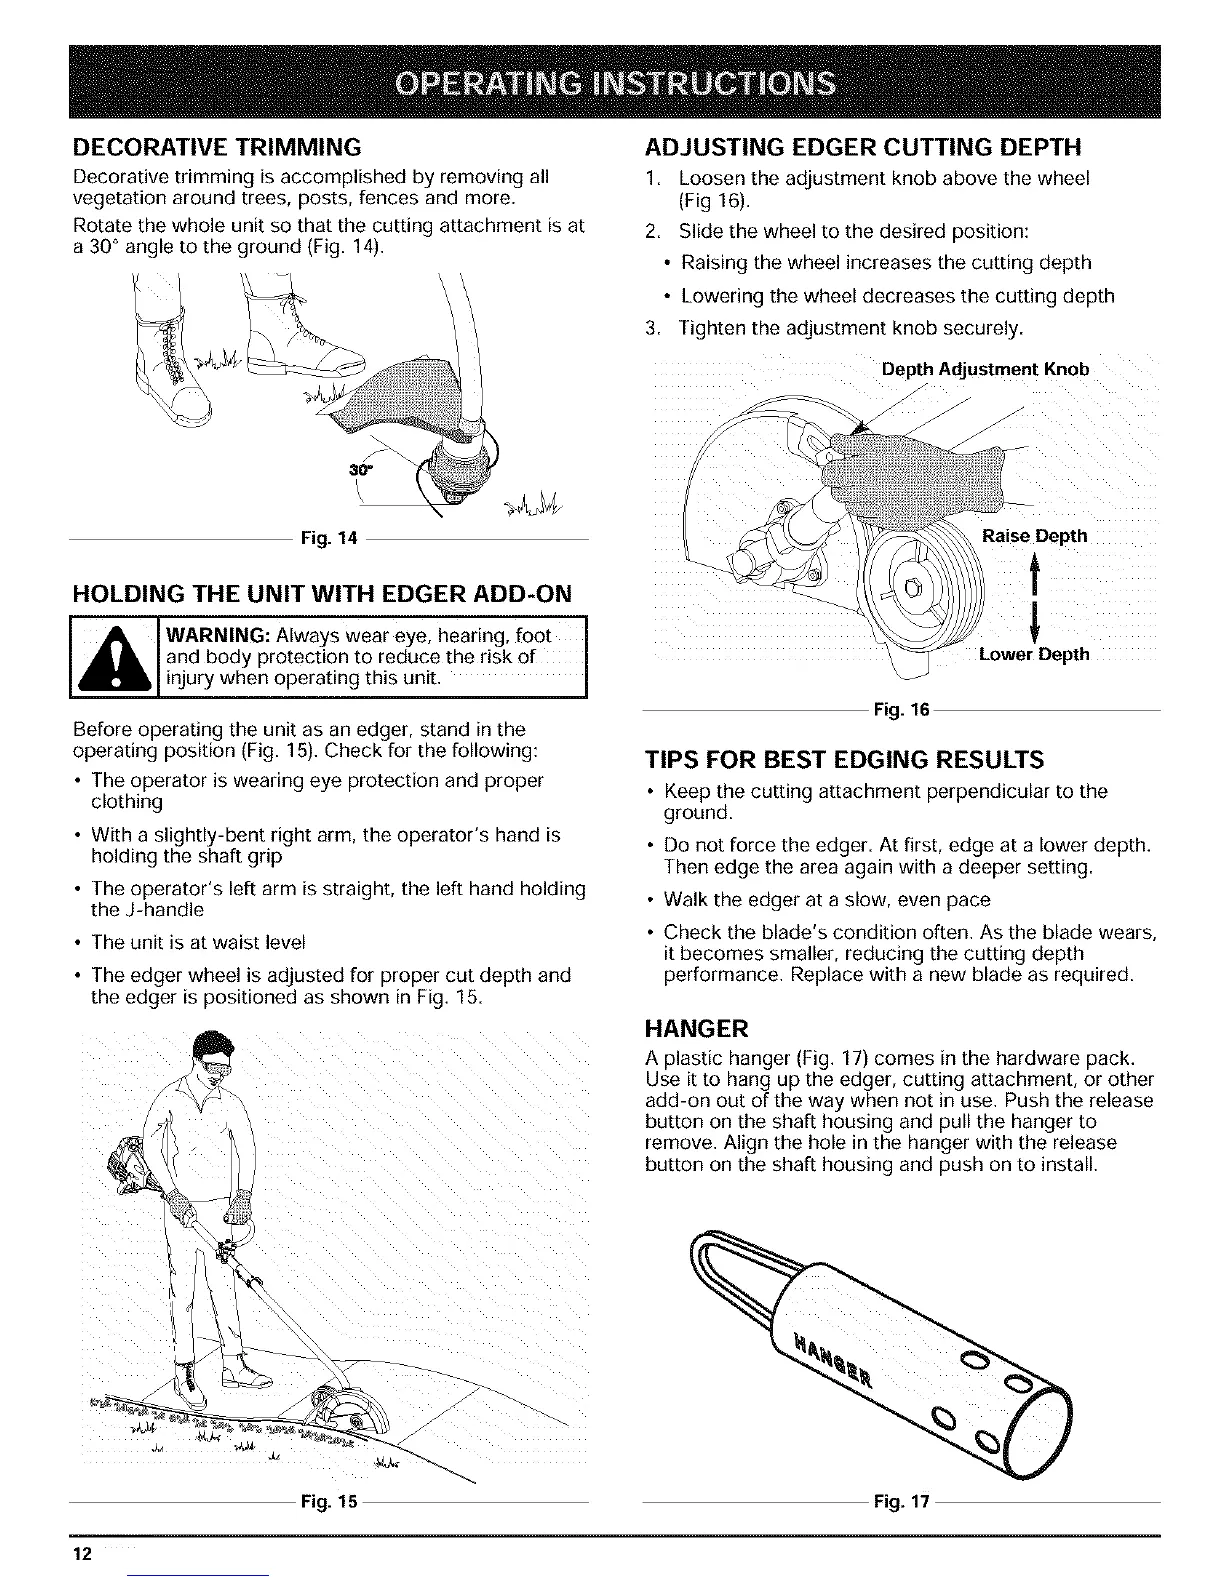
DECORATIVE TRIMMING
Decorative trimming is accomplished by removing all
vegetation around trees, posts, fences and more.
Rotate the whole unit so that the cutting attachment is at
a 30° angle to the ground (Fig. 14).
ADJUSTING EDGER CUTTING DEPTH
1. Loosen the adjustment knob above the wheel
(Fig 16).
2. Slide the wheel to the desired position:
• Raising the wheel increases the cutting depth
• Lowering the wheel decreases the cutting depth
3. Tighten the adjustment knob securely.
Depth Adjustment Knob
Fig. 14
HOLDING THE UNIT WITH EDGER ADD-ON
Raise Depth
WARNING: Always wear eye, hearing, foot J
and body protection to reduce the risk of
njury when operat ng this un t.
Before operating the unit as an edger, stand in the
operating position (Fig. 15). Check for the following:
• The operator is wearing eye protection and proper
clothing
• With a slightly-bent right arm, the operator's hand is
holding the shaft grip
• The operator's left arm is straight, the left hand holding
the J-handle
• The unit is at waist level
• The edger wheel is adjusted for proper cut depth and
the edger is positioned as shown in Fig. 15.
Lower Depth
Fig. 16
TIPS FOR BEST EDGING RESULTS
• Keep the cutting attachment perpendicular to the
ground.
• Do not force the edger. At first, edge at a lower depth.
Then edge the area again with a deeper setting.
• Walk the edger at a slow, even pace
• Check the blade's condition often. As the blade wears,
it becomes smaller, reducing the cutting depth
performance. Replace with a new blade as required.
HANGER
A plastic hanger (Fig. 17) comes in the hardware pack.
Use it to hang up the edger, cutting attachment, or other
add-on out of the way when not in use. Push the release
button on the shaft housing and pull the hanger to
remove. Align the hole in the hanger with the release
button on the shaft housing and push on to install.
Fig. 15 Fig. 17
12
 Loading...