Ply (20x15x6mm)
4
170mm
TP Screw (3x20mm)
4
4
WssherTP (3x6mm)
1.8mm
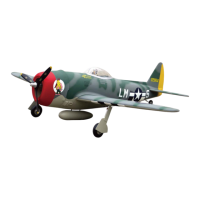
Epoxy the wooden form to appropriate in the cowling
Drill holes to appropriate position in the wooden form.
Mount the receiver and battery in the fuselage.
1
Canopy
1
wooden form
11
TP Screw (2.3x8mm)
4
TP Screw (3x20mm)
4
Wssher 3x6(mm)
Ply (15x15x3mm)
11
Trim the cowling and canopy along the shaded line.
Epoxy solid wood plates to appropriate position
inside the fuselage as below.
62
12
60
61
64
63
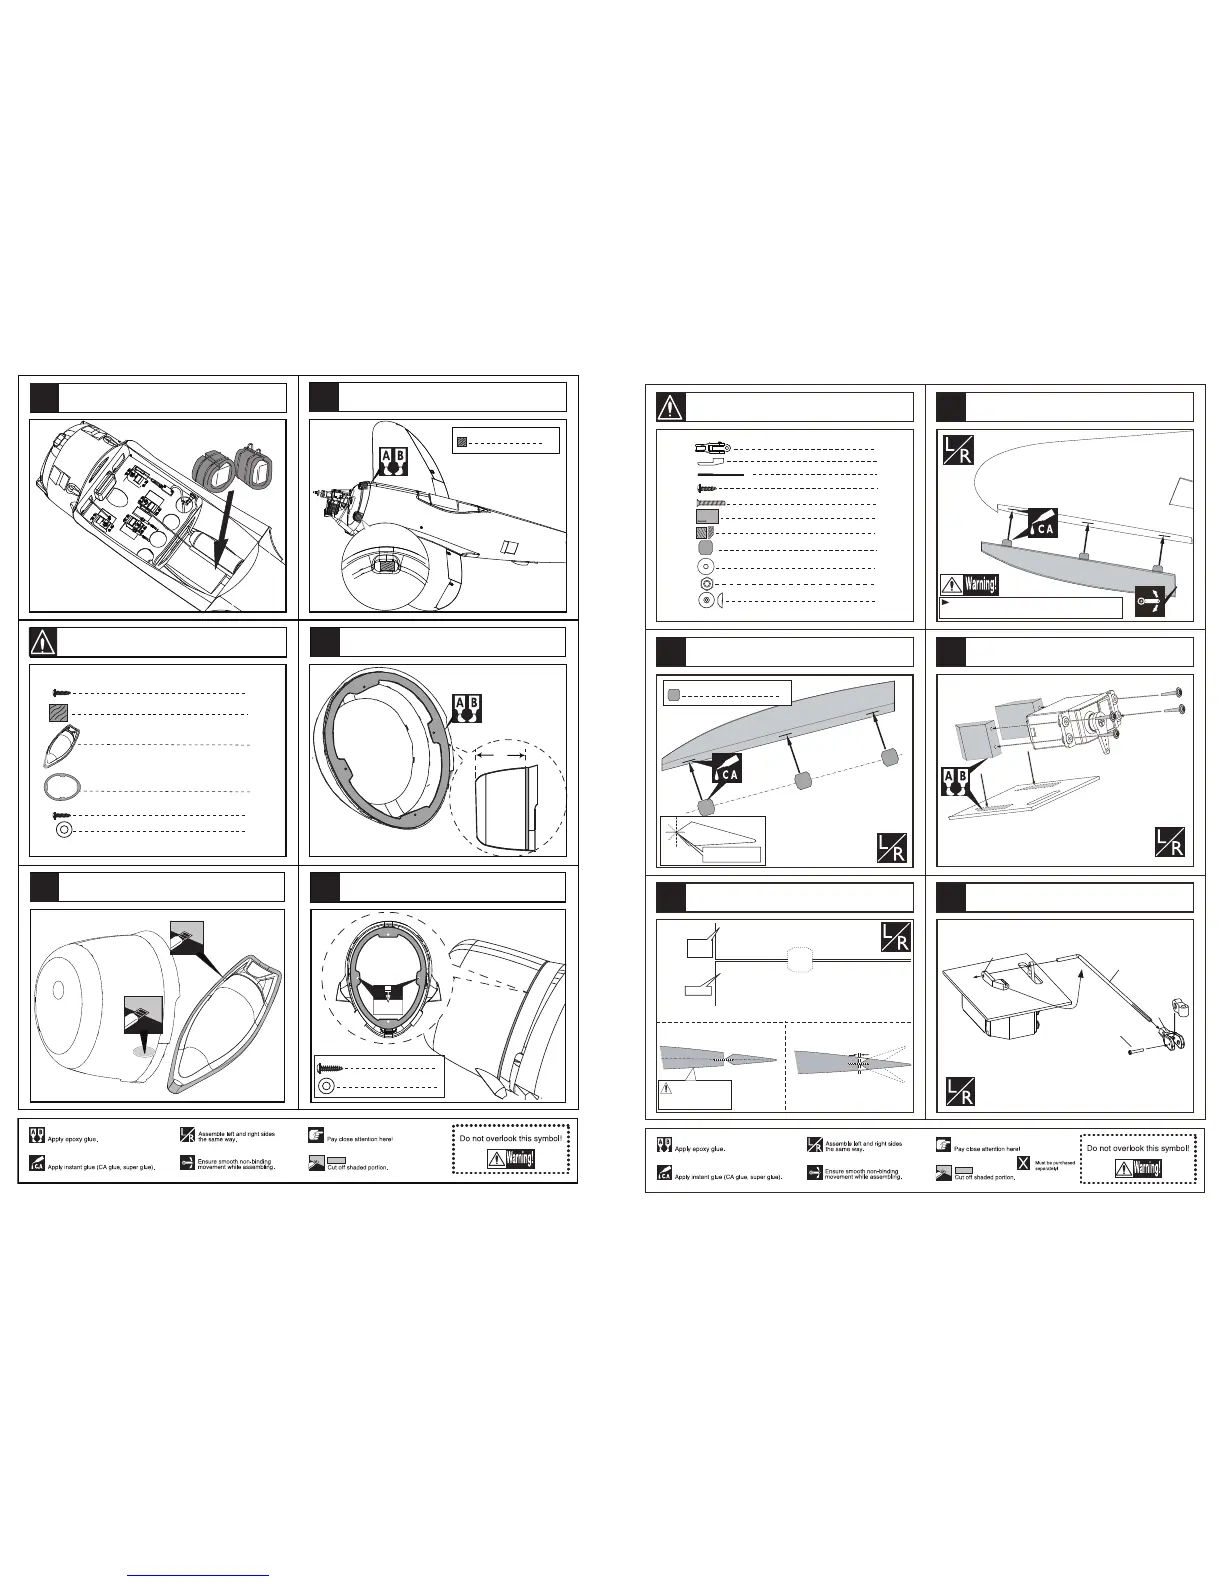
Accessory list for the coming installation steps.
6
Pin hinge(24x24mm)
Make sure hinges are
mounted in the same line.
Securely glue together. If coming off during flights, you 'll
lose control of your airplane which leads to accidents!
1mm
Aileron
Make sure they are in
the right position while
installing.
Trailing
edge
8
6
2
2
2
4
2
2
2
2
Clevis
Rod (2x300mm)
Retainer
TP Screw (2.3x12mm)
Wooden Block
(20x20x8mm)
Servo tray(68.5x56.5x2mm)
Pin hinge(24x24mm)
Screw (3x35mm)
Washer(3x15mm)
2
Washer(3x15mm)
Lock Nut (3mm )
Clevis
Retainer
Rod (2x300mm)
Screw (2x10mm)
1
2
3
4
5
1
Accessory list for the coming installation steps.
Apply instant type CA glue to aileron and pin hinge
Install the servo as the illustration below.
Install the nylon control horn and connect the linkage.
Assemble the aileron to main wing with instant type
CA glue
Keep some space about 1mm width between
aileron and trailing edge.