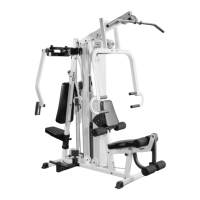
IG. 29 Attach the Foot Roll Bracket (#46) to the Leg
xtension Arm (#42) and secure it using one Hex Head Cap
crew 1/2-13 X 2 3/4 (#92), two Flat Washers SAE 1/2 (#89)
nd one Nylon Insert Jam Lock Nut 1/2-13 (#88). Next, install a
ubber Bumper 3/8 X 1 1/2 (#33) to the Leg Extension Arm
#42), as shown above, and secure it using one Hex Head Cap
crew 3/8-16 X 1 (#81) and one Flat Washer SAE 3/8 (#90).
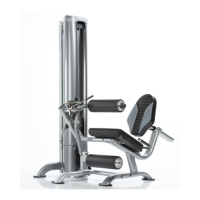
FIG. 30 Attach the Leg Extension Arm (#42) to the Leg
Extension Seat Frame (#38), as shown above, and secure it
using one Hex Head Cap Screw 1/2-13 X 3 1/4 (#96), two Fla
Washers SAE 1/2 (#89) and one Nylon Insert Jam Lock Nut
1/2-13 (#88). Note: Be sure not to over-tighten this hardware
assembly as the Leg Extension Arm (#42) should be allowe
to swivel freely. Also, it is recommended that the Le
Extension Arm (#42) be greased at the pivot point prior to
assembly.
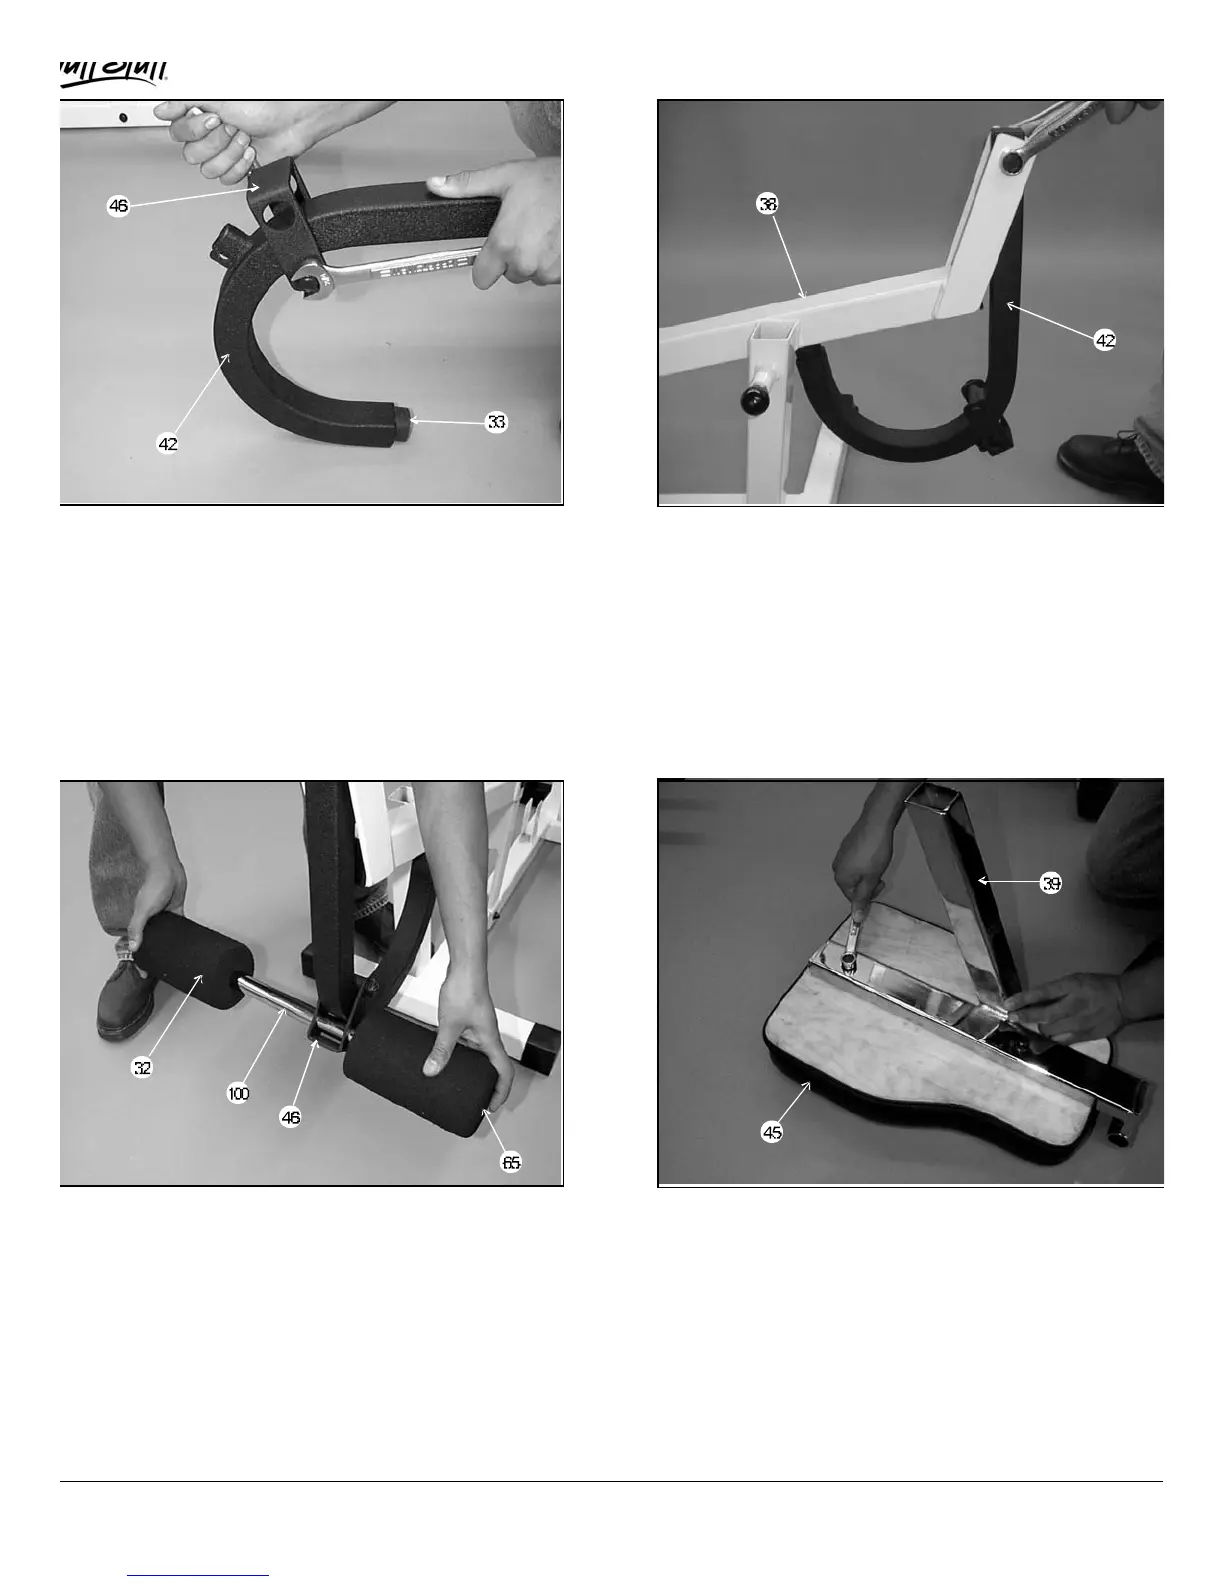
IG. 31 Insert the Foot Roll Tube 1 X 16 (#100) through
he Foot Roll Bracket (#46). Then slide a Foam Foot Roll 7
4 X 1 (#32) onto each end of the Foot Roll Tube 1 X 16
#100). Next, insert a Plastic Insert Cap 1” Rd. (#65) into each
nd of the Foot Roll Tube 1 X 16 (#100).
FIG. 32 Attach the Seat Pad (Bench Press) (#45) to th
Bench Press Adj Seat Tube (#39) and secure it using two
Hex Head Cap Screws 3/8-16 X 1 3/4 (#79) and two Flat
Washers SAE 3/8 (#90), as shown above.
MSL-IV Muscle IV Home Gym
9
 Loading...