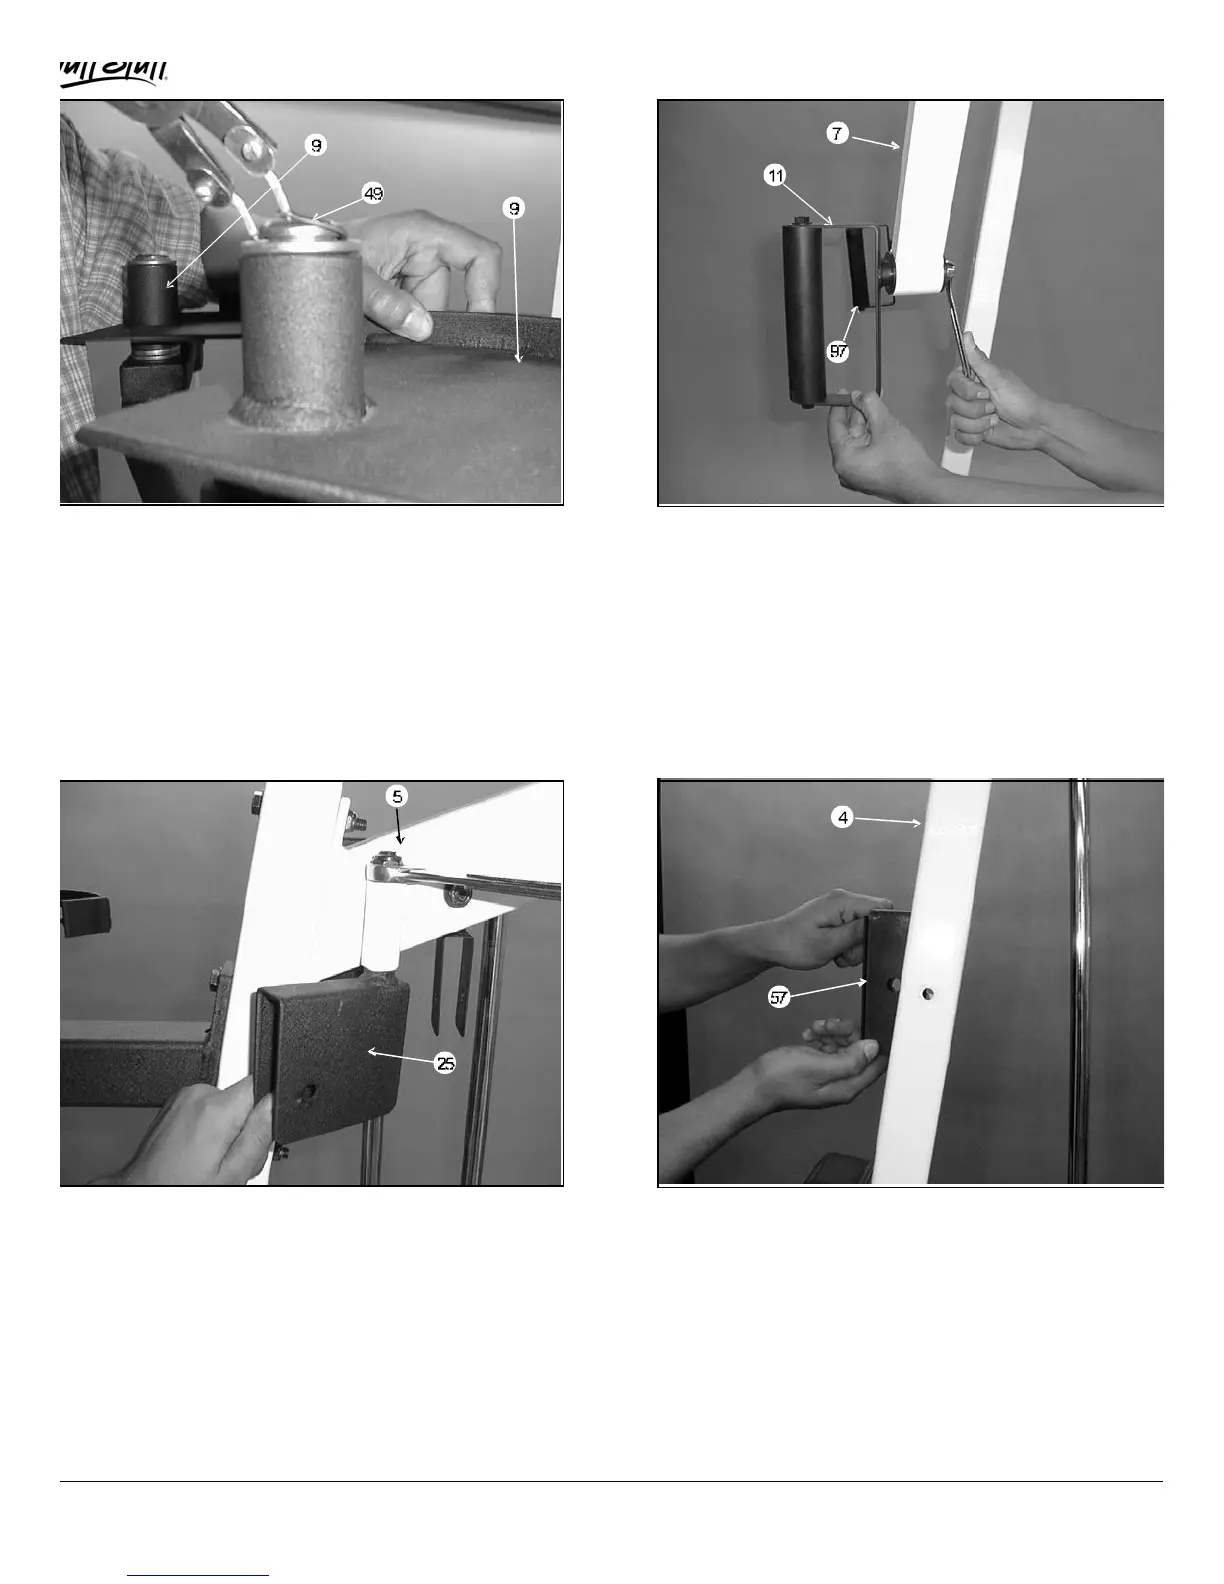
IG. 13 Secure the two Pec Dec Cams (#9) to the Pec
ec Housing (#18) using two Retaining Snap Rings (#49).If
ossible, use special snap ring pliers for this job, as shown
bove. If not available, carefully work each Retaining Snap
ing (#49) into the groove, then push down alternately with a
crew driver working the Retaining Snap Ring (#49) into the
roove. Note: Be careful not to distort the Retaining Snap
ing (#49) or bend it.
FIG. 14 Insert a Handle Bracket Left (#11) and Right
(#97) into the two Pec Dec Arms (#7) and secure them using
two Hex Head Cap Screws 3/8-16 X 1 (#81) and two Fender
Washers 3/8- 1 1/2 (#106).
IG. 15 Insert the two Pec Dec Swivel Pulley Brackets
#25) into the receptacles on the Top Pulley Assembly (#5)
nd secure using four Flat Washers SAE 1/2 (#89) and two
ylon Insert Lock Nuts 1/2-13 (#88). Do not over-tighten these
uts, as the Pec Dec Swivel Pulley Brackets (#25) must
ove freely during use of the machine. Note: It is
ecommended that the Pec Dec Swivel Pulley Brackets (#25)
e greased prior to assembly.
FIG. 16 Install the Ab Crunch Insert Bracket (#57) and
one Nylon Pulley 4 1/2 Rd. (#35-Not shown See Fig 56) into
the Rear Upright (#4) and secure it using one Hex Head Ca
Screw 3/8-16 X 2 1/2 (#78), two Flat Washers SAE 3/8 (#90)
and one Nylon Insert Jam Lock Nut 3/8-16 (#86).
MSL-IV Muscle IV Home Gym
5
 Loading...