This document is an installation and operation manual for the J-Series Refrigerators & Freezers manufactured by Turbo Air. It covers various models including Up-Right, Salad/Undercounter, and Buffet Display Tables.
Function Description
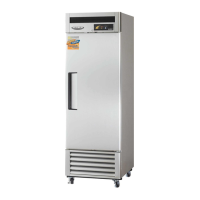
The J-Series units are commercial refrigeration and freezing equipment designed to maintain specific temperature ranges for food storage. They come in different configurations to suit various commercial kitchen needs:
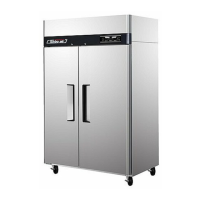
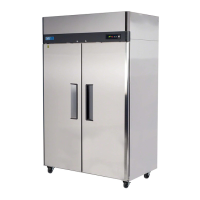
- Solid Dual Temperature (JRF-19, JRF-45, JRF-65): These units likely offer both refrigeration and freezing capabilities within a single cabinet, or separate compartments for each, allowing for versatile storage of different food types at their optimal temperatures.
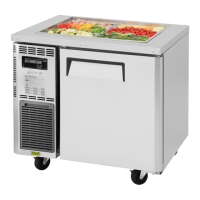
- Buffet Display Tables (JBT-36, JBT-48, JBT-60, JBT-72): These are designed for displaying food, typically in a buffet setting, while keeping it chilled. They feature a pan area for food containers and often have undercounter storage.
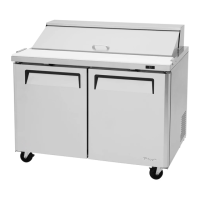
- Sandwich / Salad Units (JST-36, JST-48, JST-60, JST-72): Similar to buffet display tables, these units are specifically designed for preparing and storing sandwiches and salads, featuring top-mounted pan sections for ingredients and refrigerated storage below.
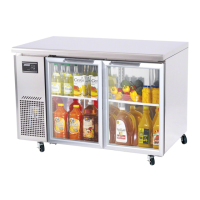
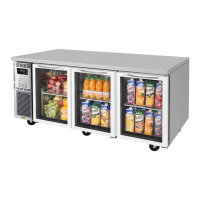
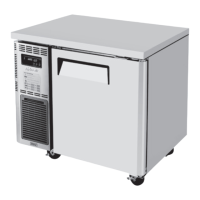
- Undercounter Refrigerators / Freezers (JUR-36, JUR-48, JUR-60, JUR-72, JUF-36, JUF-48, JUF-60, JUF-72): These compact units are designed to fit under counters, providing refrigerated or frozen storage in space-constrained environments. Some models (JUR-48-G, JUR-60-G, JUR-72-G, JURF-48, JURF-60, JURF-72) might include glass doors for product visibility.
The core function of these devices is to provide reliable and efficient cooling or freezing, controlled by an electronic controller (PCB) that manages compressor cycles and defrost cycles.
Important Technical Specifications
The manual provides structural diagrams for Top Mount (Up-Right) and Salad/Undercounter units. Key components include:
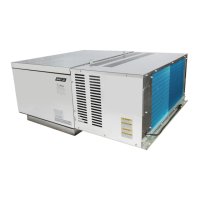
- Compressor: The heart of the refrigeration system, responsible for circulating refrigerant.
- Condenser Coil: Must be kept free of dust, dirt, and grease for proper refrigeration performance.
- Evaporator: Absorbs heat from the cabinet interior.
- Fan Motor: Circulates air for cooling.
- Electronic Box (ELEC BOX) and Display PCB: House the electronic controls and display interface.
- Shelves: Adjustable for organizing stored products.
- Casters: For mobility of the units.
- Gasket: Ensures a tight seal for the doors to maintain temperature.
- Refrigerant: The 134A(404A) Compressor Warranty section specifies the use of R134A or R404A refrigerants with polyol ester lubricant. This lubricant has rapid moisture-absorbing qualities, necessitating careful handling during servicing.
- Voltage: The installation note specifies that the product is special for 110V and cannot be used with 220V. A leakage protector is recommended.
Usage Features
Basic Operation (Dual Temp, Refrigerator, Freezer Models):
- Power On: Plug in and turn on the power switch (located on the top grille for Up-Right, or top side of the unit front cover for Salad/Undercounter). The display panel will light up, beep, and the compressor will start.
- Temperature Setting: The default temperature setting is "4". Users can adjust the internal temperature level from "1" (higher temperature) to "8" (lower temperature) using up/down buttons.
- Defrost Cycle: Automatically controlled by the PCB. A manual defrost option is available by pressing the Manual Defrost button for 3 seconds. During manual defrost, temperature control buttons are inactive.
- Turbo Freezer Function: Available on some models. Pressing the TURBO FREEZER button runs the unit at full power for a certain period. Pressing it again cancels the function.
- Temperature Display: The panel displays the inside temperature. "LO" is displayed if the temperature is below -49°F, and "HI" if it's above +64.4°F (for dual temp) or +64.4°C (for refrigerator/freezer).
- Air Flow: Critical for performance. Products should not press against the back wall or be within four inches of the evaporator compartment to ensure good air circulation.
Safety Precautions:
The manual emphasizes numerous safety warnings, including:
- Using a dedicated socket and avoiding multiple plugs in one socket to prevent overheating and fire.
- Not spraying flammable aerosols near the product.
- Preventing children from entering or playing with the unit.
- Avoiding contact with power with wet hands.
- Not putting bottled drinks in the refrigerator for extended periods to prevent frost cracks.
- Not disassembling, repairing, or altering the product.
- Not touching the power during a gas leak; ventilate the area immediately.
- Disassembling switch gear before scrapping the unit to prevent danger to children.
- Not damaging or squeezing the power cord.
- Not using abrasive cleaners.
- Ensuring proper air circulation by avoiding partitions or objects that block airflow.
- Choosing a rat-free environment for installation.
- Unplugging the unit and contacting service for abnormal situations.
- Using multiple people to carry the unit to prevent injury.
- Not placing objects on top of the unit.
- Holding the door handle to open/close.
- Not overloading the refrigerator to prevent items from falling out.
- Not storing pharmaceuticals, chemicals, or volatiles/combustibles.
- Keeping the plug clean to prevent short circuits.
- Not putting hot food in the unit.
- Using a leakage protector.
- Not plugging into a loose socket.
- Avoiding touching the top and bottom of the unit to prevent injury.
Maintenance Features
Condenser Cleaning:
- The condenser coil must be free of dust, dirt, and grease to maintain proper refrigeration performance.
- Periodic cleaning is required, with condenser fins needing cleaning at least every three months (90 days). The manual shows how to slide up the top grille for cleaning or service.
General Cleaning:
- Unplug the refrigerator before cleaning.
- Interior and Exterior: Clean with a soft, damp cloth. For stubborn dirt, use a neutral detergent.
- Shelves: Pull out shelves for cleaning.
- Avoid: Thinner, oil, water, iron brush, abrading agents, hydrochloric acid, or similar substances.
- Gasket: Wipe with a cloth and neutral detergent to remove grease and food wastes, especially on the bottom side.
Check After Cleaning:
- Verify the unit's safety and proper operation.
- Ensure power and plug are normal.
- Read the operation manual before operating.
- Confirm the product is well sealed.
- Allow the product to dry before use.
Installation Notes:
- Location: Choose a location with a strong enough floor to support the unit's total weight. An uneven floor can cause noise and shaking.
- Environment: Avoid corrosive, damp, and dusty environments.
- Clearance: Ensure the unit is at least 15cm away from walls for good air circulation.
- Power: Connect to the proper 110V voltage with a leakage protector.
- Mobility: Use casters or legs as appropriate.
Transit or Move:
- Unplug the refrigerator.
- Use multiple people to move heavier units.
- Reread the manual after moving before using the unit.
Long-Term Storage:
- Empty the refrigerator and unplug it.
- Lock the door to prevent people (especially children) from entering.
Troubleshooting:
The manual includes a troubleshooting guide for common issues:
- Unit not refrigerating at all: Check power cord, plug, voltage, and power switch.
- Unit not refrigerating well: Check temperature setting, food partition, door opening frequency, proximity to heat sources, and condenser cleanliness.
- Loud noise: Check for uneven floor, caster setting, other objects near the unit, and foreign objects in the condensing unit.
- Peculiar smell: Check if food is covered, if food is under guarantee, and if the unit is clean.
Warranty Information:
- Two-Year Parts & Labor Warranty: Covers defects in material or workmanship for two years from original installation or 27 months from shipment, whichever comes first. Includes standard straight time labor and reasonable travel time.
- Additional Three-Year Compressor Warranty: Extends coverage for hermetically and semi-hermetically sealed compressor parts for three additional years (total five years from installation or five years and three months from shipment). This warranty applies only to the compressor's sealed parts, not other components.
- 134A(404A) Compressor Warranty Conditions: Requires specific procedures to maintain validity, including using approved polyol ester lubricants (ICI-Emkarate RL 184, Emery-2927-A, Mobile Artic 22A), replacing the dryer with XH-9 desiccant when the system is opened, achieving micron-level vacuums (500 microns or lower), and replacing suction drier and 620 drier if the compressor is grounded.
- What is NOT covered: Warranty is non-transferable, does not cover consequential damages (economic loss, profit loss, food spoilage), damage due to alteration, neglect, abuse, misuse, accident, transit, installation, fire, flood, acts of God, improper electrical connections, or use of extension cords. It also does not cover products sold or used outside the continent of the United States and Canada.
- Warranty Claims: Must be made through Turbo Air and include model number, serial number, proof of purchase, installation date, and supporting information. Compressor or compressor tag must be returned for compressor replacements.
The manual provides comprehensive guidance for the safe and effective use and maintenance of Turbo Air J-Series refrigeration and freezing equipment.