TF-AMS5AV2E Multisensor IP Camera Quick Installation Guide
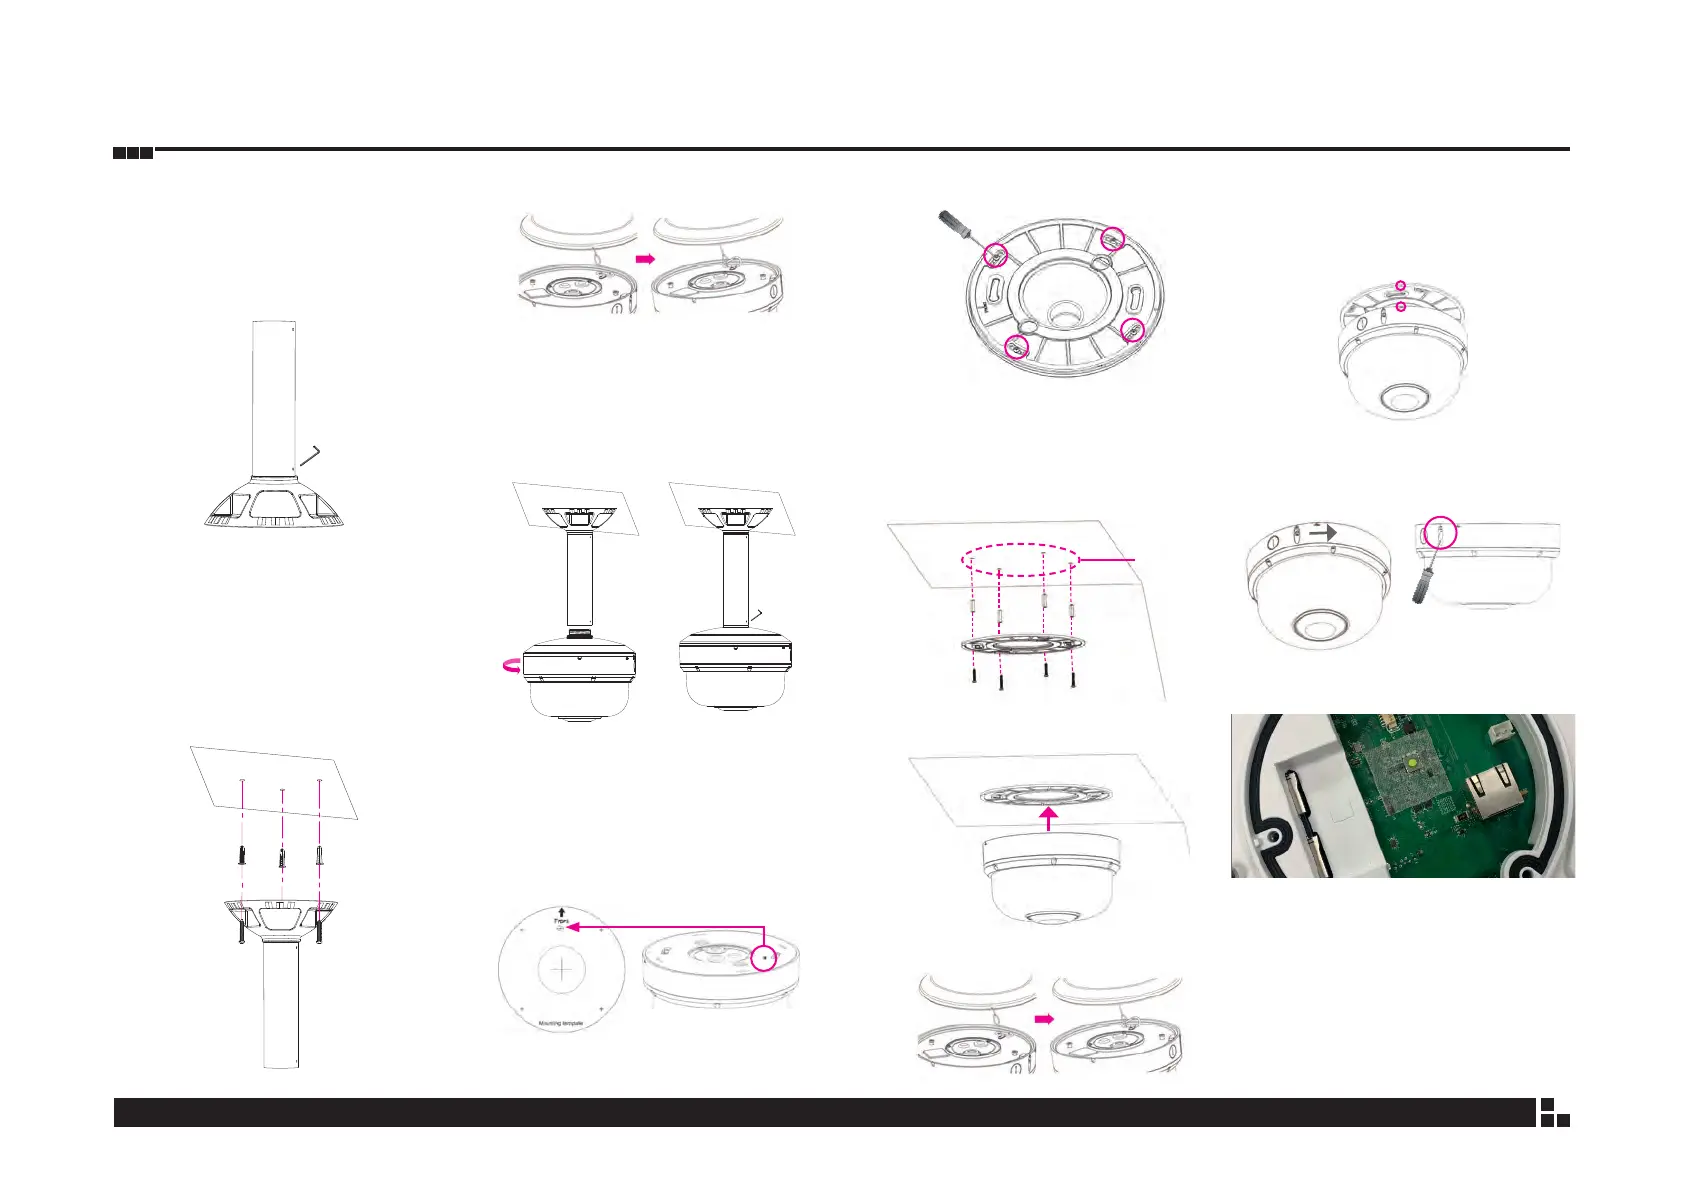
Pendant Mount Installation
(TP- PCPDMB)
1. Rotate the screw with the appropriate tool on
the base of the pendant mount to lock it in
place.
2. Choose a desired installation location and
use a driller to drill 3 holes on the surface for
securing the pendant mount. Insert 3 screw
anchors into the holes and secure the
pendant mount to the surface using the
screws for the anchors.
3. Fasten the safety wire on the hook.
4. Wire the pigtail cable inside the pendant
mount bracket. Align the bottom cap of the
camera to the bracket handle and rotate it
until it is xed on the pendant mount bracket.
Then secure the camera in place with the
screw using the appropriate tool.
Ceiling Mount
1. Place the positioning label at the desired
installation location on the ceiling and use
a driller to drill the marker
⊕
symbol
in order
to allow the screw on the camera to pass
through the drilled hole.
2. Loosen the 4 screws on the plate.
3. Use a driller to drill 4 holes on the surface
where the positioning label is placed. Insert 4
screw anchors into the holes and secure the
plate to the ceiling using the screws for the
anchors.
Positioning
Label
4. Put the camera on the plate.
5. Fasten the safety wire on the hook.
6. Please note that the OPEN
■
mark should
be aligned with the screw hole on the plate.
(There is only 1 screw hole on the plate for
easy recognition.)
7. Twist the camera counterclockwise until it is
secured rmly in place. Then x the camera on
the ceiling with the screw.
Troubleshooting
If the camera cannot be reached:
1. Ensure POE power delivers at least 30W.
Standard IEEE802.3af is insufficient at 15.4W .
2. Place the PC on the same LAN as the camera,
and then use the IP Finder to search
3. Try putting the PC and the camera on a closed
network without a DHCP server and reboot the
camera. Change the PC IP address to
192.168.1.x, then try to reach 192.168.1.168.
Reset Button
 Loading...