TF-AMS5AV2E Multisensor IP Camera Quick Installation Guide
Camera Setup
The TF-AMS5AV2E camera is intended to
be used with a Turing NVR & bridge to go on
to the Turing Vision.
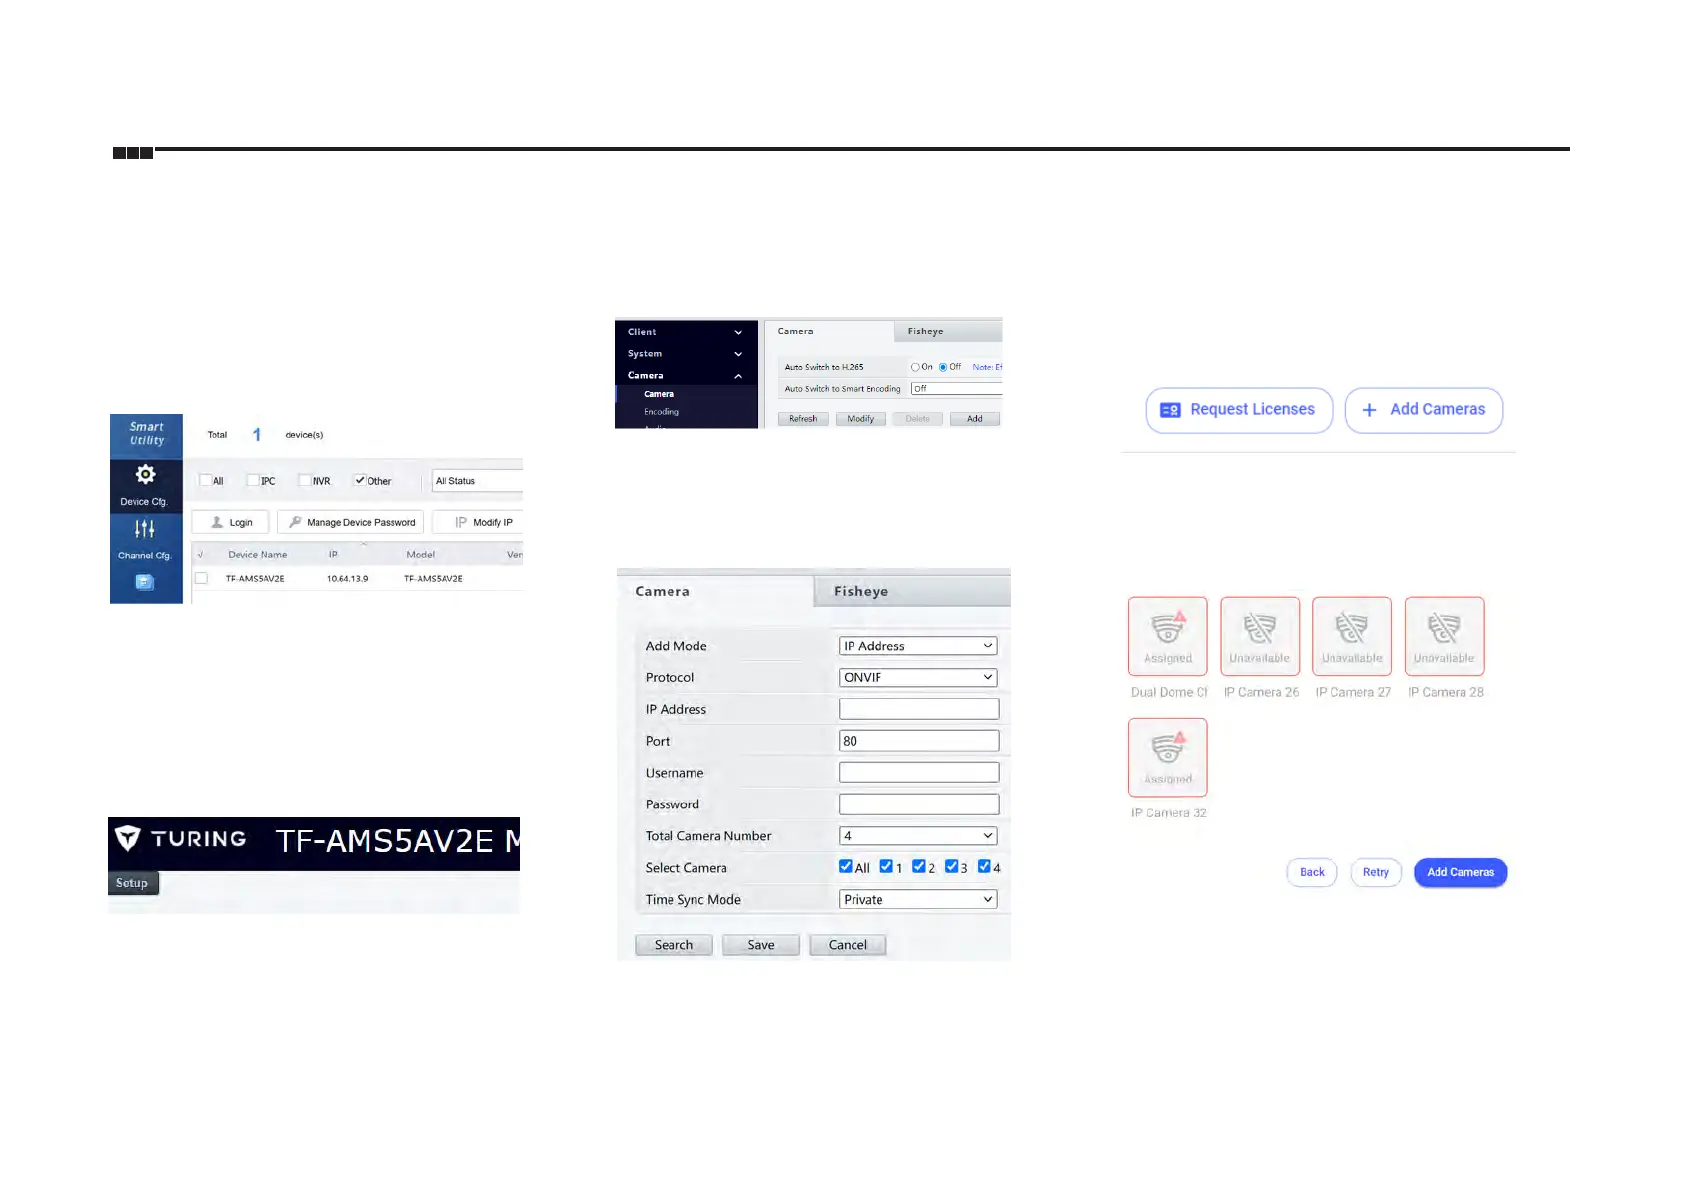
1. From a Windows PC, download the Turing Smart Utility
from the Turing Vision website turing.ai.
2. Make sure the PC is physically connected to the same
LAN as the camera and the NVR.
3. Run the Smart Utility. Check the "Other" box to look for
the IP address of the TF-AMS5AV2E
4. If there is no DHCP server or router present, you may
access the camera using the default 192.168.1.168 IP
address. Make sure your PC is on the same subnet as the
camera IP.
5. Using your browser, connect to the camera's IP address.
Login using the default credentials:
Username: admin
Password: 123456
6. Use the Setup icon on the top left corner on the web page
to make changes to camera settings.
Connecting to the NVR
Each of the cameras is added to the NVR separately as a
different channel.
1. In the NVR's Cameras > Camera menu, click on "Add"
2. Enter the camera's IP address, username and
password accordingly. Choose "ONVIF" for Protocol.
3. Choose "4" for Total Camera Number. Check all 4 for
Select Camera. Click Save to continue. The first 4
available NVR channels will now be populated by each of
the four multisensor cameras.
Adding Cameras to Turing Vision
1. Follow the NVR and bridge's Smart Installation guide to
create your Turing Vision account.
2. In Settings > Camera Settings, add camera with the
button on the top right corner.
3. Follow the instructions past Create Site, Add Bridge,
and Add Recorder steps.
4. At the "Add Cameras" Step, a snapshot preview should
become available for any new camera not already on the
Vision Account. Click "Add Cameras" to add them to the
account.
Refer to the NVR's Smart Installation guide and Vision
setup guides for details.
 Loading...