2
STEP
•
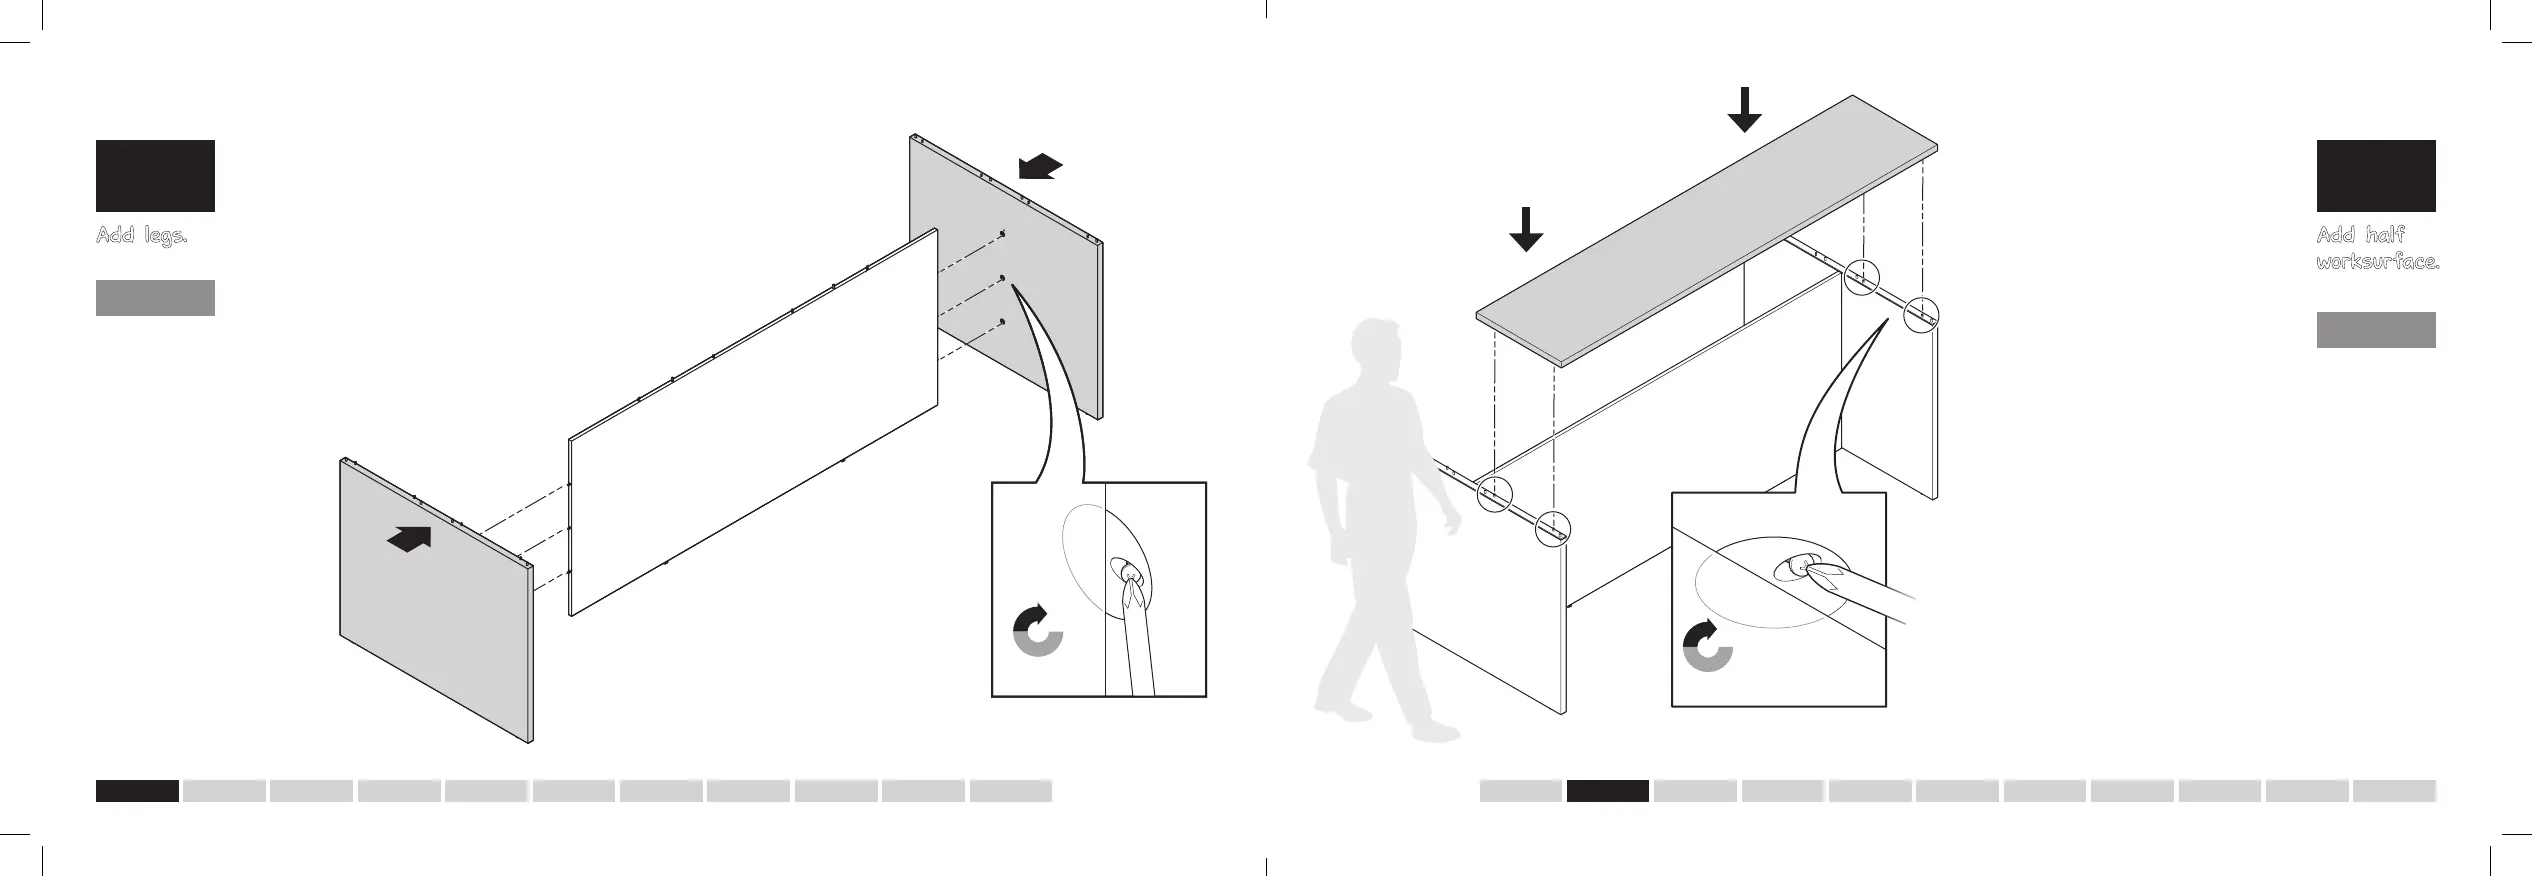
Ask a friend for help to lift the
first half worksurface onto the leg
structure. You’ll notice the edge that
faces outward is slightly rounded
and the inside edge is straight.
•
Carefully line up the holes on the
bottom of the worksurface with the
metal extrusions on the top
of the base.
•
After the worksurface top is in
place, tighten the cam-locks
underneath the table.
4x
1
STEP
•
Find the two leg pieces and place upright.
•
This might be an excellent time to call over a friend for help
as you position the large center piece in-between the two end
pieces. Secure one leg, then proceed to attach the second.
The holes will line up with the metal pieces extruding
from the middle piece.
•
Once snapped into place, tighten the cam-locks.
•
Do this on both sides, for a total of six times.
•
Add cam covers.
tips
The big table is
appropriately named...
that’s because it is, in
fact, big. Because of
this, we recommend
you install it where you
want it to stay.
The glides on the
bottom of the table
can be raised to allow
power cords to slide
underneath. You will
want to do this before
the table is assembled.
6x
Add legs. Add half
worksurface.
11 22 33 44 55 66 77 88 99 1010 1111
tip
Make sure the
cam-locks on the
worksurface are
turned to the left
before you place
the worksurface
onto the leg
structures.
tip
Half turn to the right. Repeat 6 times.
Half turn to the right. Repeat 4 times.



 To Next Page