Clean Boiler
• Removeboilerbygraspinghandleandpullingitoutofchassis(g.C).
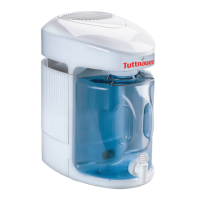
• Removeboilercapbyturningitcounterclockwise(g.D).
• Loosensteambafesecuringnutbyturningcounterclockwiseand
remove steam baffle (fig. D).
• Washinsideofboilerwithsoapandwater.
• Rinsethoroughly.Watershouldbedrainedthroughboilerspout.
IMPORTANT: Wipe off all water deposits inside the Distiller chassis and
on the outside of the boiler before each distillation cycle.
USING THE COUNTERTOP DISTILLER
WARNING: Never remove the boiler while the fan motor is running, or
for 30 minutes after it stops. Severe burns can result from boiling water or
steam. DO NOT change position or location of distiller while it is operating
or cooling.
Operational
maintenance
and replacement
requirements are
essential for this
product to
perform as
advertised.
1. Set Distiller on dry, level, well-supported, stable surface.
2. Remove collector/dispenser bottle.
3. Remove boiler by grasping its handle and pulling it out of chassis.
4. Remove boiler cap by turning it counterclockwise (fig. D).
5. Loosen steam baffle securing nut by turning counterclockwise and
remove steam baffle (fig. D).
6. Rinse boiler thoroughly before filling. The water should be drained
through boiler spout.
7. Fill boiler with ordinary tap water to bottom of four tabs in boiler
opening, approximately 1 gallon (3.8 Liters). These tabs indicate the
MAXIMUM FILL POINT. DO NOT OVERFILL (fig. D).
8. Replace boiler cap by turning it clockwise until tight.
9. Make sure gasket is installed on long end of steam baffle and that it
is snug against flange (fig D). Insert long end of baffle, flat side
down, into the boiler spout. Turn securing nut clockwise onto spout
until tight, being careful to not cross thread.
IMPORTANT: Wipe off all water deposits inside the Distiller chassis and
on the outside of the boiler before each distillation cycle.
6
Figure C
Figure D
7
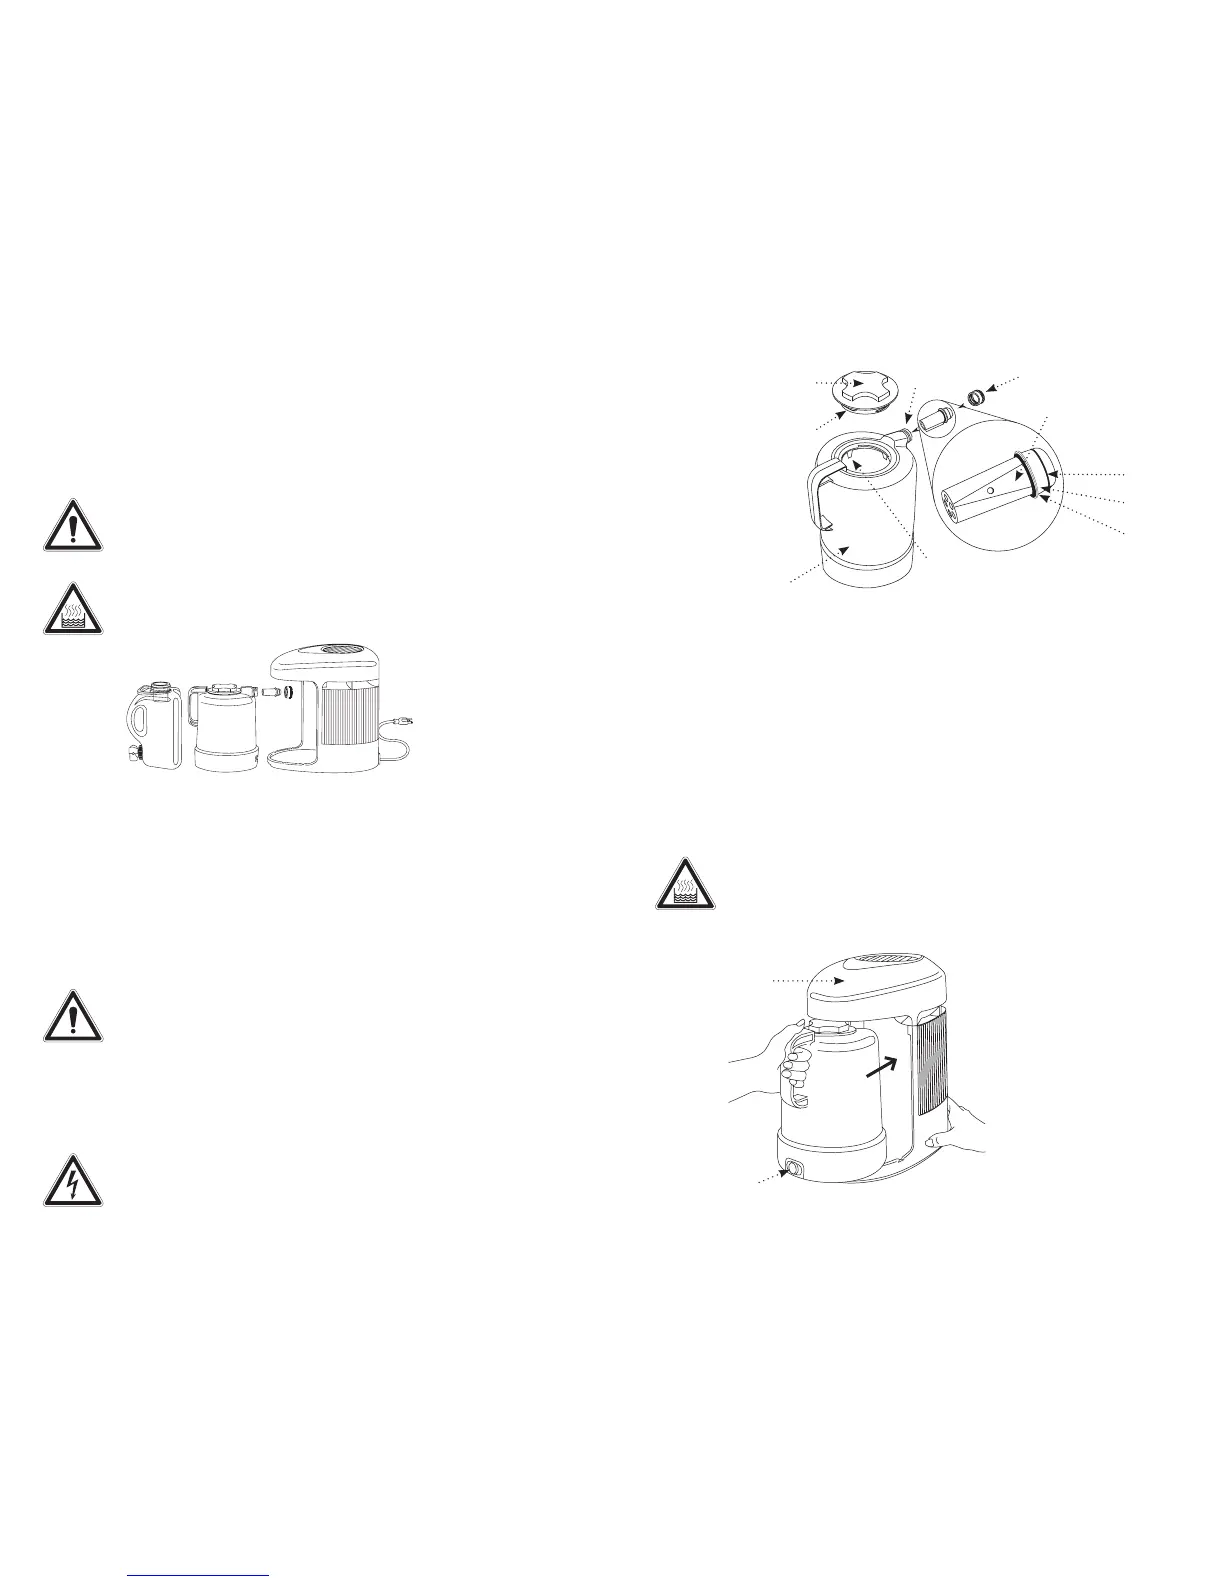
10. Slide boiler into chassis compartment and press firmly to ensure boiler
is properly placed (fig. E). To prevent personal injury or property
damage, the boiler must be fully engaged prior to start-up.
11. Plug power cord into a properly rated, grounded outlet.
12. Press “Start” button at base of boiler (fig. E). “Start” button will illum-
inate when heating; however, the light will go out and boiler will stop
heating if electrical power is interrupted or stopped. If this occurs,
press “Start” button again to restart the distillation cycle.
NOTE: The cooling fan will not start immediately because of a
delayed fan start-up feature. The fan will start once the boiler has
reached a predetermined temperature, approximately 30 to 40 minutes
after starting the cycle.
WARNING: To prevent personal injury, burn and/or scald injury,
DO NOT remove boiler while “Start” button is illuminated or at any time
when the boiler is hot. Always unplug Distiller from wall outlet and allow
boiler to cool completely before removing it from the Distiller (at least 30
minutes). DO NOT change
position or location of Dis-
tiller while it is operating or
cooling.
13. Place prepared carbon
filter cup into opening
at the top of the collec-
tor/dispenser bottle.
DO NOT install cap
onto bottle (fig. F).
14. Replace the collector/
dispenser bottle
(fig. F). Make sure the
dispensing valve is
securely tightened.
Distiller ChassisBoilerCollector/
Dispenser
Bottle
Gasket
Spout
Steam Baffle (flat side)
Boiler
Maximum Fill Point
(bottom of tabs)
Flange
O-ring
Steam Baffle Securing Nut
Boiler Cap
Gasket
Boiler Cap
Distiller
Chassis
Start
Button
Boiler
 Loading...