Product overview
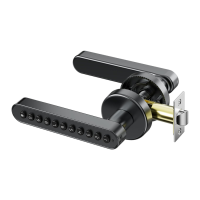
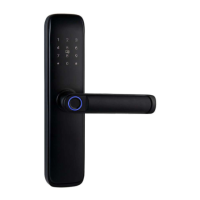
Front Lock View
5V Type C(Emergency charging port)
Rear Lock View
Working light
Digits keypad
Reset button
Mechanical lock
keyhole
Rear cover screw hole
1
SMART LOCK
INSTALLATION INSTRUCTIONS
Please read this manual before operating your Smart Lock,
and keep it for further reference.
04-05
06-10
11
12-18
TABLE OF CONTENTS
Product overview
03
02
01
Door lock
installation diagram
Door opening direction
Measuring door
dimensions
Door lock installation
tutorial
Tips and parameters
Tuya APP how to use
tutorial
screw
tube A(Length
40mm)
X2
small screwdriver
X1
screw
tube B(Length
28mm)
X2
Door lock installation diagram
screw M3*10(mm)
back handle
alkaline LR03 AAA battery
back handle cover
screw M4*30(mm)
screw tube
key
front handle
square spindle
latch
screw ST4*21(mm)
strike plate
strike box
TIPS:
1.Install the spinddle into the latch, and get the cables through the middle of spindle.
2.Fix the rear fixing plate, front handle with two screws on the door.
Accessory
front handle
X1
back handle
X1
latch
X1
strike plate
X1
strike box
X1
key
X2
square spindle
X1
screw M4*30(mm)
X2
Mscrew ST4*21(mm)
X4
screw M3*10(mm)
(spare)
X1
Open the product package. Check that the following accessories are included
2
Scan the QR code to
watch the settings video
Scan the QR code to
watch the installation video
 Loading...