EasyManua.ls Logo

Tweco fabricator 211i - User Manual

Tweco fabricator 211i
84 pages
Print Icon
To Next Page IconTo Next Page
Loading...
FABRICATOR
®
211i
3-IN-1 Multi Process
Welding Systems
Service
Manual
Revision: AD Issue Date: June 19, 2015 Manual No.: 0-5226
Tweco.com

Table of Contents

Questions and Answers

  • M
    Michelle HornAug 15, 2025
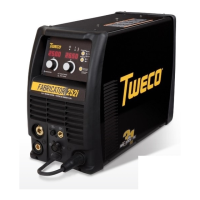
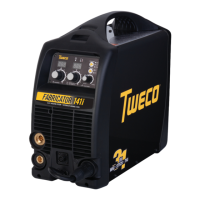
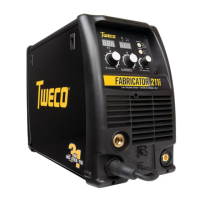
    What to do if there is no weld output and all front panel displays are off on my Tweco Welding System?
    • G
      Gail MorrisAug 15, 2025
      If your Tweco Welding System has no weld output and the front panel displays are off, here's what you can check: * Ensure the main power switch is set to 'ON'. * Replace the line fuse if it's blown. * If the main power switch is faulty, replace it. * Tighten any loose connections to the EMC board. * Consider replacing the Power Inverter board, Control board, or Display board if they are faulty.
  • Z
    zhernandezAug 18, 2025
    Why is the wirefeed motor and weld output not working when the torch trigger is depressed on my Tweco Welding System?
    • C
      Cassandra StephensAug 19, 2025
      If the wirefeed motor and weld output don't operate when you press the torch trigger on your Tweco Welding System, consider the following: * Check for internal wiring faults from the torch adaptor to the boards. * Allow the unit to cool if the over temperature light is on. * Ensure the power source is set to 'LOCAL', not 'REMOTE'. * Repair any shorted trigger wires inside the torch. * Check and repair faulty trigger wires or the torch switch. * If the issue persists, the Power Inverter board, Control board, or Display board might be faulty and require replacement.
  • S
    srussellAug 22, 2025
    What should I do if the welding arc is erratic or inconsistent with my Tweco Welding System?
    • S
      Sean MossAug 22, 2025
      If your Tweco Welding System produces an erratic or inconsistent weld, consider these potential causes and solutions: * Ensure the work lead cable is of the correct size. * Tighten any loose welding connections and the earth clamp. * Select the correct weld polarity, referring to the weld consumable manufacturer's recommendations. * Connect shielding gas if none is present. * Shield the welding area from draughts that could blow away the shielding gas. * If using TIG, ensure you have the correct tungsten type and that it is properly prepared or reground to the correct shape.
  • M
    mckeeautumnAug 25, 2025
    What to do if there is no weld output and the yellow over temperature light is on for Tweco fabricator 211i?
    • J
      Jill LeeAug 26, 2025
      If your Tweco Welding System has no weld output and the yellow over temperature light is illuminated: * Allow the unit to cool down with the fan running until the over temperature light turns off. * Check for and remove any blockages from the airflow inlet or outlet ducts. * If the fan isn't working, replace it. Also, check that the fan wiring header is securely plugged into the Control board and that the fan wiring isn't damaged.
  • S
    smithlindaAug 28, 2025
    What to do if the wirefeed motor does not operate when the torch trigger switch is depressed on my Tweco Welding System?
    • B
      Brian PopeAug 28, 2025
      If the wirefeed motor on your Tweco Welding System doesn't operate when you depress the torch trigger switch: * Ensure the power source is set to MIG mode, not TIG or STICK mode. * Check the wirefeeder motor wiring for any looseness and correct it. * Inspect and repair any faults in the trigger wires or torch switch. * If problems persist, consider replacing the Power Inverter board.
  • C
    Christopher BurgessAug 31, 2025
    What to do if the wirefeed motor operates at maximum speed and cannot be adjusted on Tweco fabricator 211i?
    • R
      ronald72Sep 1, 2025
      If the wirefeed motor on your Tweco Welding System operates at maximum speed and cannot be adjusted, the Power Inverter board or Display board may be faulty and require replacement.
  • A
    Allen HenrySep 4, 2025
    What to do if the wirefeed motor operates but the gas valve does not operate on my Tweco fabricator 211i?
    • K
      Kimberly SnyderSep 4, 2025
      If the wirefeed motor operates when the torch trigger switch is depressed, but the gas valve does not operate on your Tweco Welding System, consider the following: * Check that the solenoid wiring header is securely plugged into the Control board. * Replace the solenoid if it is faulty. * Clean out the gas system to remove any impurities causing the solenoid to stay open or closed. Disassemble the solenoid and clean out any impurities. * If the problem persists, the Power Inverter board or Control board may be faulty and require replacement.
  • M
    Melinda CarrSep 7, 2025
    What to do if there is no weld output and front panel displays are flickering on my Tweco fabricator 211i?
    • H
      Heather RasmussenSep 8, 2025
      If your Tweco Welding System has no weld output and the front panel displays are flickering, it could be due to the internal protection circuit activating because the mains supply voltage is too high. Check if the mains supply voltage is less than 274VAC. A generator with poor voltage regulation might cause a supply voltage exceeding 274VAC. Connect the Power Source to a supply voltage less than 274VAC.
  • C
    Catherine GloverSep 12, 2025
    How to fix mode switch when it does not change welding mode on Tweco fabricator 211i?
    • S
      scottvaldezSep 12, 2025
      If the mode switch on your Tweco Welding System does not change the welding mode, the Display board may be faulty and require replacement.

Summary

Safety Instructions and Warnings

Arc Welding Safety Hazards and Precautions

Details hazards associated with electric shock during arc welding operations.

Key Safety Standards for Welding Operations

Lists key safety standards and guidelines for welding operations.

Welding Equipment Symbol Chart

Explains symbols used in the manual and on the welding equipment.

Equipment Servicing Safety Hazards

Outlines potential dangers during equipment maintenance and repair procedures.

Electromagnetic Field (EMF) Information

Discusses electromagnetic fields and their potential effects during welding.

Introduction to Fabricator 211 i

How to Use This Welding Manual

Guide on interpreting manual conventions, warnings, and cautions for safe use.

Welder Equipment Identification

Information on locating model and serial numbers for the welding unit.

Receiving and Inspecting Welding Equipment

Instructions for inspecting equipment upon delivery for damage or errors.

Tweco Fabricator 211 i Product Description

Overview of the Fabricator 211i's capabilities, features, and design.

User Responsibility for Welder Operation

Defines the user's role in safe operation, maintenance, and modification.

Safe Transportation Methods for Welding Unit

Guidelines for safely moving the welding unit to different locations.

Fabricator 211 i Packaged Items List

Lists the components included in the product packaging for the welder.

Safety and Installation

Welder Duty Cycle Explained

Explains the rated duty cycle and its importance for welder performance and longevity.

Fabricator 211 i Technical Specifications

Detailed technical specifications for the Fabricator 211i welding unit.

Operating Environment Requirements

Requirements for the operating environment to ensure safety and performance.

Welder Installation Location Guidelines

Guidelines for selecting a suitable and safe installation location for the welder.

Welding Area Ventilation Requirements

Importance of adequate ventilation for welding fumes and unit cooling.

Mains Supply Voltage Requirements

Details on correct input voltage and its impact on welder operation.

Electrical Input Connection Safety

Procedures and safety precautions for connecting the welder to the power supply.

Electromagnetic Compatibility (EMC) Precautions

Precautions for managing electromagnetic interference in domestic settings.

Fabricator 211 i Volt-Ampere Curves

Visual representation of the welder's voltage and amperage output capabilities.

Operation

Welder Control Panel Overview

Detailed explanation of the welder's front panel controls, displays, and indicators.

How to Attach the MIG Gun

Step-by-step guide for connecting the MIG gun to the welding unit.

Installing a 15 kg (300 mm) Wire Spool

Procedure for mounting a 300mm diameter wire spool onto the welder.

Installing a 5 kg (200 mm) Wire Spool

Procedure for mounting a 200mm diameter wire spool onto the welder.

Wire Feed Mechanism Wire Insertion

Instructions for threading the welding wire through the wire feed system.

Feed Roller Pressure Adjustment Guide

How to adjust pressure on the wire feed rollers for optimal performance.

How to Change the Feed Roll

Steps for replacing the feed rolls on the wire feeder mechanism.

Wire Reel Brake Adjustment

Information on adjusting the wire spool brake for proper wire tension.

MIG (GMAW) Setup with Gas Shielded Wire

Guide for configuring the welder for MIG welding with shielding gas.

MIG (FCAW) Setup with Gasless Wire

Guide for configuring the welder for MIG welding with flux-cored wire.

Spool Gun MIG Setup with Gas Shielded Wire

Instructions for setting up spool gun operation for MIG welding.

Lift TIG (GTAW) Welding Setup Procedure

Configuration steps for performing Lift TIG welding with the unit.

Stick (MMA) Welding Setup Procedure

Procedure for setting up the welder for Stick (MMA) welding.

Gas System Leak Testing Procedure

How to perform leak tests on the gas system before welding operation.

Troubleshooting

Power Source Fault Troubleshooting Guide

Guide to diagnosing and resolving common power source operational issues.

Routine Service and Calibration

Schedule and procedures for regular maintenance and calibration of the welder.

Pre-Power On Unit Checks

Safety checks to perform before applying power to the welding unit.

Troubleshooting Test Equipment

List of essential tools and equipment needed for diagnostics and servicing.

Visual Inspection for Faults

Guidance on performing visual checks for damage or faults within the welder.

DC Bus Measurement - Inverter Board

Procedure for measuring DC bus voltage on the main inverter board.

Main Inverter Board Preliminary Checks

Steps for initial checks on the main inverter board components.

Main Input Rectifier Testing

Instructions for testing the main input rectifier for proper function.

DC Bus Voltage Measurement Procedure

How to measure DC bus voltages with the unit powered on safely.

Inverter and Control PCB Connectors

Identification and function of various PCB connectors for diagnostics.

Control PCB DIP Switch Settings

Details on DIP switch configurations for the control PCB for optimal operation.

Welder Calibration Procedures

Procedures for calibrating output current, voltage, and wire speed.

Fabricator 211 i Circuit Diagram

Schematic representation of the unit's internal electrical circuitry.

Main Circuit Description and Operation

Explanation of the main electrical circuits and their functions.

Disassembly Procedure

Safety Precautions for Disassembly

Essential safety measures to follow before starting any disassembly.

Control Board Removal Procedure

Step-by-step guide for safely removing the control board from the unit.

Front Panel Assembly Removal

Instructions for safely removing the front panel assembly for access.

Operator Interface PCB Removal

Procedure for removing the front panel operator interface circuit board.

Back Panel Removal Steps

Steps for removing the back panel of the welding unit.

Power Switch and Cord Removal

Guide for safely removing the main power switch and power cord.

Base Panel Removal Instructions

Instructions for removing the base panel of the welding unit.

Assembly Procedures

Installing the Base Board

Steps for installing the base board and associated internal components.

Installing the Back Panel

Procedure for reinstalling the back panel onto the welder.

Installing the Front Panel

Instructions for reinstalling the front panel assembly onto the unit.

Main Control Panel and Cover Sheet Installation

Guide for installing the main control panel and protective clear cover.

Installing the Welder Case

Steps for reassembling the outer case of the welding unit.

Key Spare Parts

Power Source Spare Parts List

List and identification of essential spare parts for the welder's power source.

Optional Accessories

Optional Accessories for Fabricator 211 i

List of available accessories that can enhance the welder's functionality.

Tweco Limited Warranty Terms

Tweco fabricator 211i Specifications

General IconGeneral
Input Voltage120/230V
Input PhaseSingle Phase
Input Frequency50/60 Hz
ProcessesMIG, Stick
Weight38 lbs
Wire Feed Speed Range50-500 IPM
Wire Diameter Range.023 - .035 in

Related product manuals