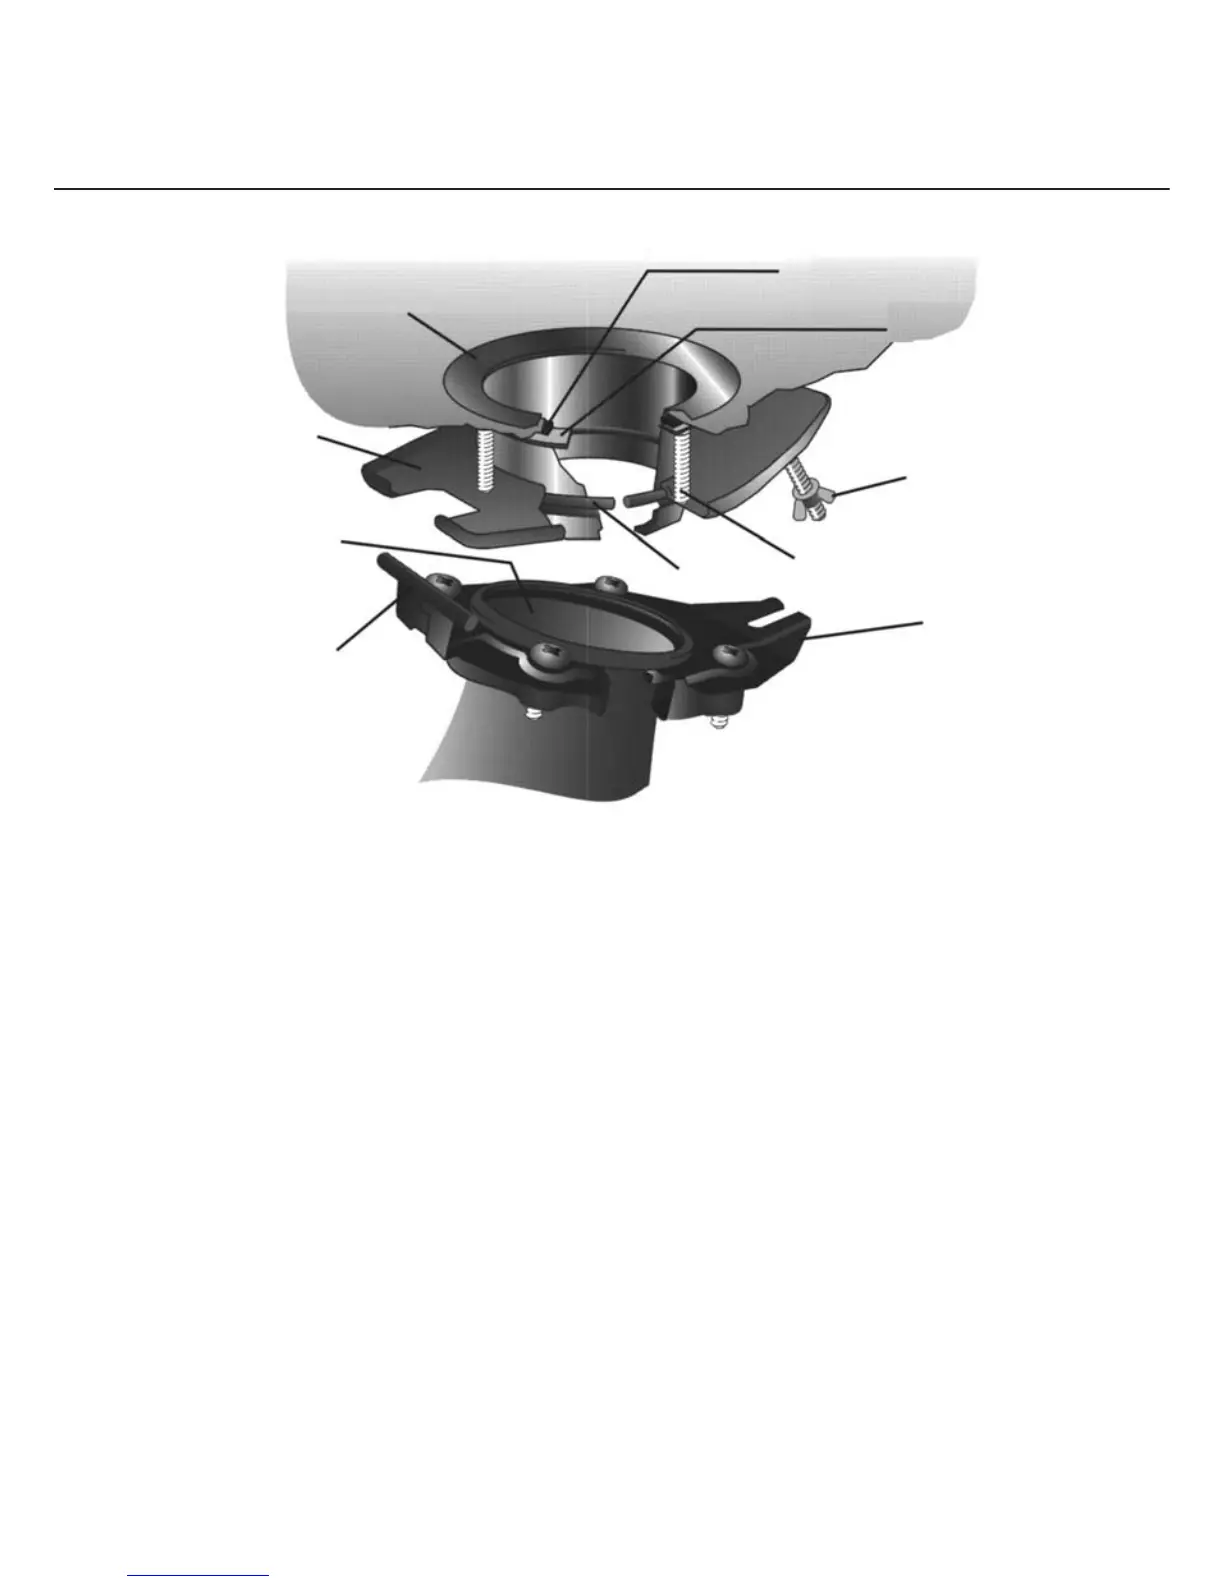
1. Ensure bottom of sink is smooth, clean and dry.
2. Remove the sink outlet assembly from the pack.
3. Using the allen key provided, unscrew the four screws until they are just below the top face
of the suspension plate.
4. The circlip can now be detached to allow for the removal of the suspension plate, pressure
plate, and rubber washer. The sink outlet is now free of all other items.
5. To the hole recess, between the sink outlet and the sink bowl, apply a liberal amount of
plumbers putty or silicone sealer. (Note: The rubber washer is not fi tted at this stage - it is
supplied for use on the underside of the sink bowl.)
6. Press the sink outlet down fi rmly on to this putty bed, squeezing out as much putty as possible.
7. On the underside of the sink, place in position the rubber washer, pressure plate and
suspension plate. Push these items up to the underside of the sink until the circlip can be
inserted over the swage of the sink outlet.
8. Ensure the suspension plate is level to the circlip and EVENLY tighten the four allen screws until the
suspension plate is held fi rmly in place, failure to level or uneven tightening may result in failure of the
circlip to hold.
9. Additional allen screws are supplied to accomodate thicker sinks.
Installing the suspension unit
all models except Westminster
Carrier plate
Wing nut
Allen screws
Circlip
Hinge pin
Seal
Suspension plate
Sink outlet
Rubber washer
7