INSTALLATION AND OPERATING INSTRUCTIONS
4211-861-G 10-12-16 7013545 314 SKSM 211 B
Page 9
DIAGRAM 7
TYPICAL PRE-CUT WALL CONSTRUCTION
2x4" framing
1/2" wallboard
berglass insulation
1/2" wallboard
T&G soft wood
foil vapor barrier
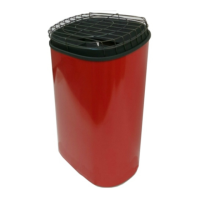
HEATER SCREEN (GUARD RAIL)
DIAGRAM 8
VENTILATION
DIAGRAM 9
DIAGRAM 10
Locate vent under
the top bench
c. Loosely cover the tops of
all elements a minimum
of 2" to 3".
High Limit
Sensor
Rocks between
the front element
and the outer wall
will reduce cycling
of the heater.
b. Rocks must be placed between the
elements and the wall of the rock compartment.
Incorrect Placement
of Rocks
a. Loosely place rocks between
the elements so air ow is not
restricted.
Rock Grate
Wall Bracket
Minimum Dimensions
1. Put smaller rocks in rst around the outer perimeter of the
heating chamber.
2. Completely ll all four sections (front, 2 center sections
between elements, and back).
3. In the outer sections, use smaller rocks placed more
tightly (see note b).
4. Place rocks loosely in the center 2 sections (see note a).
5. Be sure rocks completely cover the elements (see note c).
6. Loosely cover the tops of all elements a minimum of 2” to
3”.
 Loading...