9-20
-Unloading valve(2) and related parts.
Install the spool and confirm that the returns
smoothly by the spring force after it is
compressed by pushing the stopper bolt end and
check that it slides smoothly.
-Pilot spool and related parts.
Be careful not to damage the O-ring during
pilot spool installation.After assembly,make
sure that the spool slides smoothly by pushing
the push rod.
4) Reassembly
-Inspection of the disassembled parts.
Place all the disassembled parts side by side on
a clean surface.Check o-rings for damage and
replace defective ones.Inspect the friction
surfaces of the spools,poppets,and casing for
flaws like scratches.Correct slight flaw with an
oil stone and wash corrected parts in a cleanser.
-Main spool and related parts.
When the head is disassembled,it should be
tighten and locked securely using adhesive.
Before retaining the spool with the snap ring E,
make sure that the spool slides smoothing
within the casing.
-Holding check valve and related parts
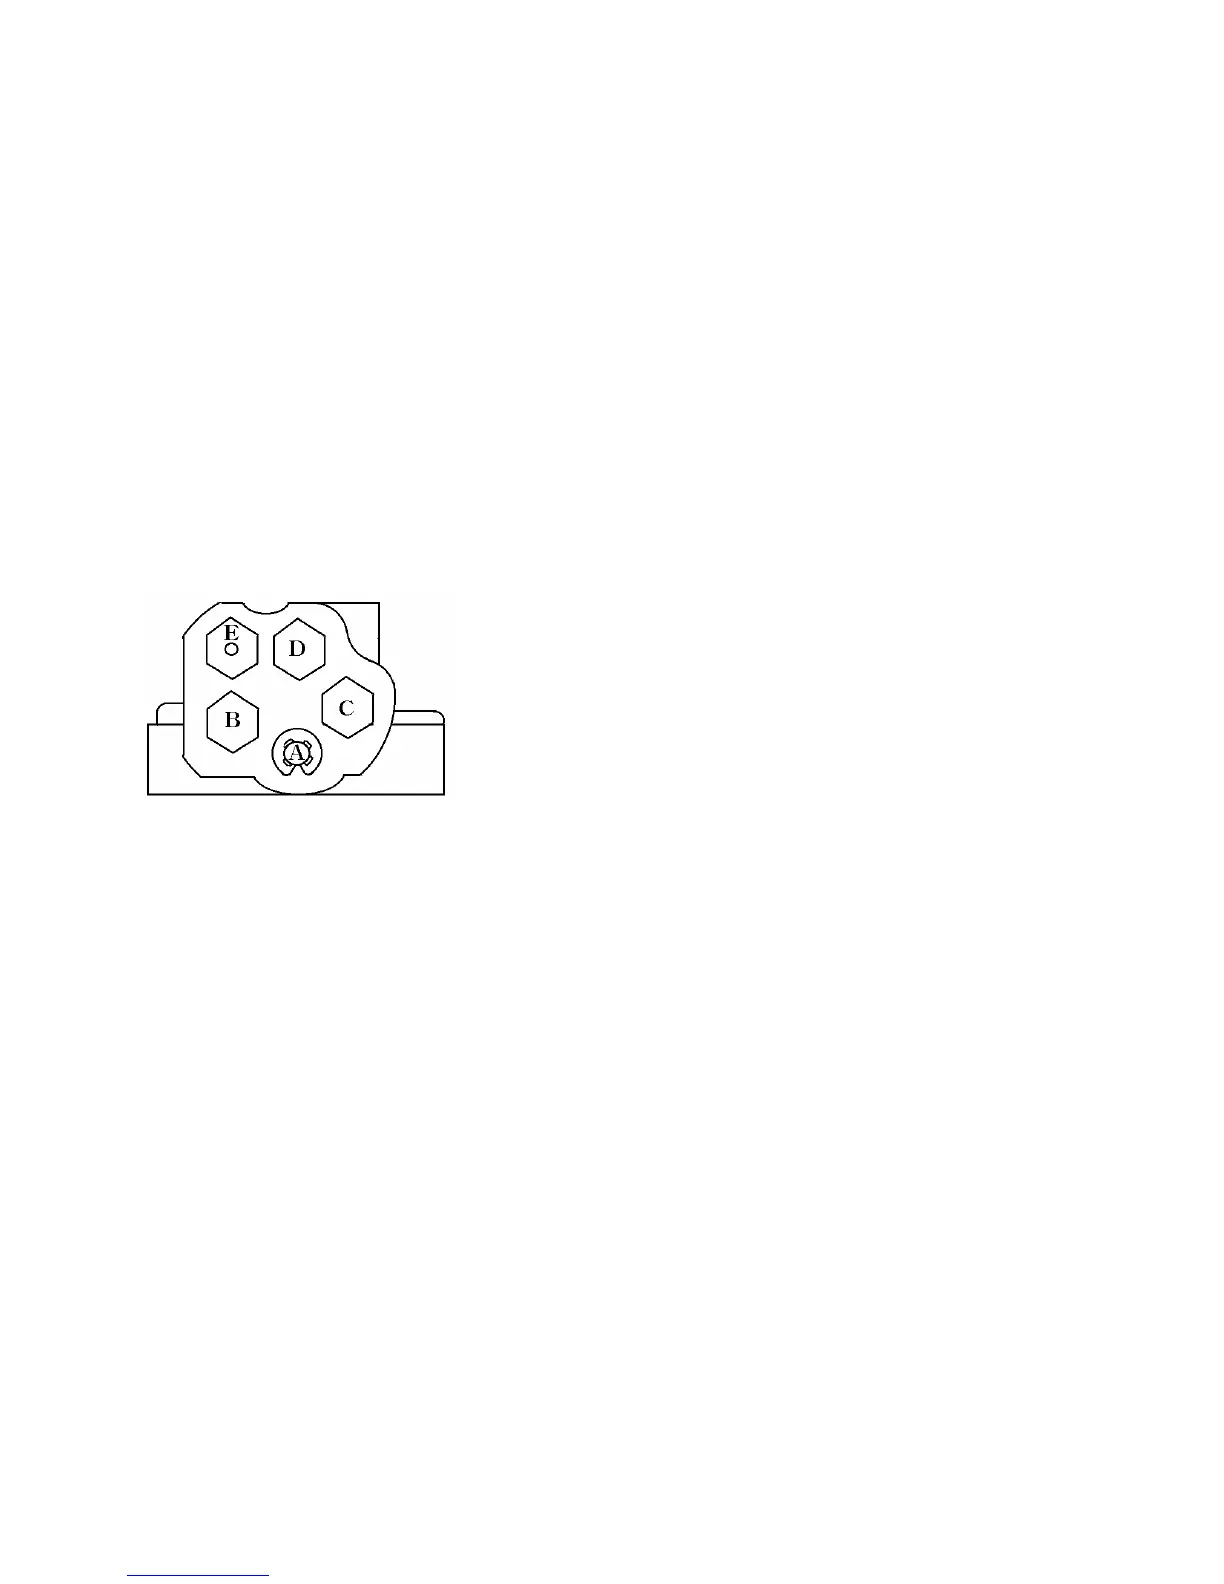
Fig.9-27 (A) Main spool hose
(B) Check valve’s hole
(C) Unloading valve-1’s hole
(D)Unloading valve-2’s hole
(E) Pilot spool’s hole
Put the poppet into hole B as shown in the figure and
make sure that the poppet slides smoothly.Then put
the spring in and tighten the plug,on which the O-
ring must be installed,to the specified torque.
-unloading valve(1) and related parts.
Install the spool into hole C(Fig.9-19) in the correct
direction.Put the spring in and tighten the plug to the
specified torque.
 Loading...