Do you have a question about the U-Line 2075WC WINE CAPTAIN and is the answer not in the manual?
Defines DANGER, WARNING, and CAUTION terms used for safety warnings throughout the guide.
Emphasizes the necessity of proper electrical grounding for safe operation and preventing shock hazards.
Provides instructions on safe handling of the unit, including using gloves and avoiding obstructions.
Lists the essential tools and materials required for installation and setup.
Details the steps for unwrapping and inspecting the unit for any damage or issues.
Specific instructions for removing the protective coating from stainless steel units.
Guides on how to clean exterior surfaces of black, white, and stainless steel models.
Provides critical measurements for the installation opening, ensuring proper fit.
Specifies required door swing clearances and how they differ between unit finishes.
Step-by-step guide for reversing the door swing direction on compatible models.
Details the electrical requirements, including voltage, frequency, and circuit breaker recommendations.
Outlines the recommended ambient temperature range and location considerations for optimal performance.
Steps for applying a final finish coat to the wood trim on wine racks.
Detailed process for staining the wood trim to a different color using specific products.
Guidelines for preparing the overlay frame, including dimensions and material thickness.
Steps to prepare the unit door, including gasket management, before attaching the overlay frame.
How to visually inspect the fit of the overlay frame on the door and identify gaps.
Instructions for applying foam tape to the overlay frame to ensure a snug fit.
Steps for securely attaching the prepared overlay frame to the unit door.
Detailed steps for mounting the door, including pivot posts and closer alignment.
How to verify if the door is properly aligned with the cabinet, noting specific measurements.
Procedures for correcting door alignment issues by adjusting hinge plates and closers.
Final steps for connecting the unit to the power supply, including safety warnings.
Instructions on how to use a level and adjust feet to ensure the unit is perfectly level.
A specific tip for leveling the unit when the room floor is higher than the cutout.
Guide for installing anti-tip brackets to secure the unit to the floor for safety.
Addresses common installation problems, such as door not closing properly.
Covers initial start-up steps and troubleshooting for common startup issues like no power or light on.
Provides guidance on contacting support, finding service companies, and locating model/serial numbers.
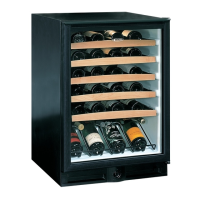
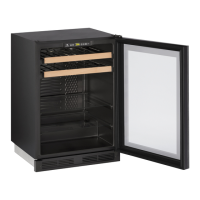
| Model Number | 2075WC |
|---|---|
| Category | Wine Cooler |
| Brand | U-Line |
| Model | WINE CAPTAIN |
| Reversible Door | Yes |
| Door Style | Glass door |
| Lighting | LED |
| Installation Type | Built-in |
| Refrigerant | R600a |