PAGE 2 OF 12 0919 IH-161
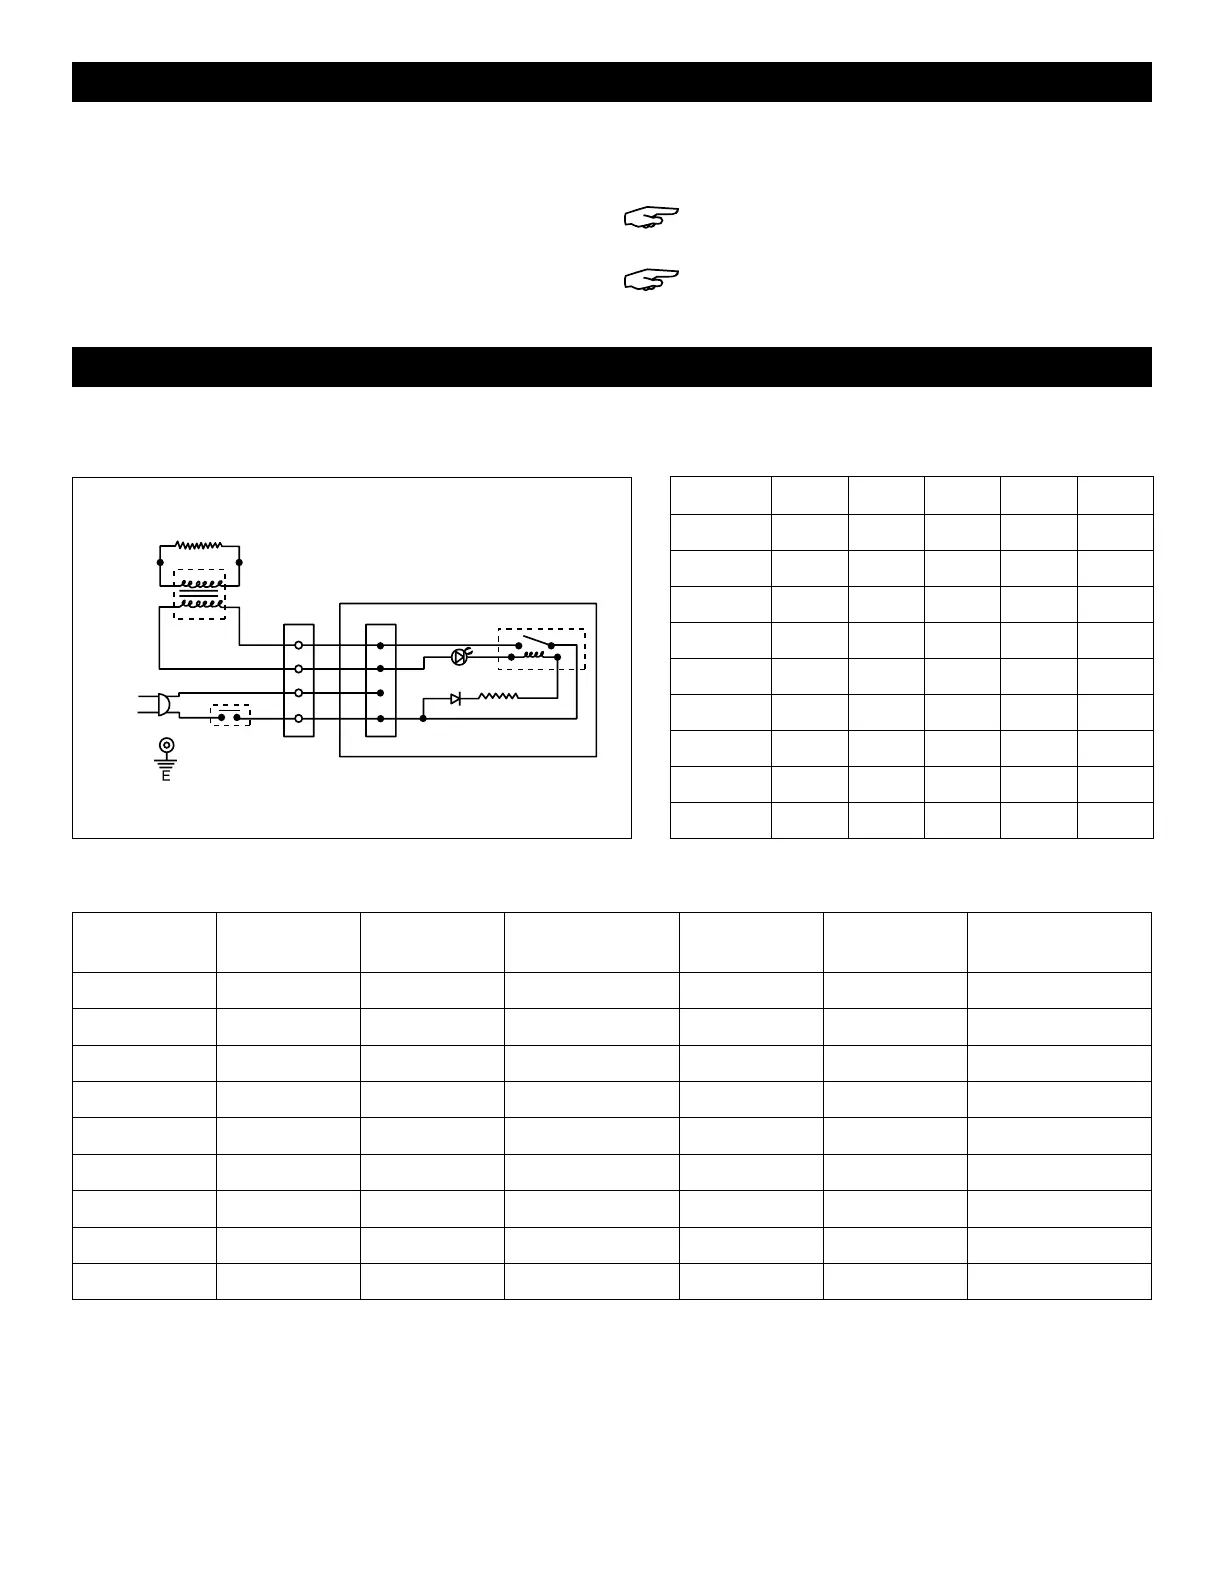
SEALER 1 MIL 2 MIL 3 MIL 4 MIL 6 MIL 8 MIL
H-161 3 3 3 4 5 5
H-163 3 3 3 4 5 5
H-190 3 3 3.5 4 5.5 5.5
H-293 3 3 3.5 4 5.5 5.5
H-306 3 3 3.5 4 5.5 5.5
H-458 3 3 3 4 5 5
H-963 3 3 3.5 4 5 5
H-1029 3 3 3.5 4 5.5 5.5
H-1252 3 3 3.5 4 5 5
OPERATING INSTRUCTIONS
SPECIFICATIONS
MODEL SOURCE
IMPULSE
POWER
MAX. SEAL
LENGTH
MAX. SEAL
THICKNESS
WEIGHT DIMENSIONS
H-161 120 V 410 W 8" 8 Mil 7.7 lbs. 3.2 x 15 x 6.3"
H-163 120 V 410 W 8" 8 Mil 5.8 lbs. 3.2 x 12.6 x 5.9"
H-190 120 V 580 W 12" 8 Mil 8.5 lbs. 3.3 x 17.8 x 7.4"
H-293 120 V 580 W 12" 8 Mil 10.1 lbs. 3.2 x 17.9 x 7.4"
H-306 120 V 670 W 16" 8 Mil 9.9 lbs. 3 x 21 x 7"
H-458 120 V 160 W 4" 8 Mil 3.7 lbs. 2.8 x 8.3 x 5.9"
H-963 120 V 670 W 16" 8 Mil 11.9 l b s. 3.2 x 21.8 x 7.3"
H-1029 120 V 870 W 20" 8 Mil 13 lbs. 4.5 x 28 x 7.8"
H-1252 120 V 870 W 20" 8 Mil 13 lbs. 3.2 x 25.9 x 7.4"
Transformer
Connector
Microswitch
N
L
Relay DC24V
Sealing Light
Timer
D
R
Control P.C.B
NOTE: The cutter may have a wax coating
that needs to be removed before first use. Use
caution when removing.
1. Plug the power cord into the outlet and set the timer
knob to the thickness of the materials to be sealed.
(See Recommended Settings Table)
2. Put poly bag on the sealing platform and push down
the sealing arm. The sealer will automatically control
the seal time.
3. After 1 to 2 seconds, slide the cutter to trim the bag.
(Only on H-161 and H-293) Release the sealing arm.
NOTE: The higher the number on the dial, the
longer the heat sealing time.
NOTE: Sealing is complete when the light
turns off.
RECOMMENDED SETTINGSCONNECTION DIAGRAM
SEALER SPECIFICATIONS
 Loading...