This document is a User Guide & Service Manual for the U-Line Model: U-1224DWRINT-00B, a premium modular refrigeration unit designed for various applications including residential, outdoor, ADA height compliant, marine, and commercial. U-Line products are known for their functionality, style, and inspired innovations, focusing on preserving products at the right temperature in the right place.
Function Description
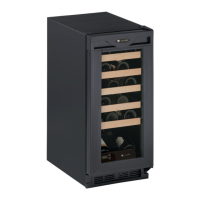
The U-1224DWRINT-00B is a dual-drawer refrigerator designed to provide flexible storage and precise temperature control. It is part of U-Line's advanced refrigeration systems, offering large and flexible capacities with a built-in, clean integrated look. The unit is intended for indoor/interior applications and is designed to operate between 50°F (10°C) and 100°F (38°C) ambient temperatures. It features a control panel for managing various settings, including temperature adjustment, lighting, and a Sabbath mode. The unit is designed to store up to 150 (12 oz. [330 ml]) cans or 98 (12 oz. [330 ml]) bottles when properly loaded.
Important Technical Specifications
- Model: U-1224DWRINT-00B
- Dimensions:
- Width: 23-1/4" (591 mm) (includes 3/4" [20 mm] integrated panel)
- Height: 34-1/8" to 35-1/8" (867 mm to 892 mm)
- Depth: 24" (610 mm)
- Grille Height: 3-7/8" (99 mm)
- Electrical Requirements: Grounded and polarized 115 VAC, 60 Hz, 15A power supply (normal household current). An individual, properly grounded branch circuit or circuit breaker is recommended. GFCI is generally not required for fixed location appliances but local codes should be consulted.
- Refrigerant: R600a (Isobutane), a flammable hydrocarbon. Service must be performed by factory authorized service personnel using approved tools and equipment for R-600a refrigerant.
- Compressor: Embraco EMX20CLC
- Voltage: 115 - 127 VAC
- Frequency: 60 Hz
- Run Cap: 12µF/165 VAC
- Start Winding: 6.7 Ohm at 77°F
- Run Winding: 12.6 Ohm at 77°F
- LRA: 3.7 A
- FLA: 0.5 A
- Starting Device: 8EA14C
- Overload: 4TM142RFBYY-53
- Thermistors: Two thermistors are used: one for the zone (located on the right-hand side wall) and one for the evaporator. They provide temperature readings based on resistance, which varies with temperature.
- Defrost Settings (for 1224DWRINT model):
- Compressor Run Time Between Defrost: 12 hours
- Duration in Minutes (Minimum): 5
- Duration in Minutes (Maximum): 45
- Stop Temperature °F (°C): 42 (6)
- Storage Capacity: Up to 150 (12 oz. [330 ml]) cans or 98 (12 oz. [330 ml]) bottles.
Usage Features
- First Use: The unit comes with factory preset controls. U-Line recommends allowing the unit to run overnight before loading products. To turn the unit on/off, press the power button.
- Control Operation:
- ON/OFF: Press the power button.
- Toggle Lights: Press the light button for 3 hours to leave interior light on.
- Adjust Refrigerator Temperature: Use the up or down arrows to adjust the set point temperature when the °F or °C symbol is flashing.
- View Temperature in Unit: Press the up and down arrows together to display the temperature.
- Toggle between F/C: Hold the up and down arrows for five seconds to change temperature units.
- Door Alert Notification: An audible tone sounds and "dr" appears on the display if the door is left open for more than 5 minutes. Closing the door silences the alert.
- Sabbath Mode: This unit is Star-K certified. To enable Sabbath mode, press and hold the hidden button (4) for ten seconds. The interior light and control display will go dark, disabling system responses to user activities, lighting, display, and audible alarms, while maintaining internal temperatures.
- Airflow and Product Loading: Proper airflow is crucial for efficiency. Do not block the front grille or install the unit behind a door. Leave space between the evaporator and loaded products to prevent freezing.
Maintenance Features
- Cleaning:
- Exterior (Vinyl Clad): Clean with a mild detergent and warm water solution using a soft sponge. Avoid solvent-based or abrasive cleaners.
- Exterior (Stainless Models): Clean monthly with a good quality all-in-one stainless steel cleaner and polish (e.g., Claire® Stainless Steel Polish and Cleaner). Avoid steel wool pads and cleaners not specifically intended for stainless steel. Promptly clean any discoloring or rusting with Bon-Ami® or Barkeepers Friend Cleanser®.
- Exterior (Integrated Models): Use household cleaner as recommended by the cabinet manufacturer.
- Interior: Disconnect power. Clean with a mild nonabrasive detergent and warm water solution using a soft sponge. Rinse with clean water. Avoid solvent-based or abrasive cleaners.
- Defrosting: Under normal conditions, manual defrosting is not required. Minor frost on the rear wall is normal. If excessive frost (1/4" [6 mm] or more) builds up, manually defrost by disconnecting power, removing products, propping the door open (minimum 2" [50 mm]), allowing frost to melt, cleaning the interior, and then reconnecting power. DO NOT use sharp objects or heaters to speed up defrosting.
- Cleaning Condenser: Every six months, clean the condenser coil using a soft brush with a "combing" action or a vacuum cleaner. Disconnect power before cleaning. DO NOT touch the condenser fins as they are sharp and easily damaged.
- Extended Non-Use (Vacation/Holiday, Prolonged Shutdown):
- Remove all consumable content.
- Disconnect power.
- Allow ice to thaw naturally if present.
- Clean and dry the interior, ensuring all water is removed.
- Leave the door open a minimum of 2" (50 mm) for ventilation to prevent mold and mildew.
- Winterization is required if the unit will be exposed to temperatures of 40°F (5°C) or less. Damage from freezing temperatures is not covered by warranty.
Installation Features
- Anti-Tip Bracket: The unit includes anti-tip brackets for floor mounting. Installation involves sliding the unit out, removing screws from the hinge assembly, attaching the bracket, marking floor positions, drilling pilot holes, fastening brackets, and then positioning the unit to engage the brackets.
- Leveling: Use a level to confirm the unit is level from top and side edges. Adjust the legs on the corners as necessary.
- Integrated Panel Installation: Instructions are provided for attaching an integrated panel to the door/drawer using clamps and screws, ensuring proper alignment and avoiding damage to the wood panel.
- Grille - Plinth Installation: The grille must be installed for proper operation. Instructions cover removing and installing the grille by loosening/tightening screws.
- Drawer Alignment: The unit's drawers are factory-aligned but may require adjustment after shipment or panel installation. Instructions detail minor and severe adjustments for side-to-side, front-to-back, and top-to-bottom alignment by loosening/tightening mounting screws or drilling new holes. Drawer removal and re-installation procedures are also provided.
- Free Standing Kit: An optional accessory (ULAFREESTANDS) for units not installed in surrounding cabinetry. Installation involves removing the grille, placing a shell accessory over the cabinet base, and aligning/tightening screws.