Do you have a question about the U-Turn Orbit Theory and is the answer not in the manual?
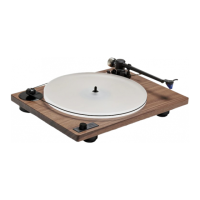
Remove foam block from spindle, foam ring, and twist tie from tonearm. Place platter on spindle, connect power adapter, and plug in RCA cables.
Wrap belt around pulley groove, holding it along the platter's back edge. Use left hand to guide belt into platter groove.
Change speeds (33 or 45 RPM) using speed control knob.
Position turntable on a stable surface. Place bubble level anywhere on top of plinth.
If the bubble is not centered, adjust the height of the feet to level turntable. Turn bottom of foot to raise or lower it.
With tonearm in rest, slide counterweight onto tonearm until it covers about half of the indicator line.
Pinch tab on the bottom of stylus guard to release and remove it. Do not touch stylus.
Lower cue lever before balancing tonearm. Make sure anti-skate is turned off by lifting the anti-skate rod.
Remove tonearm from rest and hold the headshell over the platter. Do not allow stylus to touch the platter.
While holding the headshell, rotate the entire counterweight backwards until tonearm is balanced and floating horizontally when headshell is released.
Place tonearm in rest. Hold counterweight, turn dial to align "0" marking with indicator line.
Rotate the counterweight and dial together until indicator line aligns with desired tracking force value.
Push the anti-skate rod down until it clicks out of the locked position and rests on the tonearm base.
To adjust anti-skate force, move the anti-skate weight to the desired setting on the anti-skate rod.
Slide the dust cover onto the hinges.
The preamp is enabled when the preamp LED light is on. To turn preamp on or off, press the bypass switch.
We stand by our products with a 3-year warranty that covers any defects in materials or workmanship.
Setup videos & tutorials, Email support@uturnaudio.com, Phone (781) 451-1445.