The Under Control ii-CON controller is a versatile gamepad designed for use with the Nintendo Switch and Switch Lite consoles. This manual provides comprehensive instructions for its setup, usage, and maintenance, ensuring an optimal gaming experience.
Function Description
The ii-CON controller functions as a primary input device for gaming on the Nintendo Switch and Switch Lite. It offers a full range of controls, including directional input, action buttons, joysticks, and shoulder buttons, allowing for precise and responsive gameplay. The controller can be used in both single-player and multiplayer modes, and it supports wireless connectivity for enhanced freedom of movement.
Important Technical Specifications
- Power Supply: DC 5V
- Charging Current: 80~350 mAh
- Battery Capacity: 330 mAh
- Charging Time: 2 to 3 hours
- Working Time (per charge): Between 6 and 10 hours
- Autonomy (standby): 72 hours
- Operating Distance: Up to 10 meters
- Compatibility: Nintendo Switch and Switch Lite. Not compatible with Amiibo or Nintendo® charging media.
Content of the Box:
The package includes:
- 2 x ii-Con controllers
- 1 x User manual
- 1 x Charging cable
- 2 x Wrist straps
- 1 x Battery operating instructions
Usage Features
Initial Setup and Charging:
Before first use, it is crucial to fully charge the controllers. The controllers can be charged using the supplied USB cable. During charging, the 4 LED indicators on the controller will light up when fully charged. It is important to use only the provided charging cable and avoid connecting the controllers to the console while charging via USB to prevent potential damage.
Connecting ii-Con Controllers:
To activate the controllers, press one of the directional pad buttons on the left joystick or one of the action buttons ("A", "B", "X", "Y") on the right joystick. Once connected, the LED indicator will flash. It is important to avoid touching the joysticks during connection to prevent drift phenomena. If drift occurs, turn off the controllers and reconnect them.
Synchronizing ii-Con Controllers:
- Single Player Mode: To synchronize the controllers in single-player mode, simply clip them to the console.
- Multiplayer Mode & Switch Lite Console: For multiplayer use or with the Switch Lite, press and hold the synchronization button for 3 seconds until the LED indicator flashes quickly. Then, press the R and L buttons to connect both joysticks to the console. A notification will appear on the screen once the connection is established.
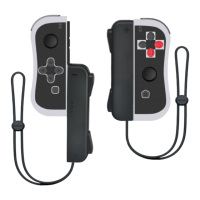
The ii-CON controllers feature a standard gamepad layout:
- Left Controller:
- 3D Left Joystick
- D-Pad (Directional Pad)
- Screenshot button
- L and ZL shoulder buttons
- USB Connector
- SL and SR buttons
- 4 LED indicators
- Right Controller:
- 3D Right Joystick
- Action Buttons (X, Y, A, B)
- R and ZR shoulder buttons
- Home button
- USB Connector
- SL and SR buttons
- 4 LED indicators
- Both Controllers: Eject buttons are located on the top of each controller for easy detachment from the console.
3D Joystick Adjustment (Calibration):
To calibrate the joysticks:
- Press the "Home" button to access the main interface.
- Select "System Settings."
- Press the "A" button to enter the controller and sensor settings.
- Choose "Calibrate Control Sticks."
- Press the "A" button to proceed to the calibration interface.
- Press the 3D (L3/R3) button on the joystick you wish to calibrate.
- Press the "X" button to initiate calibration.
- Follow the on-screen instructions to complete the calibration process.
Maintenance Features
Restarting the Controller:
In case of any malfunction or anomaly, a restart can be performed. Locate the small square reset button on the side of the controller, beneath the 4 LED indicators, and press it to reset the device.
Firmware Update:
While ii-CON controllers typically update automatically with the console, emergency updates can be performed manually via a PC.
- Download Driver: Visit www.proximaplus.com and download the latest ii-CON controller driver for your specific model (e.g., "Manettes ii-CON SWITCH™"). Save the executable file (e.g., "Switch_1127_fw.exe") to your PC.
- Run Driver: Execute the downloaded driver file.
- Connect Controller:
- Press and hold the 3D (left or right) joystick for 5 seconds.
- LED 1 and LED 3 will light up. Continue holding for another 3 seconds until LED 1 and LED 3 turn off.
- Connect the controller to your PC using the supplied USB cable. The "Device Status" on the software interface should change from "OFFLINE" to "ONLINE."
- Open Firmware File: Click "OPEN" in the software and select the appropriate firmware file for your controller (right or left).
- Download Update: Click "DOWNLOAD" on the software interface to begin the firmware update.
- Completion: Once the update is successful (indicated by "SUCCESS" and 100% progress), disconnect the controller from the PC. The 4 LED indicators on the controller will flash, signifying a successful update.
This comprehensive guide ensures users can effectively set up, operate, and maintain their Under Control ii-CON controllers for an uninterrupted and enjoyable gaming experience.