Quick Installation Guide DX120 CAT5 DVI KVM Extender Over LAN w/Audio & Mic
3
http://www.uniclass.com.tw Rev. 1.1 Copyright @ All Rights Reserved
Installation
Take the package items out of the box and begin installation.
Note:
Before the installation, please ensure that the 4 Position Dip
Switch of the Transmitter and Receiver Unit are set to the same
positions (1 to 4, the default setting for all switches are ON,
then you can slide down to adjust as needed but, they are have
to correspond on the same position), otherwise it might be
encounter the connection problem.
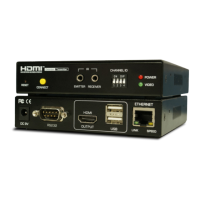
Configure the Transmitter Console
1. Connect on end of the CATx UTP cable the CAT5
extension port of the Transmitter (Connector f).
2. Connect the power adapter to the Transmitter to power
it up before connecting any computer or cables to it.
(Connector g).
3. Connect the DVI cable between the computer’s DVI port
and the DVI port (l) of the Transmitter.
4. Connect the USB cable between Transmitter’s USB ports
(h, Type B) to PC’s USB port.
5. Connect the Remote Control Unit to the Remote Out Jack
(i, Optional).
6. Connect the Microphone to the Mic. jack (j).
7. Connect the Speakers to the speaker jack (k).
Configure the Receiver Console
1. Connect the other end of the CATx UTP cable to the CAT5
Extension port of the Receiver (connector 10).
2. Connect the power adapter to the Receiver Power Jack
(11) to power it up before connecting any devices to it.
3. Connect the Keyboard and mouse to the USB ports
4. Connect any devices that you needed such as Flash Drive
(8, 9)
5. Connect the IR Remote Control Unit to the Remote In
Jack(12, Optional)
6. Connect Microphone Mic. jack (13)
7. Connect Speakers the speaker jack (14)
8. Connect the DVI cable between the RX’s DVI port and
Monitor’s DVI port. (15)
Now, you have set up the whole system and ready to operate.
Operation
Turn Remote Console ON/OFF Switch (Yellow button)
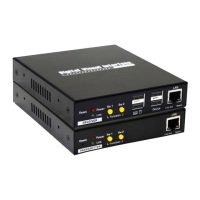
Transmitter (TX) Unit
Receiver (RX) Unit
To turn Remote Console ON/OFF and Mode Selections
from the Momentary Switch (Yellow button) SW1 and
Sw2
1. SW1 - Short press to switch ON/OFF
2. SW2 :
a. Short press to select the Graphic Mode/Video
Mode.
b. Long press to select the Anti-Dither 1/2/OFF.
 Loading...