Bulletin 30-122.2014.04.006 5 Copyright © 2014 Unico, Inc.
(SAC xx.xxxx.xxx.xx)
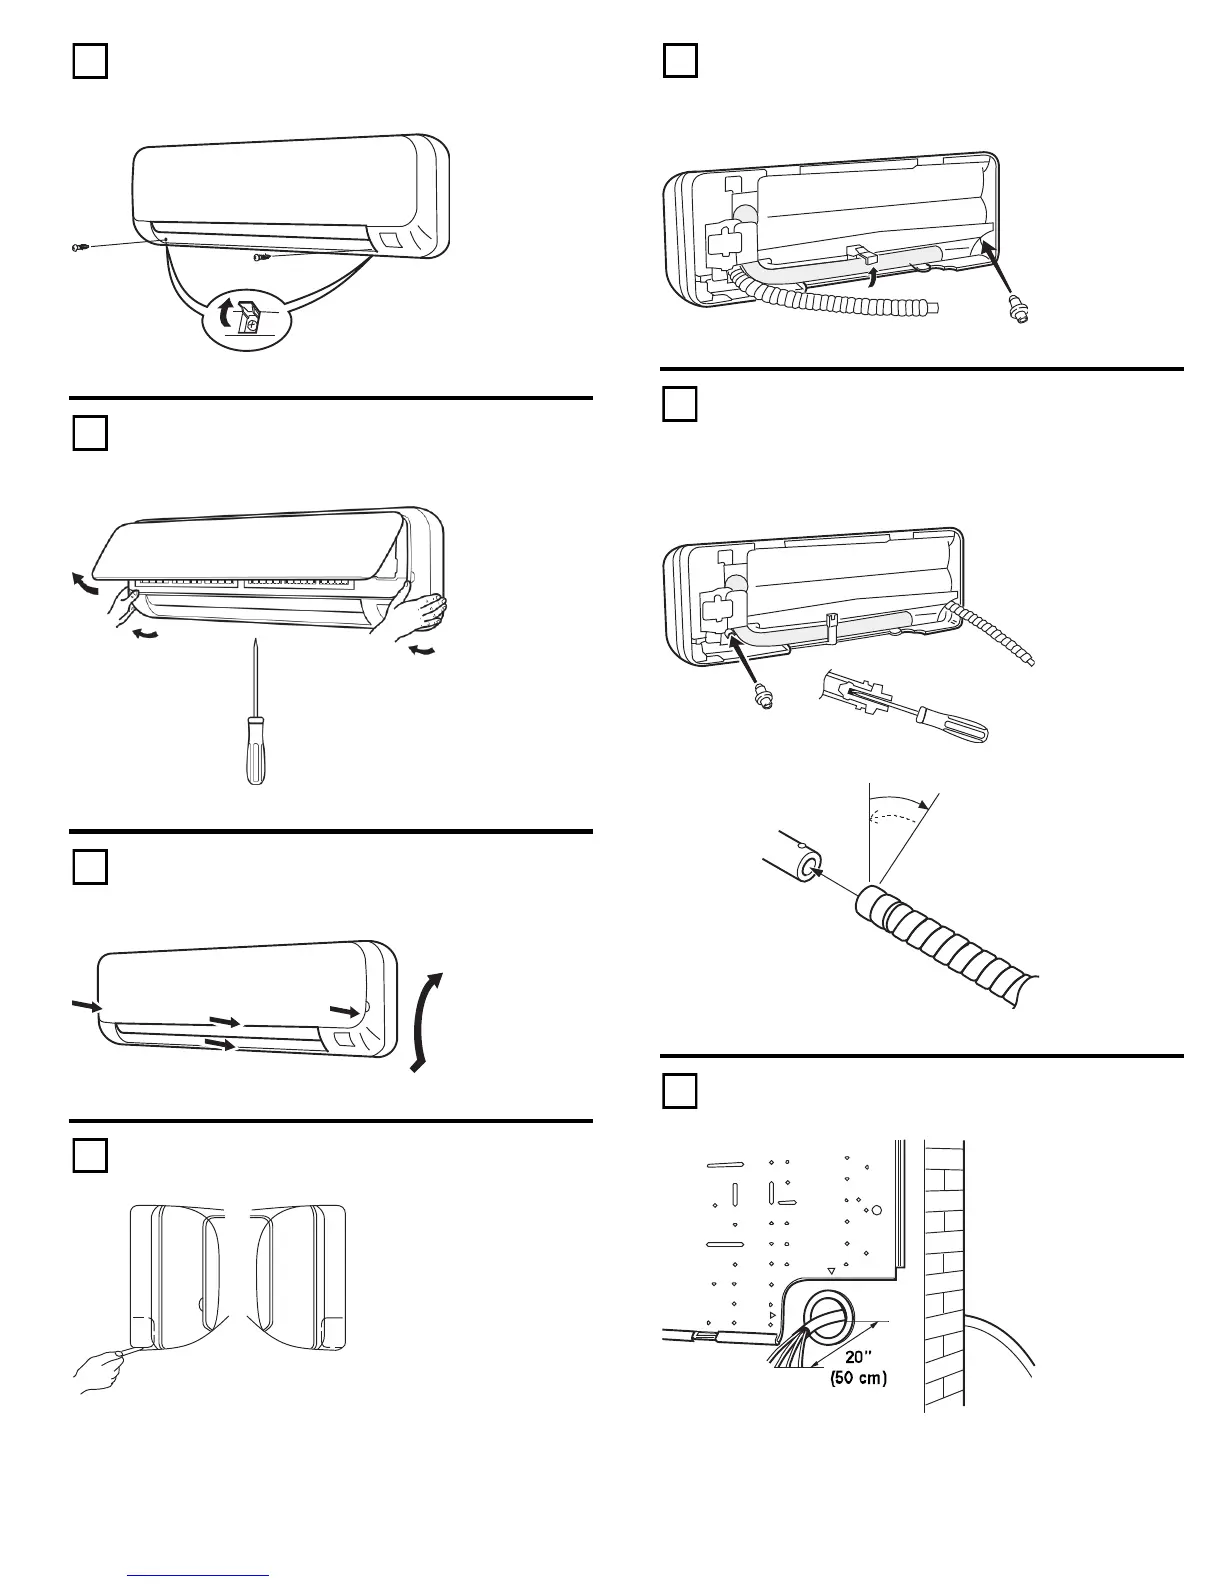
The indoor unit can be installed without removing the
front panel. If necessary, remove the set screws
placed under the two little covers.
Disengage the front panel through a screwdriver
pressing the three shown marks. Remove the front
panel by sliding it up.
To install the front panel again, insert it in the lower
side of the unit and align it with the blocking points.
Then push lightly on the shown marks (arrows).
Tubing connections on right or left side. Cut a corner
of the frame.
The refrigerant tubes and drain hose are on the right
side of the unit. The drain tray is supplied with two
outlets with tube on the right side and rubber plug on the
left side.
How to reverse the drain hose position. Remove the
drain hose by turning it counterclockwise, then
remove the rubber plug on the other side of the unit.
Replace them inverting their position, use a screwdriver to
place the plug correctly.
Running power wires plus ground wire from indoor to
outdoor unit (use table to determine wire size).
 Loading...