*Range may vary depending on environmental and/or topographical conditions.
•
15GMRS/7FRSChannels
• 7WeatherChannels
•
142PrivacyCodes(CTCSSTone
andDCSCode)
•
Upto50MileRange*
•
InternalVOXCircuitry
•
TRUWaterproof™(JIS7)—
SubmersibleandFloats
•
DirectCallwithNameDisplay
•
143GroupCodes
•
SilentMode
•
10SelectableCall/RingToneAlerts
•
BacklitLCDDisplay
•
Glowinthedarkkeys
•
RogerBeep
•
CallAlert;Vibrate(GMR5099Only)
• 2HeadsetBoomMics
•
BOOSTforMaximumRange*
•
HeadsetJack
•
AutoChannelChangeCall
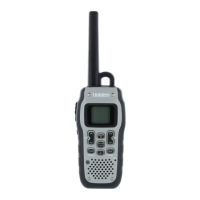
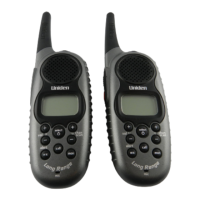
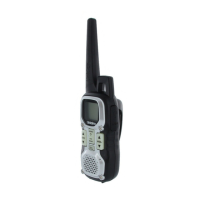
1 Antenna
2 PTT(Push-To-Talk)Button
3 BOOSTButton
4 Light/MonitorButton
5 ChannelUp/DownKey
6 Tone/GroupKey
7 D-callKey
8 StrobeLight
9 HeadsetJack
10 Menu/Powerkey
11 VolumeUp/Downkey
12 Enter/LockKey
13 Weather/AlertKey
14 Microphone
15 Speaker
16 BatteryLevelIndicator
17 SubCodeIndicator
18 AlertIndicator
19 GroupIndicator
20 ReceiveIndicator
21 VOXIndicator
22 CallIndicator
23 ChannelIndicator
24 MissedCallIndicator
25 ChargingContacts
26 ChargingIndicators
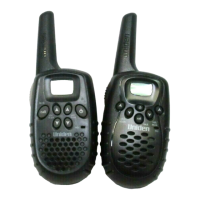
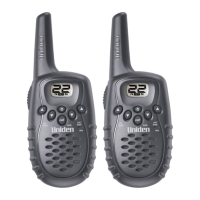
CongratulationsonyourpurchaseofaUniden
GMRS(GeneralMobileRadioService)waterproof
radio.Theselightweight,palm-sized,radiosare
state-of-the-artdevices.Bothhavemanytop
features.TheGMR5089-2CKHSandGMR5099-
2CKHSincludetwoVOXheadsetboommics.Use
thematsportingevents,tocontactfamilyand
friends,whilehiking,skiing,oroutdoors,orina
neighborhoodwatchforvitalcommunication—even
outsidebythepool!Don'tworry;theyfloat!
Your radio complies with JIS7 water-resistant
standards, which means the radio can be
submerged in 1.0 meters of water for 30 minutes
without damage.
• Theradiowillonlymeetthisratingiffully
assembledandallrubbersealsandthejack
coverarewellmaintainedandcorrectlyfitted.This
meansthattheHeadsetplugisnotinserted,and
theHeadsetjackcoverandthebatterypackare
attachedandsecurelyfastened.
• Afteryourradioissubmergedinwater,youmight
noticethatthesoundisdistorted.Thisisbecause
waterremainsinandaroundthespeakerand
microphone.Justshaketheradiotoclearexcess
water,andthesoundshouldreturntonormal.
Note: If your radio is exposed to salt water, clean
your radio thoroughly with fresh water and dry it
before turning it on.
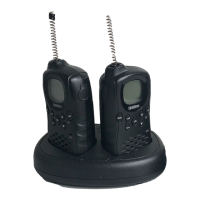
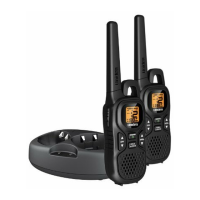
PACKAGE CONTENTS
Yourpackagecontainstworadios,tworechargeable
NiMHbatterypacks,oneACadapter,onecharging
cradle,twoheadsetboommics,twobeltclips,two
carabinerclips,andthisreferenceguide.ANiMH
batterypackpowersthisunit.Toorderthefollowing
optionalaccessories,visitourwebsiteatwww.
uniden.comorcall1-800-554-3988duringregular
businesshours.Use only Uniden accessories.
•NiMHBatteryPack–#BP-38
•ChargingCradle–#RC-1289
•HeadsetBoomMic–#ZA-133orZA-160
•ACAdapter–#AD-0001
•CarabinerClip–#TSTD0720002
GMRS LICENSE
The radio operates on the General Mobile Radio
Service (GMRS) frequencies when using
Channels 1-7 and channels 15-22. You must
have a GMRS license issued by the Federal
Communications Commission to legally use
these channels.
For licensing information and application
forms, visit the FCC online at: www.fcc.gov/wtb/
uls or call the FCC hotline at 1-800-418-3676. If
you have any questions, you can contact the
FCC direct at 1-888-225-5322. No license is
required for operation on channels 8-14 or
operation on any channel in Canada.
INSTALL THE BATTERY
EachradiousesasuppliedNiMHbatterypack.To
installtheNiMHbatterypack:
1)Makesuretheradioisoff.
2)Turnthescrewholdingthebatterycompartment
counterclockwisewithascrewdriverandliftup
thebatterycover,
3)PuttheNiMHbatterypackinthebattery
compartment,applyingthebatterycontactsto
thelowerchargecontacts.Besuretofollowthe
instructionswrittenonthebatterypack’slabel.
Installingthebatterypackincorrectlywillprevent
theunitfromoperating.
4)Beforeplacingthebatterycoverbackonthe
radio,checktherubbersealaroundthebattery
compartmentandtheribbonofthebatterypack;
makesurethatthesealisingoodconditionand
thatthereisnoforeignmatterundertheseal.
5)Replacethebatterycompartmentdoor.Tighten
thescrewssecurely.
Note:If the rubber seal appears worn, nicked, or
dried out, replacement seals are available from
www.uniden.com or call 1-800-554-3988 during
business hours.
CHARGING THE RADIO
Yourradiosincludeachargingcradleandtwo
rechargeablebatterypacks.Followthese
instructionstorechargeyourradios.
Make sure to turn the radio OFF before placing
the radio in the charging cradle.
1)Connecttheadapter'splugtoDCIN9Vjackof
thechargingcradleandplugtheotherendinto
anACoutlet.
2)Setthechargingcradleonthedeskortabletop
andplacetheradiointhechargingcradlewith
thekeypadfacingforward.
3)MakesurethattheLEDilluminates.Chargethe
batterypackfor16hoursandremovetheradio
fromthechargingcradleaftercharging.
Note:
• UseonlythesuppliedbatteryandACadapteror
approvedaccessoriesfromUniden.
• Chargetimemayvarydependingonthebattery
liferemaining.
GMR5089- 2CKHS /GMR5099 -2CKHS RAD IO
Choosing a Channel
Yourradiohas22channelsand142Privacy
codesyoucanusetotalktoothers.Inorderto
speaktosomeone,bothyourradiosmustbesetto
thesamechannelandPrivacycode.
Tochooseachannel:
PressCH
or ,thenpressCH or to
increaseordecreasethechannelnumber
displayed.
Tochangethechannelcontinuously,press
CH
or ,thenrepeatedlypressandhold
CH or formorethan1second.
Note: Channels 1-7 and 15-22 have a typical
range of up to 50 miles by pressing BOOST. HI
displays when you select a GMRS channel, and
LO displays when you select a FRS channel.
SETTING UP GROUP MODE
InordertouseGroupmode,youneedtoinitialize
acoupleofsettingsinyourradio:
• SettheradiotoGroupmode.
• SetaGroupCode.
• SetaUnitNumber.
• Seta"Nickname".
Setting the Radio to Group Mode
TosettheradiotoGroupmode,whichenables
DirectCall,AutoChannelChange,andAllCall,
pressandholdTONE/GROUPfor2seconds.The
radiodisplaysGRP andgroupcode.
Note:InGroupmode,youcannotreceive
transmissionsfromotherradiosunlesstheyare
alsosettothesamechannelandgroupcode.
Setting the Group Code
Setthegroupcodeforyourradiogroupfrom
0-142.Everyoneinyourgroupmustselectthe
samegroupcodeinordertocommunicatewith
eachother.
1)PressTONE/GROUPinGroupmode.Press
CH
or toselectthegroupnumber.
2)PressENTER/
orTONE/GROUPtoreturnto
normaloperation.
Setting the Unit Number
Eachradioinyourgroupneedstobesettoa
uniqueunitnumber,from1-16.
1)PressMENU/
.Advancethroughthemenu
untilUNITappears,andthenpressENTER/ .
Thecurrentunitnumberflashes.
2)PressCH
or toselectthedesiredunit
number.
3)PressENTER/
tocontinuetothenext
section.
Setting Your Nickname
Yournicknameappearsonotherunits’displays
whenyoumakeanAllCallorDirectCall.Thisis
alsothenamethatappearsonotherradiodisplays
whensomeonewantstomakeaDirectCalltoyou.
Withoutanickname,theunitnumbershows.
1)PressMENU/
.Advancethroughthemenu
untilUNITappears,andthenpressENTER/ .
Thecurrentunitnumberflashes,thenpress
ENTER/ .Theradiodisplays
- - - -
(oryour
currentnickname)withthefirstplaceinthe
nicknameflashing.
2)PressCH
or toselecttheletter,then
ENTER/ toadvancetothenextletteruntilyou
haveenteredyournickname.
3)PressMENU/
toconfirmthesettingandexit
themenu.
Using Group Mode
Groupmodeletsyoumakedirectcallstoother
peopleinyourgroupwithoutalertingtheentire
groupandalsoletsyouquicklychangeeveryonein
yourgrouptoanotherchannelfromasingleradio.
BeforeusingGroupmode,followtheinstructionsin
"SettingUpGroupmode"oneveryradioinyour
group.Then,torecordtheunitIDandeveryone’s
nicknameineveryradio,sendacallto"All"from
eachradioonetime(see"SendingaDirectCall").
Sending a Direct Call
DirectCallletsyoucalleveryoneinyourgroupat
once,orcallasinglepersoninyourgroupwithout
anyoneelseinthegroupknowing.Itislikea
"speeddial"directlytotheperson(s)youwantto
talkto.
Tocalleveryoneinyourgroup,pressD CALLin
Groupmode.TheradioflashesALL.Then,press
D CALL or ENTER/
.Everyoneinyourgroup
receivesacall"chirp"forabout3seconds.When
thechirpends,beginyourconversation.
Note:When you make a direct call to "all," your
radio also sends out your nickname or ID so that it
will show up in the call list for everyone in your
group.
Tocallonepersoninyourgroupwithouthaving
otherpeopleknow,pressD CALLinGroupmode.
Then,useCH
or toselectthepersonyou
wanttocallandpressD CALL orENTER/ .Your
radiosoundstonesfor3secondsasitsendsthe
call.Whentheselectedpersonanswers,youcan
beginyourconversation.
Youcansilencethecalltonesanytimebypressing
PTTorBOOST.
Yourconversationremainsprivatebetweenyou
andthepersonyoucalleduntil15secondsafter
yourlastconversation.Then,yourradio
automaticallyexitsPrivatemode.
Channel Scan Feature
Yourradiohasachannelscanfeaturethatletsyou
easilyscanall22channels.Whenanactive
channelisdetected,theradiopausesonthat
channeluntilthechannelisclear.Thenaftera
2-seconddelay,theradioresumesscanning.
PressingPTTorBOOSTwhilethescanispaused
onachannelletsyoutransmitonthatchannel.
Toturnonchannelscan:
PressMENU/
.TheradiodisplaysSCAN.Press
ENTER/ .Thechannelnumberchangesasthe
radiorapidlycyclesthroughthechannels.
UsetheradioinStandard(notGroup)modewhen
youneedtobeabletocommunicatewithradios
thatdonothavethegroupfeature.
Talking on Your Radio
Totalktoothersusingtheradio:
1)PressandholdPTTorBOOSTandspeakina
clear,normalvoiceabout2-3inchesawayfrom
themicrophone.Whileyoutransmit,TXHIor
TXLOappearsonthedisplayaccordingtothe
typeofchannel.Toavoidcuttingoffthefirstpart
ofyourtransmission,pauseslightlyafter
pressingPTTorBOOSTbeforeyoustart
talking.
2)Whenyoufinishspeaking,releasePTTor
BOOST.Youcannowreceiveincomingcalls.
Whilereceiving,RXappearsonthedisplay.
Note:
• When you press BOOST, BOOS appear on the
display. The radio transmits at maximum power
when a GMRS channel is selected.
• IfBOOST,PTTorVOXiscontinuouslyused,1
minuteafteryoustartusingthefeaturethe
transmissionstopsandyouhearatimeouterror
tone.
Monitor Mode Feature
Yourradioletsyoulistenforweaksignalsonthe
currentchannelatthepressofakey.
ToturnontheMonitormode:
• PressandholdLIGHT/MONfor2secondsuntil
twobeepssoundforcontinuouslistening.The
receivercircuitstaysopen,soyouhearboththe
noiseandweaksignals.
ToturnoffMonitormode:
PressLIGHT/MONtoreturntothepreviousmode.
MONandRXdisappear.
Navigating through the Normal Menu
YourradiohasaMenufunctiontoaccess
advancedfeatures.InordertouseAutoChannel
Change,youneedtosetyourradiotoGroup
mode.
Start
Scanning
Scan
Mode
Silent
Mode
ON-OFF
Auto
Channel
Change
Channel
Change
VOX
Level
OFF, 1-5
1-10
Call
Tone
Unit
Setting
Setting
Unit
Number
Roger
Beep
ON-OFF
Beep
Tone
ON-OFF
Setting
Nickname
1)Toenterthemenu,pressMENU/ .
2)PressMENU/
againtoadvancethroughthe
menu.Afterthelastmenuitem,theradioexits
tothepreviousmode.
3)OtherwaystoexittheMenufunctionare:
a.PressPTT,BOOST,LIGHT/MON, D CALL,
WX/ALERT or TONE/GROUP.
b.Wait10secondsuntiltheradioautomatically
returnstothepreviousmode.
Setting Silent Mode
WhenyouturnonSilentmode,allincomingcalls
aremuted,thedisplaybacklightflashes,andthe
channelindicatordisplaysSLNTandCALLtoalert
youtoanincomingcall.Ifyoudonotrespondto
thecallwithin15seconds,thebacklightturnsoff.
TheGMR5099willalsovibratetoremindyouthat
youmissedacall.Silentmodeisdisabledfor15
secondswhenyoutransmit,receive,orpressany
otherbutton.
TosetSilentmode:
1)Enterthemenu.Advancethroughthemenuuntil
theSLNTdisplays,thenpressENTER/
.The
currentsettingflashes.
2)
Press
CH
todisplayon,thenpressENTER/ .
Note:To prevent unwanted silent alerts, be sure to
use a Privacy Code or Group Code whenever you
use the Silent mode feature.
•
BatteryLevelMeter
•
RechargeableNiMH
BatteryPacks
•
DualChargingCradlewith
ACAdapter
•
ChannelMonitor
•
ChannelScan
•
GroupScan
•
KeypadLock
•
NOAAEmergency/
WeatherChannels
•
EmergencyWeatherAlert
•
EmergencyStrobeLight
•
BeltClip
• 2CarabinerClips
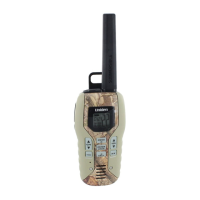
• Camo(GMR5099Only)
Automatically Changing Channels
AutoChannelChangeletsyoueasilycoordinatea
channelchangeforeveryoneinyourgroup.You
mightwanttodothiswhenyoufindyouaregetting
alotofinterferenceonyourcurrentchannel.You
alsousethisfeaturetochangefromalow-power
channel(8-14)tooneofthehigh-powered
channels(1-7,15-22)formorerange(ortoalow-
powerchannelifyouneedlongerbatterylife).
Tostartanautochannelchange,onanyradioin
thegroup,pressMENU/
. Advancethroughthe
menuuntilCHCX appears,thenpress ENTER/ .
Thecurrentchannelflashes.Use CH or to
selectthetargetchannel.Youcancheckwhether
theselectedchannelisclear.ThenpressD CALL
orENTER/ .
Yourradiochirpsforabout10secondswhileit
sendsoutthechannelchangesignal.Aseach
radioreceivesthechannelchangesignal,itchirps
once,thenchangestothenewchannel.
Toensureallradiosmakeittothenewchannel,
werecommendyou:
• Makesureyouareinanopenenvironment,
wheretheradiowillgetthebestrange.
• Optimizerangeduringthechannelchange
signalbyraisingtheradiooveryourheadto
givethebestpossibleheight.
• Doa"rollcall"onthenewchannelafterthe
movetobesurenoonewasleftbehind.Ifyou
missedsomeone,returntothepreviouschannel
andissuethesignalagain.
USING THE RADIO IN STANDARD MODE
UsetheradioinStandard(notGroup)modewhen
youneedtobeabletocommunicatewithradios
thatdonothavethegroupfeature.
Choosing a Privacy Code
YoucanselectaPrivacyCodefrom1-142foreach
channel.oF(off)indicatesnoPrivacyCode
selectedandyourradiocanreceiveasignal
regardlessofthecodesettingsofthetransmitting
radio.
1)PressTONE/GROUP.ThePrivacyCode
indicatorflashes.
2)PressCH
or toincreaseordecreasethe
code.YoucanalsoselectoF.
3)PressENTER/
orTONE/GROUP toreturnto
normaloperation.
Note:Only tones 1-38 are standard across radio
brands. Other settings might differ from brand to
brand. See the specifications for the specific tones
used for each setting.
You can hear the received voice when you turn on
channel scan and an active channel is detected, even
during Silent mode.
Missed Call Alerts
IfyoureceiveanincomingcallwhileSilentmodeis
onanddonotrespond,theradiowillturnonthe
MissedCallicon.IfyouareusingGroupmode,the
radiowillalsoindicatewhomadethecall.
TheGMR5099willadditionallyremindyouofa
missedcallbyvibratingeveryminuteafterthecallfor
3minutes.
Voice Operated Transmission
YourradioisequippedwithauserselectableVoice
OperatedTransmitter(VOX)thatcanbeusedfor
automaticvoicetransmissions.TheVOXfeatureis
designedtobeusedwithaheadsetwitha
microphone.Transmissionisinitiatedbyspeaking
intotheremotemicrophoneinsteadofpushingPTT
andBOOST.ToselecttheVOXlevel:
1)PressMENU/
.AdvancethroughtheMenuuntil
VOXappearsonthedisplay, thenpressENTER/
. The currentlevel(off,1-5) flashes.LeveloF
(off)disablesVOX,whilelevels1-5setthe
sensitivityoftheVOXcircuit.
2)PresseitherCH
or toreachthedesired
VOXsensitivitylevel,thenpressENTER/ .Use
level1forincreasedsensitivitytovoiceinnormally
quietenvironments,anduseahigherlevelto
reduceundesiredactivationinverynoisy
environments.
Transmitting a Call Tone
Yourradioisequippedwith10selectablecalltones
thataretransmittedwhenyoupressD CALLin
Standardmode.
Theselectedtonealsowillbeheardwhensomeone
placesadirectcalltoyou.
Toselectacalltone:
1)PressMENU/
.Advancethroughthemenuuntil
CALLappears,thenpressENTER/ .Thecurrent
calltonenumber(1-10)flashes.
2)PressCH
or toincreaseordecreasethe
numbertothedesiredcalltone.Eachtonewillbe
heardthroughthespeaker.PressENTER/ toselecta
calltone.
Totransmittheselectedcalltone,pressD CALL.
Theselectedtoneistransmittedforafixedlengthof
time.CallToneiscancelledifyoupressPTTor
BOOST.
Roger Beep
RogerBeepisabeepthatissenttonotifytheendof
transmission(bothPTTandVOXtransmission).You
canhearRogerBeepthroughthespeakerwhenboth
RogerBeepandBeepToneareon.WhenRoger
• Thebatterymustbeinstalledfortheunitto
operate,eveniftheunitisalsoconnectedto
externalpower.
• Ifbatterypowerislow,youcannotoperatethe
radioevenusingexternalpower.Allowthe
batterytochargebeforeusing.Ifyoutryto
transmitwhilepowerislow,theradiowill
automaticallyturnoff.
Warning!
• Thechargingcradleisnotwaterproof.Ifthe
chargingcradlefallsinthewater,unplugit
beforeattemptingtoremoveitfromthewater.
Allowthecradletodrycompletelybefore
reconnectingthepower.
• Wipeoffdirtorshakewaterfromyourradio
beforeplacinginthechargingcradleifyour
radioissoiledorwet.
USING A HEADSET
Youcanuseaheadset(#ZA-133orZA-160)for
moreprivatecommunications.Touseaheadset,
lifttherubbercoverfromovertheheadsetjack,
thenplugintheheadset.
Important: Your radio is not submersible or
waterproof when using a headset jack. When you
remove the headset, be sure to fully press the jack
cover into place to restore its waterproof capability.
USING THE RADIO BATTERY LEVEL AND LOW
BATTERY ALERT
Thisradiohasabatterylevelmeterthatindicates
thestatusofthebattery.Whenthebatterylevelis
low,thebatterylevelmetericon flashesand
thenBATT appearsafter30seconds.Rechargethe
NiMHbatterypackimmediately.
Warning!To avoid the risk of personal injury or
property damage from fire or electrical shock, only
use the Uniden accessories specifically designated
for this product.
USING THE RADIO
Inordertogetthemostoutofyournewradio,read
thisreferenceguidecompletelybeforeattempting
tooperatetheunit.
Turning the Radio On and Adjusting the Volume
1)PressandholdMENU/
toturntheradioon.
2)Tochangethevolumelevel,pressVO
or
toincreaseordecreasethevolumelevelthen
pressENTER/ .
3)PressandholdMENU/
toturntheradiooff.
U01UT065ZZA(0)
English