F R S
2-way
radios
SX167
1
2
3
4
6
7
8
9
10
5
• 22 FRS Channels
• Long Battery Life
• Up to 16-mile Range*
• Battery Strength Meter
• Roger Beep
• Battery Low Alert/Battery Save
• Call Key
• Last Channel Memory
• USB Charging
• NOAA Weather Radio
* Range may vary depending on environmental
and/or topographical conditions.
Congratulations on your purchase of
Uniden's SX167 series radio. This
lightweight, palm-sized radio is a
state-of-the-art device, equipped with
many valuable features. Use it at
sporting events, to stay in contact
with family and friends, hiking, skiing,
outdoors, or in a neighborhood watch
for vital communication.
PACKAGE CONTENTS
Each radio uses 3 AAA rechargeable
Ni-MH batteries, included.
If your model number contains a "C,"
your radio can be charged. A micro-
USB Y charging cable is included.
If your model number contains an
"H," your radio has a headset jack.
Headsets are not included.
Refer to the packaging for other
specific contents.
BATTERIES
Each SX167 radio comes with 3 AAA
NiMH batteries. You can also use 3
AAA Alkaline batteries (not included) .
To install the batteries (NiMH or
Alkaline):
1. If necessary, remove the belt clip.
Press up on the belt clip latch and
slide the belt clip off of the radio.
2. Remove the battery compartment
door by pressing on and sliding
out the compartment door.
Remove the cover.
3. Install the 3 AAA batteries (NiMH
included) into the battery
compartment. Be certain to follow
the + and – symbols in the
compartment. Installing the
batteries incorrectly will prevent
the unit from operating.
4. Replace the battery compartment
door by sliding the door into
place.
5. Replace the belt clip if necessary.
CHARGING THE RADIO
For models that recharge with
rechargeable NiMH batteries
installed:
1. Plug one branch of the included
microUSB Y-Cable into each
radio's microUSB charge port.
2. Insert the other end (USB) into a
USB power source (computer,
phone charger, etc - not
included).
3. The battery strength meter in the
upper right-hand corner indicates
the battery level during
recharging.
Notes:
• Charge time may vary depending
on the battery life remaining. For
fastest charging, turn off the radio
before charging.
• Do not try to recharge alkaline
batteries. Doing so can create a
safety hazard and/or damage the
radio.
• If battery power is low, you cannot
operate the radio even using
external power. if you try to
transmit while power is low, the
radio will automatically turn off.
Recharge or replace the batteries.
USING A HEADSET
For models that have a headset jack:
You can use a headset for more
private communications. To use a
headset, lift the rubber cover from
over the headset jack, then plug in a
headset (not included).
USING THE RADIO
In order to get the most out of your
new radio, read this reference guide
completely before attempting to
operate it.
TURNING THE RADIO ON AND
ADJUSTING THE VOLUME
1. Press and hold the /CH key to
turn the radio ON. The radio
tunes to the last active channel.
2. Press and hold the /CH key to
turn the radio OFF.
Press the ▲ or ▼ keys to increase or
decrease the volume level. L1 - L8
displays as you press the keys.
CHANNEL OPERATION
Your radio has 22 channels you can
use to talk to others. In order to speak
to someone, each of you must be set
to the same channel.
CHOOSE A CHANNEL
1. With the radio on, press /CH key
once. The current channel number
flashes.
2. Use the ▲ or ▼ keys to select
other channels (1 - 22). Press and
hold ▲ or ▼ keys to rapidly
change channels.
TALK ON YOUR RADIO
To talk to others using the radio:
Once you select a channel, press PTT
to talk. When you finish talking,
release PTT. The radio sends a roger
beep at the end of your transmission
so that others know you've finished
talking.
If the other party does not hear you,
you can press CALL to send a call
alert tone.
AUTOMATIC POWER SAVE
FEATURE
Your radio has a unique circuit
designed to dramatically extend the
life of the batteries. If there are no
transmissions or incoming calls within
2 seconds, your radio switches to the
Power Save mode. The radio is still
able to receive transmissions in this
mode.
WEATHER CHANNEL
1. With the radio on, press /CH key
twice. The weather icon displays
and the radio tunes to the current
weather channel.
2. Use the ▲ or ▼ keys to select
other weather channels (1 - 10).
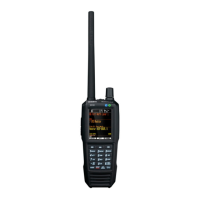
1 Antenna 6 Volume/Channel
Up
2 Call Key 7 USB (some
versions; see
packaging)
3 PTT (Push-to-
Talk)
8 Volume/Channel
Down
4 Power/Channel
Key
9 Microphone
5 LCD 10 Speaker
SPECIFICATIONS
Channels 22 FRS
Operating Freq. UHF 462.5500 - 467.7125 MHz
Power Source 3 AAA Rechargeable NiMH Batteries
Battery Life 20 Hours typical
(5/5/90 duty cycle)
FREQUENCY CHART
CH. FREQ
(MHz)
X-REF CH. FREQ
(MHz)
X-REF
1 462.5325 FRS/GMRS 1 12 467.6625 FRS 12
2 462.5875 FRS/GMRS 2 13 467.6875 FRS 13
3 462.6125 FRS/GMRS 3 14 467.7125 FRS 14
4 462.6375 FRS/GMRS 4 15 462.5500 GMRS 11
5 462.6625 FRS/GMRS 5 16 462.5750 GMRS 8
6 462.6875 FRS/GMRS 6 17 462.6000 GMRS 12
7 462.7125 FRS/GMRS 7 18 462.6250 GMRS 9
8 467.5625 FRS 8 19 462.6500 GMRS 13
9 467.5875 FRS 9 20 462.6750 GMRS 10
10 467.6125 FRS 10 21 462.7000 GMRS 14
11 467.6375 FRS 11 22 462.7250 GMRS 15
Note:This product is considered FRS only with 22 FRS
channels in the US market. It is considered a GMRS
product in the Canadian market.
MAINTENANCE
TO BE SAFE AND SURE:
• Never open your radio’s case.
• Never change or replace anything in your radio except
the batteries.
CARE AND SAFETY
To clean the radio, use a soft cloth dampened with water.
Do not use cleaners or solvents because they can harm
the body of the unit and leak inside, causing permanent
damage. Use a dry, lint-free cloth to clean the battery
contacts. Do not submerge the unit in water. If the unit
gets wet, turn it off and remove the batteries immediately.
Dry the battery compartment with a soft cloth to minimize
potential water damage. Leave the battery compartment
cover off overnight to ensure complete drying. Do not use
the radio until the unit is completely dry.
Your radio might cause TV or radio interference even
when it is operating properly. To determine whether your