4. When the indicator light that flashes in red light turns into stable red light without flashing, turn the
Steam Control Knob (3) to the indicator ON.
5. A small amount of water may be emitted from the Steam Arm (6). This is normal. Allow it to run until
only steam is being made.
Note: It is normal when the temperature drops, the indicator light will flash in red light again, when the
temperature reaches the requirement, the indicator light will be on with red light without flashing.
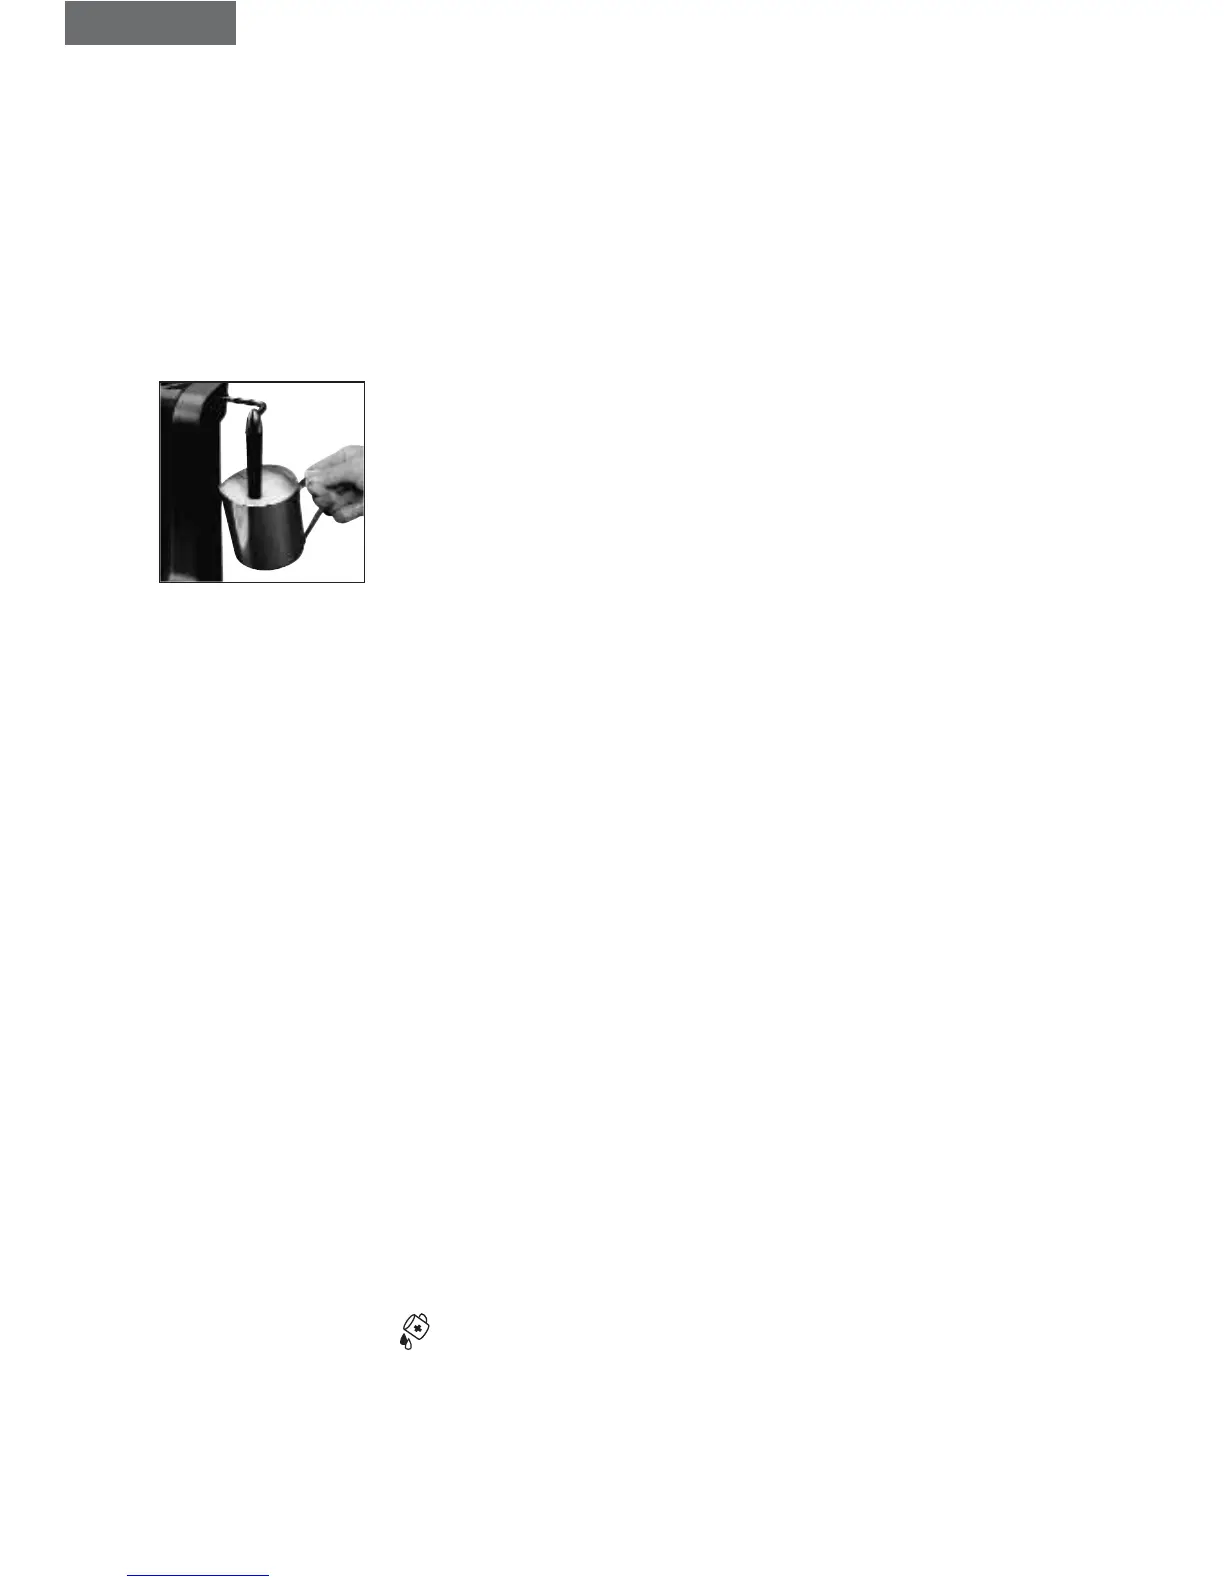
6. Place the stainless steel jug or a similar container under the Frother (7), locating the end of the
Frother (7) beneath the surface of the milk (see picture). Allow the steam to froth the milk. Be careful
not to position the Frother (7) directly against the base or sides of the container to ensure it does
not overheat.
Picture
7. When milk has been frothed, turn the Steam Control Knob (2) to the indicator position OFF.
8. Pour the milk into the espresso. Generally cappuccino is made with half espresso and half milk.
9. When you have finished making espresso and frothed milk, turn off the Espresso/Cappuccino
Machine by turning the Switch Control Knob (3) to the indicator position OFF and unplug the
appliance from the outlet.
Note: Never remove the espresso Filter Holder (15) until all steam and hot water has been released.
10. It is now important to release the steam pressure by following the directions under “Pressure”.
CLEANING AND MAINTENANCE
1. Unplug the appliance Power Cord (20).
2. Clean the Steam Arm (6) immediately after foaming milk by allowing the appliance to produce
steam for another 1-2 seconds, which will clear the Steam Arm (6). Wipe Steam Arm (6) with a
damp cloth. Clean the Steam Arm (6) with a needle if it is still blocked.
3. If necessary, the Frother (7) can be unscrewed and can be washed with soapy water.
4. Removable Water Reservoir (5), Frother (7), Drip Tray Cover (8), Drip Tray (9), Filter Holder (15),
Cups (16) and Measuring Scoop (18) can be washed with soapy water or placed on the top rack
only of your dishwasher.
Caution: Do not immerse machine in water. Do not remove Reservoir Cover (1) while machine is under
pressure. See section “Pressure”.
5. Always empty the Water Reservoir (5) of any water between uses.
6. Wipe housing with a soft wet cloth. Do not use abrasive cleaners or scouring pads as they will
scratch the finish.
7. Do not store the Filter Holder (15) in the Adaptor (19).
How to clean the Boiler
1. When you energize the Espresso/Cappuccino Machine and then turn the Switch Control Knob (3)
to the indicator position . The water will flow through the Boiler (17) from the Water Reservoir
(5) and clean it.
2. While you clean the Boiler (17), please place a jug or similar container on the Drip Tray Cover (8) to
catch the water.
Note: The capacity of the container for catching the water should be at least 1.5 liter.
DELIMING
Mineral deposit build-up in the Espresso Maker will affect the operation of the machine. Your Espresso
ENGLISH
6
 Loading...