INSUHC0116
4
INSTALLATION
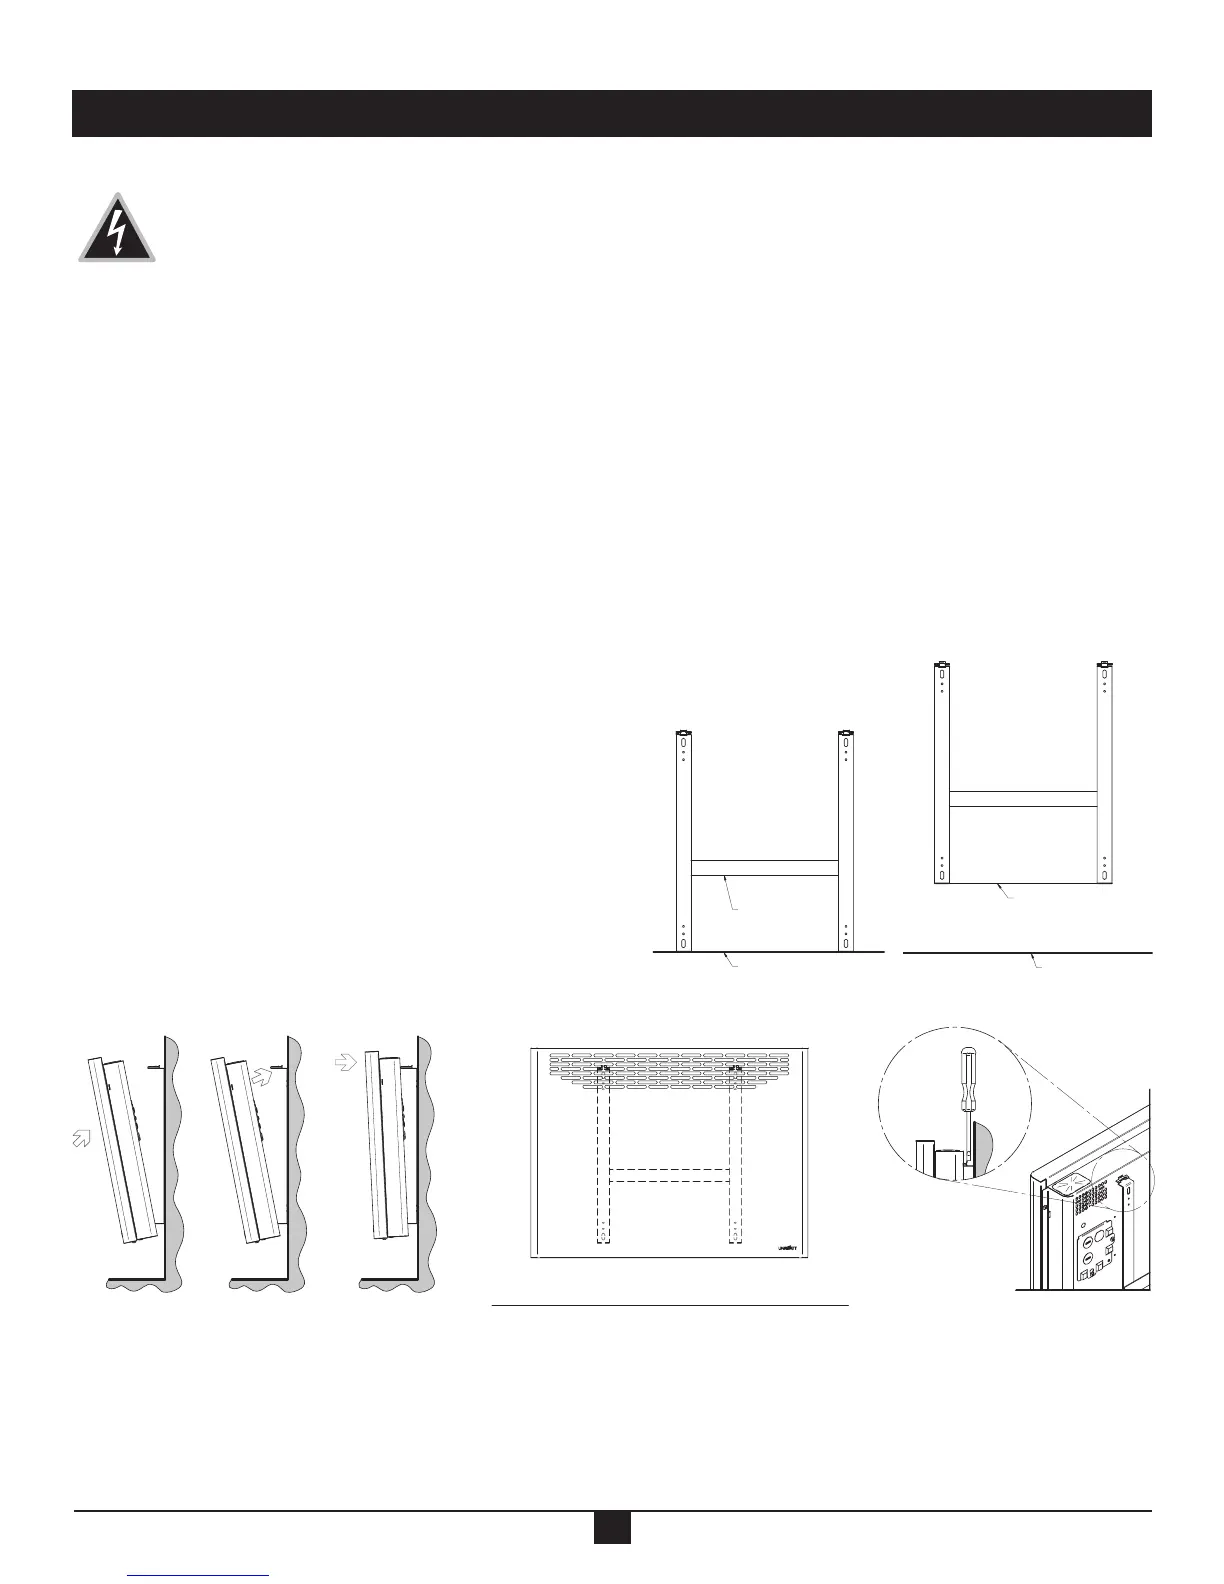
HANGING THE UNIT ON THE WALL BRACKET
1. Insert the lower hooks of the wall bracket in the device. (FIG. 3)
2. Tilt the top of the unit and snap it. (FIG. 4)
3. Push the unit to secure it. (FIG. 5)
4. The unit must be mounted at least 4 inches (10.2 cm) from the oor.
(FIG. 6)
REMOVING THE UNIT FROM THE WALL RACK
1. Using a screwdriver, press on each clip. (FIG. 7)
2. Pull the upper part of the unit toward you to disengage the hooks.
3. Pull the unit off the lower hooks
CUT OFF POWER SUPPLY AT CIRCUIT BREAKER/FUSE BEFORE PROCEEDING TO THE
INSTALLATION.
- The unit should be installed at least 4 in (10.2 cm) from the oor and 6 in (15 cm) from adjacent walls.
- Before operating the unit, make sure that both the air inlet (bottom) and air outlet (front) are free from obstruction.
INSTALLATION OF THE WALL RACK
1. Remove the unit from the wall rack’s hooks.
2. Put the bracket on the oor, on the wall where the appliance is installed and draw a temporary line under the horizontal line of the bracket
using a pencil. (FIG. 1)
3. Align bottom of wall bracket with the temporary line drawn in the previous step. (FIG. 2)
4. Make marks with a pencil to identify the four areas where you will screw the bracket.
5. Secure the bracket to the wall making sure it is level. When drilling the wall, make sure not to damage electrical wiring and other hidden
utilities.
N.B. The wall where you install the device must be straight so that the bracket is perfectly level, without any
pressure. It is very important to follow this directive to prevent damaging the bracket during the installation. This
could cause malfunction of the interlock system.
INSTALLATION
ç
FIG. 4
ç
FIG. 5
LINE DRAWN IN PENCIL
DRAW LINE IN PENCIL
HERE
FLOOR
FLOOR
FIG. 1
 Loading...