- 22 - - 23 -
ENGLISH
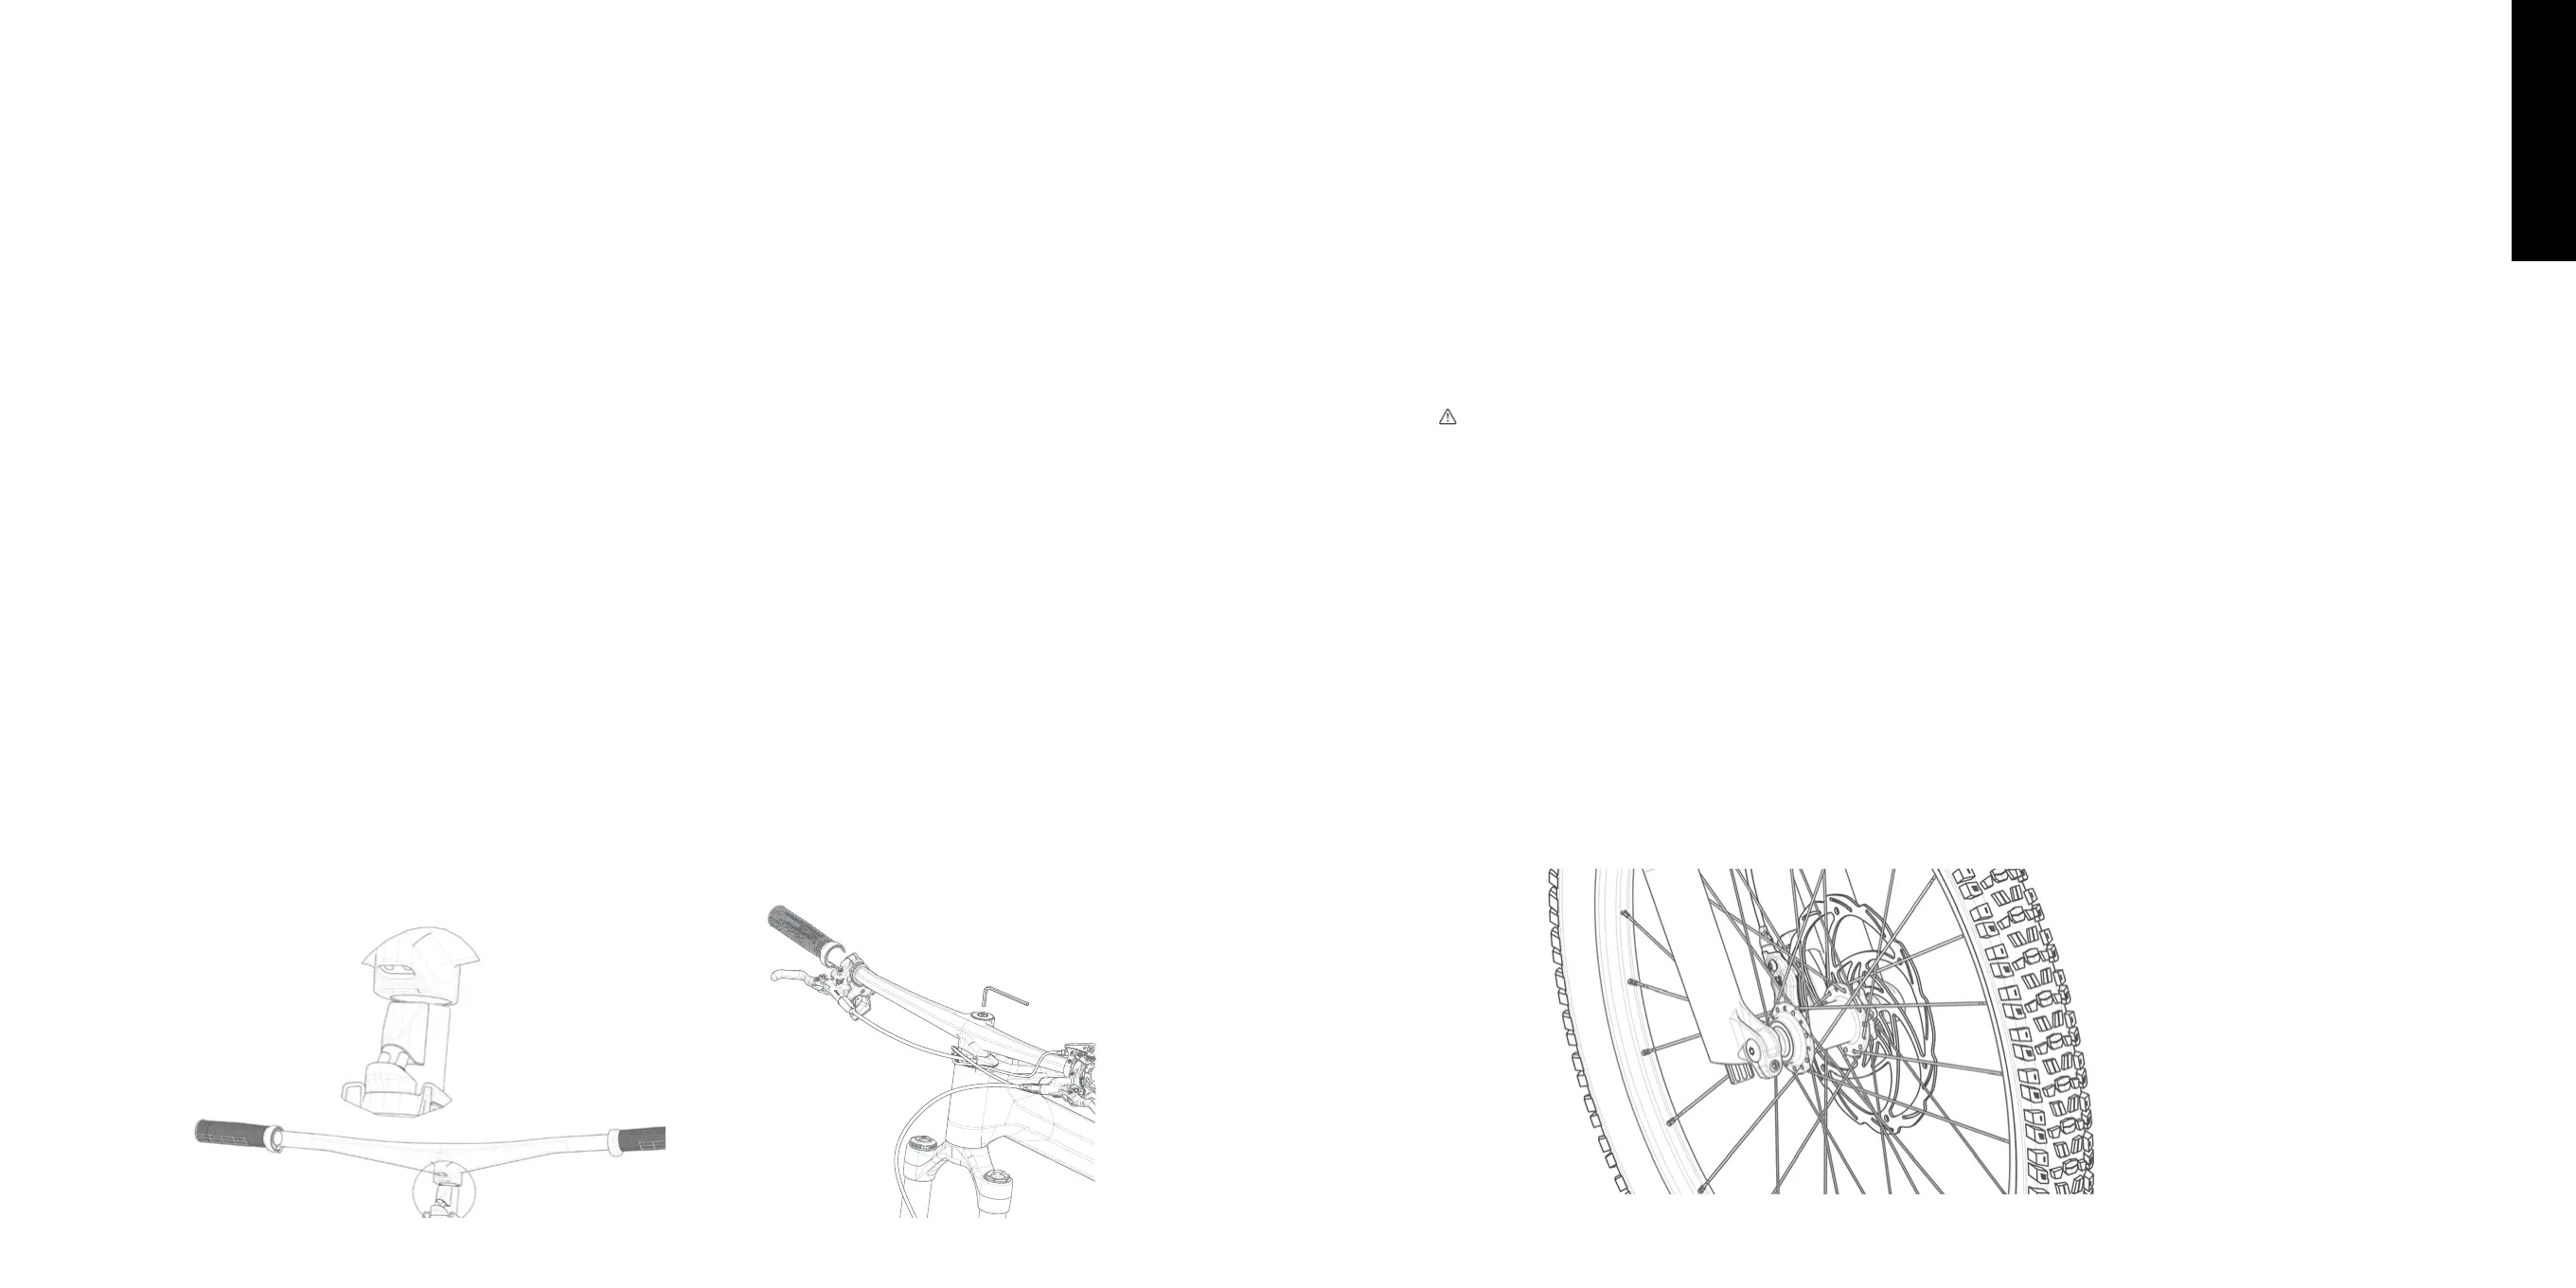
Before placing the wheel, make sure that the brake pads are correctly positioned in the calliper.
For this, verify that the pads are parallel and that there is sufficient space between them to insert
the brake disc.
Do not actuate the brake after removing a wheel or when the disc is not inside the brake calliper.
If the brake lever is pressed with the disc out, the brake pads can stick together, and the disc can
not be put back into its position. If this happens, consult the technical manual of the brake manu-
facturer or a trusted mechanic.
Mount the front wheel. When inserting it, observe and guide the brake disc carefully between the
brake pads.
If you press the edge of the disc hardly against the brake pads, they could be damaged and
must be replaced.
Align the wheel and insert the through axle, through the dropouts and hub.
Make sure that the quick release lever is fully open.
When the thread of the axle fits into the thread of the fork leg, turn the axle to the right. The
through axle must rotate freely during the first few turns. When you reach the end of the thread
path, rotate one third of a turn back.
Tighten the quick release lever with the palm of your hand until the axle is locked.
When starting the motion to close the quick release, the lever is easily moved, as it’s not tightening
the axle yet.
During the second half of its travel, the lever must be offering more and more resistance. At the
STEP 2 | Handlebar assembly
The Unno trail range can come with integrated bars or traditional handlebar and stem combo.
The handlebar comes disassembled inside a bag. Place it on the fork tube or in the stem.
If your bike comes with a handlebar and stem combo
Turn the stem and the fork forward until they are in the riding direction. Be sure not to twist the
cables and hoses. Make sure that the cables and hoses do not twist or bend and that they come
with a uniform curvature radius to the frame entry holes and to the front brake calliper.
If your bike comes with a stem and handlebar combo, please apply a thin layer of assembly paste
to the area that holds the handlebar, both inside of the cover and on the stem part itself. Never
apply grease or oil in the tightening areas. Always use carbon specific assem bly paste.
First, screw the headset bolt until needed. Secondly, screw the stem bolts. They are located on the
front side of the handlebars. Remove the rubber cap and screw them.
If your bike comes with a DEUX integrated bar or stem
Place the integrated bars in the fork tube and in the right direction.
First, screw the headset bolt until needed.
Then, find the two bolts located in the front side of the bars. Screw them to the recommended
tightening until the internal clamping system is correctly attached in the fork tube.
STEP 3 | Mounting the Front Wheel
The front wheel comes inside a cardboard protector.
 Loading...