4
INSTALLATION INSTRUCTIONS
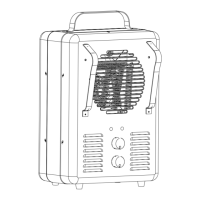
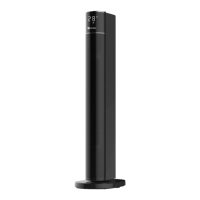
MOUNTING THE BRACKET:
Refer to Figure 3a and 3b.
• Locate a stud in the ceiling joist.
• Remove the mounting bracket from the heating
unit by loosening bracket thumb screws.
• Drill a 1/4" pilot hole in ceiling joints. Place a
washer on screws before inserting through the
holes in the mounting bracket and screw them
securely into a ceiling joist.
• NOTE: If you want to swivel the heater either to
the right or left, adding a washer to both sides
of the bracket is recommended. A longer Lag
bolt may be required to properly secure the unit
(see 3a).
• Tighten screws enough to securely hold heating
unit with air ow pointed in proper direction.
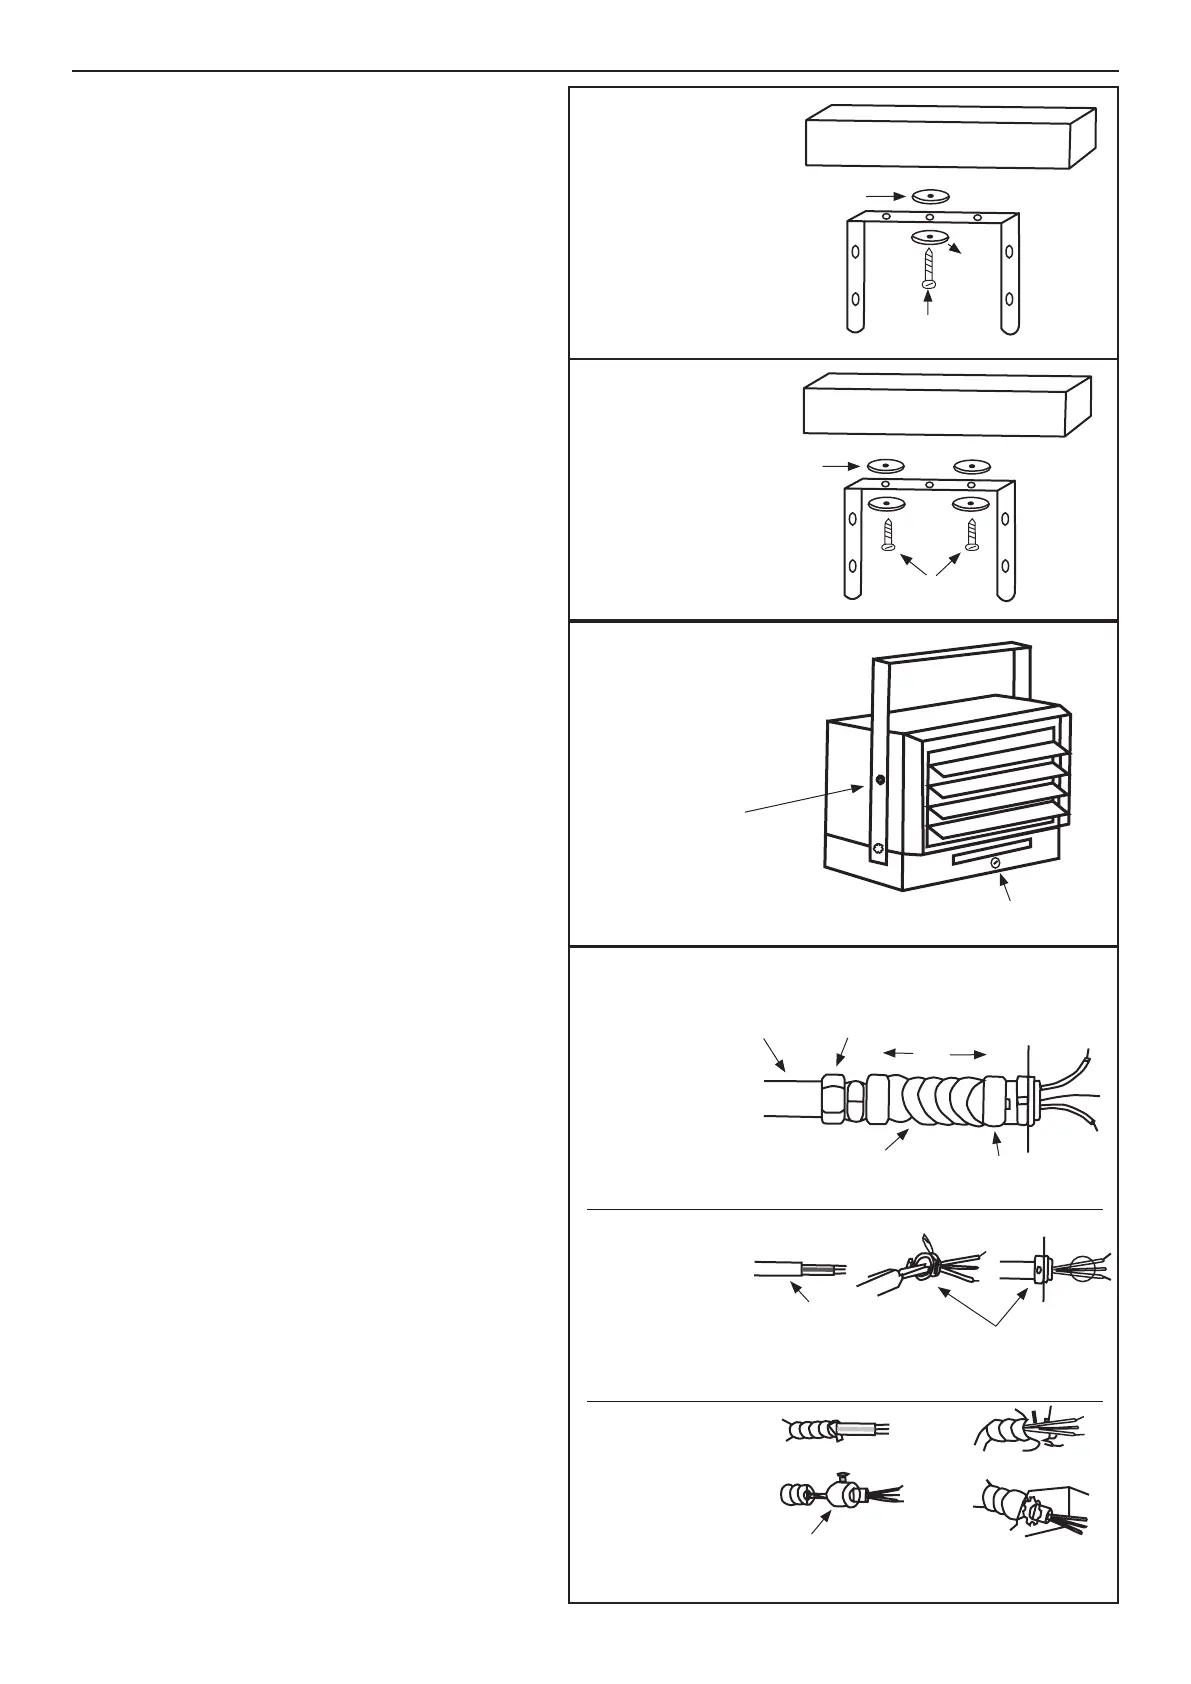
HANGING THE HEATER:
• Attach the heating unit to the mounting
bracket.
• Lift the heater up and into the mounting
bracket.
• Align the bracket screws with the keyholes
slots in the mounting bracket.
• If the heater is to be tilted, it must be
positioned in the keyholes slots (see Figure 4)
• Tighten the bracket screws with a wrench so
the unit is securely suspended horizontal or
vertical level.
CONNECTING THE POWER:
• Remove the screw from the front of the unit
to connect the power to the heater.
• Attach the cable connectors to the unit
(See Figure 5) and slide the 8-guage wire
through the cable connector.
• NOTE: This appliance must be grounded.
• NOTE: Proper size fuses and circuit
breakers in accordance with the National
Electric Code must be used.
• NOTE: The appliance must connect to a
current protection circuit or device at 50A
or more before connecting to power supply.
Higher protection limits may be required by
code. Check your local electrical codes.
• NOTE: For certain applications, conduit
may be required (See Figure 5). Check
local electrical codes. If you run the wiring
in conduit and wish to be able to turn the
heater be sure to purchase enough exible
conduit to allow the heater to be turned.
Figure 3a
Figure 3b
SINGLE
SCREW MOUNTING
DOUBLE
SCREW MOUNTING
WASHER
BRACKET
3/8" DIAMETER
LAG BOLTS
CEILING JOIST
BRACKET
WASHER
3/8" DIAMETER
LAG BOLT
CEILING JOIST
WASHER
USE TOP KEYHOLE
SLOTS IF HEATER IS
TO BE TILTED DOWN
REMOVE SCREW
TO OPEN DOOR
Figure 4
If heater is to be
turned and wire
is inside conduit
If heater is to be
connected with
exible conduit
If heater is to be
connected with
NM cable
Figure 5
CONDUIT
CONDUIT
CONNECTOR
3ft
min.
FLEXIBLE
CONDUIT
FLEXIBLE
NM CABLE
7
FLEXIBLE NM CABLE
CONNECTOR
(use per electrical codes)
FLEXIBLE CABLE
CONNECTOR
(use per electrical codes)
FLEXIBLE CONDUIT
CONNECTOR
1
1
3
4
2
2

 Loading...