With power disconnected to your electrical box, remove the old fixture. If your old fixture is attached to
an electrical box having more than two (2) wire leads, it is recommended you use tape and markings
to keep track of which wires were attached to each other.
ASSEMBLY INSTRUCTIONS
PREPARATION
Estimated Assembly Time: 45 minutes
Tools Required for Assembly (not included):
Flathead Screwdriver, Safety Glasses, Electrical Tape
Phillips head Screwdriver, Wire Cutters, Pliers, Wire Strippers, Step Ladder, Level
.
1
2
3
Machine
Screw
BB
x 2
Hardware Used
Mounting
Bracket
x 1
EE
Hardware Used
Mounting
Bracket
x 1
EE
EE
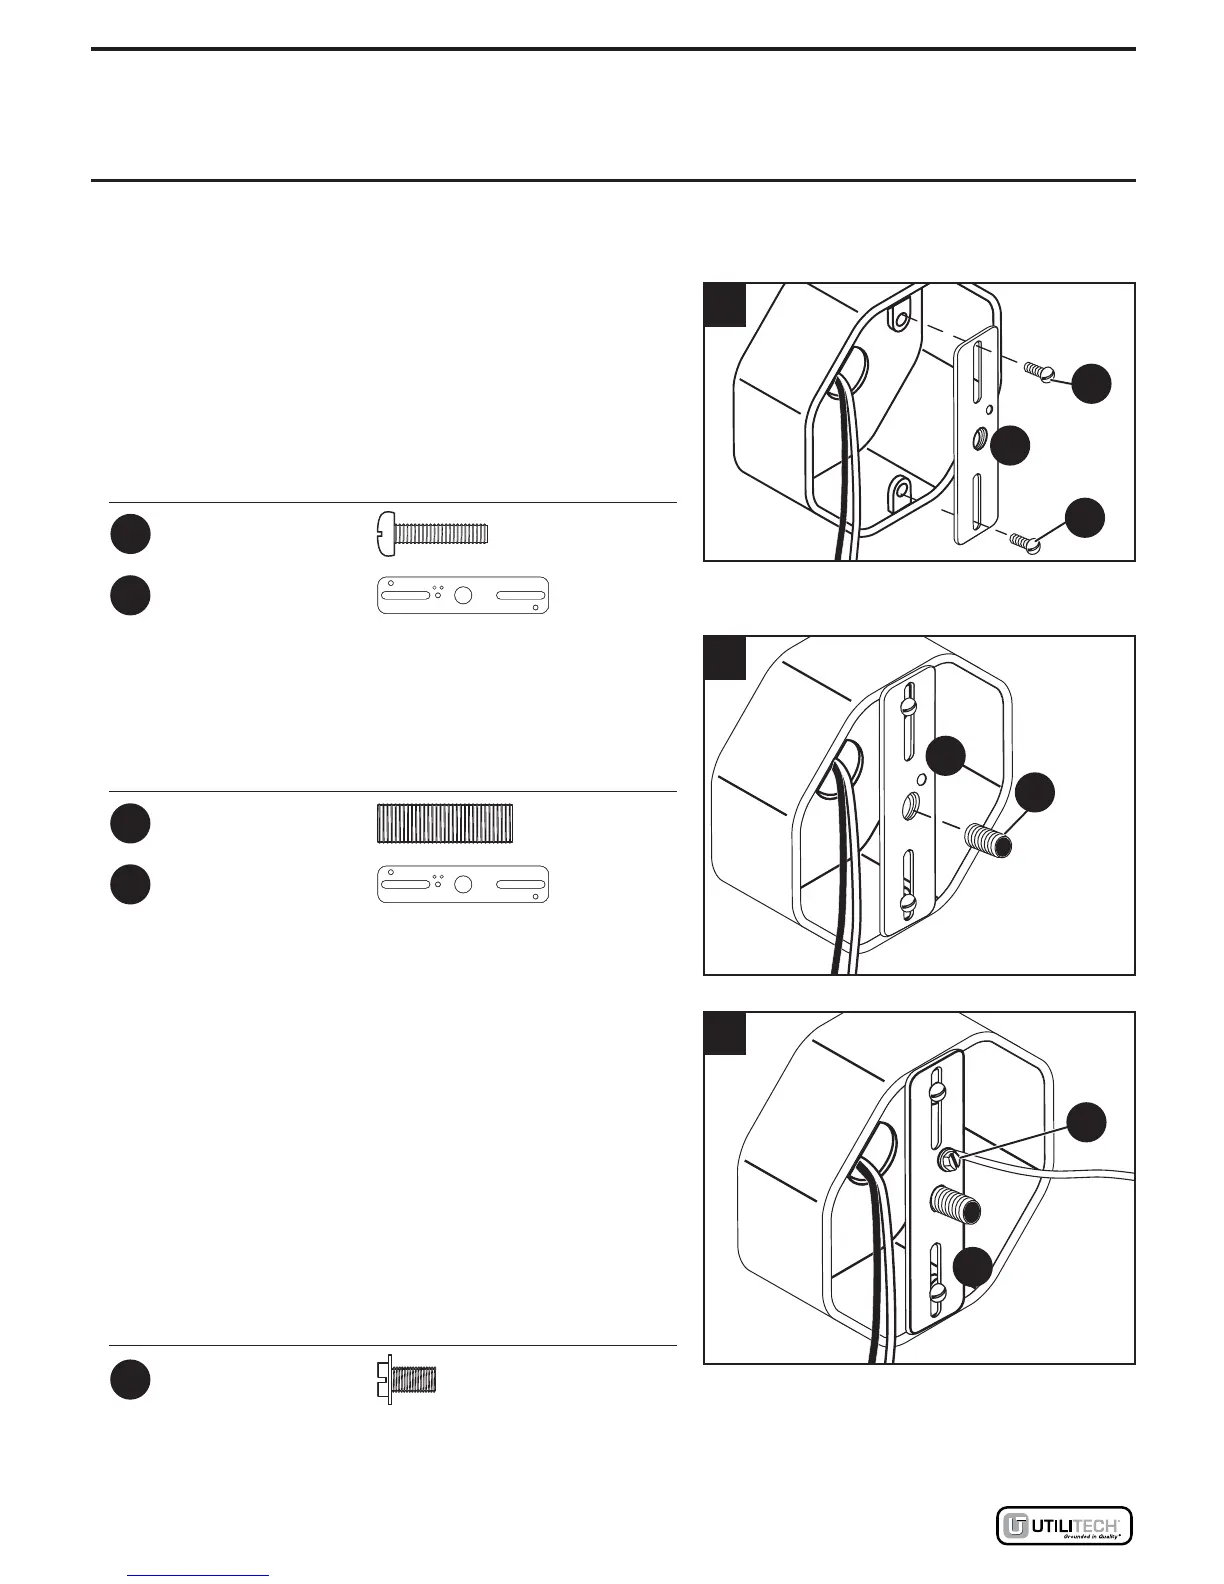
1.
Position the elongated holes in the mounting
bracket (EE) over the electrical box ears and attach
the mounting bracket (EE) onto the electrical box
using either the original screws from the electrical box
or the machine screws (BB) (Fig. 1). NOTE: The
included mounting bracket (EE) may be slightly
different. The mounting bracket (EE) may mount
vertically, diagonally or horizontal.
2.
Screw the threaded tube (DD) into the center hole of
the mounting bracket (EE), leaving approximately 1/2
in. of the threaded tube (DD) protruding beyond the
front surface of the mounting bracket (EE) (Fig. 2).
3. For safety and proper operation, your fixture must be
properly grounded (Fig. 3). If you are unfamiliar with the
methods of properly grounding your fixture, consult a
qualified electrician. A copper ground wire is
pre-attached to your fixture pan (A). If your electrical
box is made of plastic and/or has a green or bare
copper grounding wire inside, the fixture grounding wire
and the electrical box ground wire should be connected
together using one of the wire nuts (AA). If your
electrical box is made of metal and is already grounded,
secure the bare end of the fixture ground wire to the
mounting bracket (EE) using the ground screw (FF) on
the mounting bracket (EE).
BB
DD
EE
BB
EE
FF
Threaded
Tube
DD
x 1
Hardware Used
Grounding
Screw
FF
x 1
Lowes.com
3
 Loading...