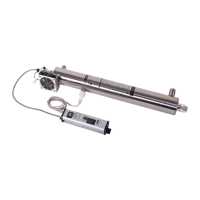
Install your UV Dynamics disinfection system indoors in a protected
area where the temperature does not fall below 15C (60F) and the
humidity level is low (to prevent condensation on the chamber). This unit
functions ideally in a temperature range from 15C - 29C. (60 – 85F)
Models 8.40C, 11.40C and 14.40C must be installed vertically. Model
20.40C may be mounted horizontally with inlet and outlet ports
orientated upwards only. Installing with ports orientated downward will
result in air being trapped in the disinfection chamber, resulting in
reduced disinfection performance and erratic UV sensor operation.
Use teflon tape on all pipe connections. DO NOT USE ANY
OTHER SEALANT.
If the AC power distribution system is subject to frequent power line
surges or electrical storm activity, the installation of an external surge
protection device is required. Preferably, the surge protection device will
have an indicator showing that the surge protection components have
not failed and the device should be checked frequently.
If the water system in which the UV disinfection system is to be
installed includes a pump, the UV disinfection system should not be
connected to the same AC supply circuit as the pump. Pumps can create
significant voltage droop on start-up which may be sufficient to trigger an
abnormal operating condition alarm in the UV power source. In these
cases connection of the UV disinfection system to an isolated AC supply
will minimize nuisance alarms.
If the installation location is subject to frequent power outages or
brown out conditions an inverter type uninterruptable power system
(UPS) device with true sine wave output should be installed on the AC
supply to ensure reliable system operation.
Do not connect UVDynamics disinfection systems directly to PEX
tubing or other plastic piping. Plastic material will suffer structural
degradation, and possible service failures, when subjected to long-term
UV light exposure. PEX tubing and plastic piping can be connected
directly to the inlet port if it is located on the bottom of the chamber.
All side ports will require the use of a metallic light dam (16”/40cm
section of metallic tubing, street elbow or stainless steel flex connector
suitably bent to prevent direct UV radiation)
Installation Procedure
The UV disinfection system should be the last step of your water
treatment system. Choose a location for installation with a close
electrical outlet. Note the direction of water flow in the supply line. Refer
to the installation example diagrams and check that you have all
necessary fittings for installation. Note: Ensure that the chosen
mounting location has adequate clearance to facilitate quartz sleeve and
UV lamp replacement.
Shut off the main water supply valve.
Mount the unit to the wall using the mounting brackets provided.
Mount power source beside the chamber. Ensure that the chosen power
source location is not subject to any possible dripping of condensation
from either plumbing or system components
Install new plumbing as per diagram. Note: When installing the 5
micron pre-filter, make sure the flow arrows point in the same direction
as the water flow. WARNING: if soldering, do not allow heat near
plastic threads or fittings.
SOLENOID VALVE INSTALLATION
On vertically mounted systems a solenoid valve can be directly mounted
to the inlet port. In all other mounting configurations the solenoid valve
should be isolated by 12” (30cm) of piping on either port of horizontally
mounted disinfection chambers, and the output port of vertically mounted
chambers,
Mounting of the solenoid valve directly to the ports of a horizontally
mounted chamber or directly to the output port of a vertically mounted
chamber will result in premature solenoid coil failure due to the elevated
temperature conditions that exist during periods of no water flow.
QUARTZ SLEEVE INSTALLATION - Model 8.40C
Verify that the red “O” ring is installed in the inside groove of the gland
nut, and place the black “O” ring on the open end of the quartz sleeve
approximately 1”(25mm) from the end. Then push the quartz sleeve into
the gland nut until the sleeve touches the top of the retainer edge in the
gland nut. Failure to insert the quartz sleeve fully into the gland nut will
allow excessive sleeve movement during water flow, resulting in possible
water leakage and sleeve breakage.
QUARTZ SLEEVE INSTALLATION - All other Models
Install one of the black “O” rings on the end of the quartz sleeve and
position approximately 1”(25mm) from the open quartz sleeve end.
Carefully insert the other end of the quartz sleeve into the disinfection
chamber. Install the second black “O” ring on the remaining quartz
sleeve end which is now emerging from the end of the chamber and
adjust sleeve position so that equal amounts of quartz sleeve extend
from both ends of the disinfection chamber. Install the gland nut with the
black light shield on the bottom or non lamp end of the disinfection
chamber. The other gland nut is used on the lamp end of the
disinfection chamber. Hand tighten both gland nuts.
Place the lamp spring, then the lamp into the quartz sleeve. Install the
Cold Spot Fan
TM
over the gland nut. Holding the top of the lamp, attach
lamp to the lamp connector. Ensure the lamp is orientated so that the
lamp wires are not in the path of the UV Sensor Probe. FAILURE TO
ORIENTATE THE LAMP CORRECTLY COULD RESULT IN REDUCED
UV DOSE INDICATION Push the lamp connector down snugly into the
gland nut and tighten the lamp connector set screw.
WARNING: do not over tighten as plastic threads are easily
damaged.
Connect the lamp connector cable labeled FAN to the Cold Spot Fan
TM
assembly.
Remove the nut from the ground stud at the top of the unit. Next,
place the ground wire (green wire with yellow stripe) over the stud and
re-install nut and tighten. FAILURE TO GROUND CHAMBER MAY
RESULT IN AN ELECTRICAL SHOCK HAZARD AND ERRATIC UV
SENSOR BEHAVIOUR
Install UV Sensor Probe. The probe must be hand tightened
completely to insure accurate calibration. Connect UV Sensor Probe
plug into port labeled UV Sensor on the UV power source.
Caution – Hand tighten only
Open the valves on either side of the disinfection chamber. Check for
leaks. Open supply valve slowly and bleed air from system.
Connect UV power source to AC line. UV power source audio alarm will
sound three times before igniting the lamp.
Your UV Dynamics disinfection system is now ready for service. Before
service begins, all household plumbing lines should be chemically
disinfected.
© COPYRIGHT 2019 UVDynamics – a Castle Circuits Inc. Business Group All RIGHTS RESERVED
 Loading...